

Kicking off next season’s garden by starting seeds indoors can be a great way to ensure healthy, productive crops for your vegetable plot. Sowing seeds inside can help you have more control over your growing season, expand the varieties you have available, and trim your garden budget.
Nurturing root systems before planting outdoors prepares your young plants for success before the final frost hits. By sowing your seeds inside, you will protect your plants against the elements when they are young. When spring rolls around, your veggies, herbs, or flowers will have strong root systems and be ready to thrive and produce beautiful blossoms, fragrant leaves, and healthy vegetables.
Let’s look more closely at the many benefits of starting seeds indoors versus directly planting outside or buying live plants.
Why Should I Start Seeds Indoors?
Setting up a germination station indoors before spring can save you money, offers you more control over plants, and is rewarding.
A seed packet is less expensive than a seedling from the garden center. Materials required to sow seeds early can be recycled items like egg cartons or toilet rolls or purchased items that can be re-used from year to year.
When you start indoors, you have more control over the climate. Plan the lighting by placing seed starts in a south-facing, sunny window or supply supplemental lighting to mimic sunlight. Control temperatures for germination with a heat mat, or place the seedlings in an area of your house that you keep warm.
For frost-sensitive or for half-hardy seeds, they should be started inside to extend their growing season, instead of starting outdoors and waiting for the sprouts to appear after the last frost. Give the plants a bit more coddling, letting them germinate and become stable before putting seedlings outdoors. Start hardy varieties inside to give them a good start and prolong the growing season, though these can be directly sown outside.
Hardening the plants off before permanent placement provides seedlings the best chance at success. It takes time for plants to reach the proper size and strength to be transplanted outside, so starting inside is a great use of the slow winter months.
Another reason to sow indoors is to grow heirloom plants. Most likely, your local garden center or nursery is not going to carry every variety of heirloom plants! By ordering through a seed catalog, and getting a head start indoors, you improve your selection in the garden.
You can also grow many species as microgreens. This is a great way to have access to fresh greens in the off-season!
Indoor Seed Starting Media
Select a good soil mix for starting seeds. The medium should be loose, have good drainage, and may include some nutrients to start your seeds out properly. There are also soilless options available.
Root rot and damping off can be big issues for seedlings if they get too wet, so drainage is a priority. Just the right amount of nutrients is important too. Too much fertilization too early appears as a spurt of leaf growth but not enough root development. Fertilize once the seeds sprout, although some slow-release fertilizers are usually included in seed starting mixes.
Do not just dig up soil from your garden to use! Garden dirt may be too clay-dense for the roots to break through and could be carrying diseases that could harm your young seedlings. If all you have is clay soils, amend heavily with gardening amendments such as compost.
Using Seed Starting Mix or Soil
When you buy a seed starting mix, make sure it is labeled specifically for seed starting. Potting mix is typically just for container gardens, whereas starters are specifically created for seedlings. These mixes are designed for seed germination. They are typically fine, loose soils that may have a slow-release fertilizer to give your seeds the best possible sprouting conditions. They are often a combination of sifted soil, perlite, compost, and peat moss or a peat substitute like coconut coir.
Most store-bought mixes are pasteurized or sterilized. Purchase a fresh bag of mix as soils that sit for too long can develop fungus, mold, or other problems.
Take precautions by keeping your work areas, tools, and containers as clean as possible for sterile seed starting. Focus on good hygiene around the area and clean your tools and containers between uses. Sanitize containers and tools with a solution of warm water and hydrogen peroxide.
Making Your Own Seed Starting Mix
To make a potting mix for propagation, sift compost through a screen after breaking up large chunks in your hands. You don’t want this seed potting mix to be too chunky or heavy. Combine one part sifted compost, one part coconut coir or peat moss, and ½ part perlite (a form of volcanic glass). Perlite helps with drainage to make sure that your soil containers will not get waterlogged. The coconut coir will help it retain moisture where necessary. Some people like to add worm castings to this mix to add slow-release fertilizer. You can add one part to this mix.
Using Coconut Coir or Peat Moss
Coconut coir is a peat substitute that has become popular in recent years. It is a processed husk that is prepared for planting use. Hydrate the bricks, mix them with sand or perlite and use that as a growing medium, in this case, you will need to add a liquid fertilizer. You can also use spaghnum peat moss. This is a lightweight growing medium for seed starting. Both can be used as seed starters on their own, but adding compost and perlite provides better drainage and good nutrition.
Using Vermiculite
You can also directly sow seeds right into vermiculite. Vermiculite is a popular medium because the seeds germinate quickly when started indoors with this water-retaining mineral. The downside is that they need to be moved into soil as soon as their first or second leaves appear for nutrients.
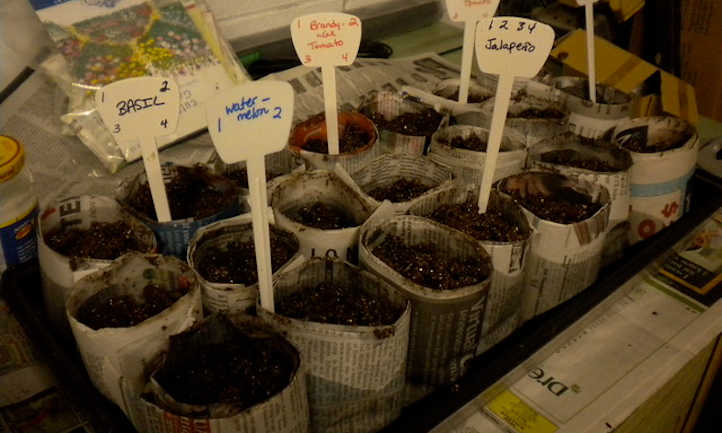
Seed Starting Containers
There are a lot of different options for containers. Remember to first look at what you already own. You can reuse food containers, packaging, or old pots. You can even use a compostable pot that can be planted right in the ground. Another option is rigid plastic seed starting containers that you can reuse every year.
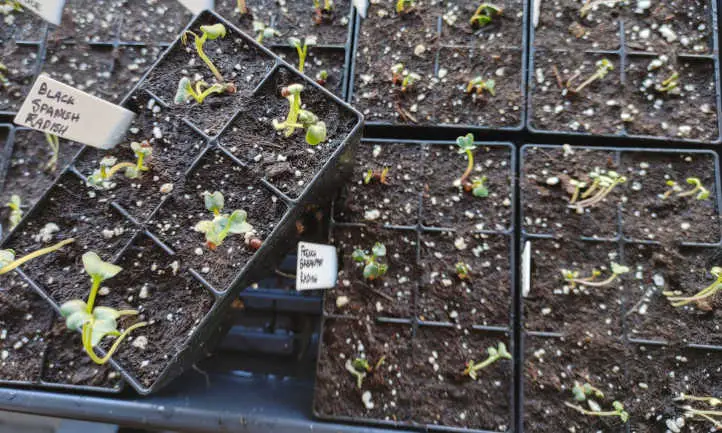
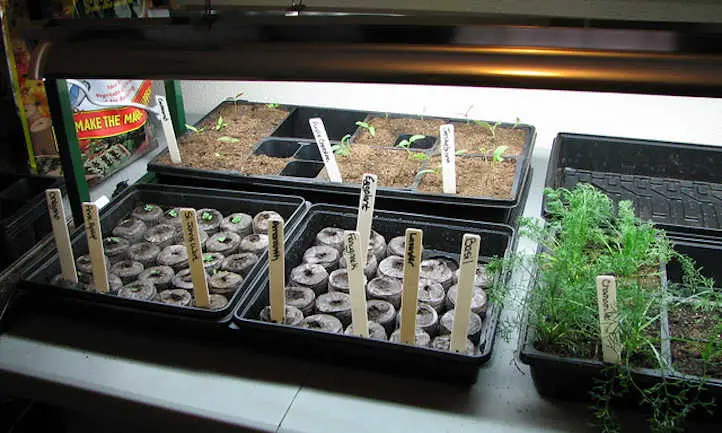
Cell or Nursery Trays
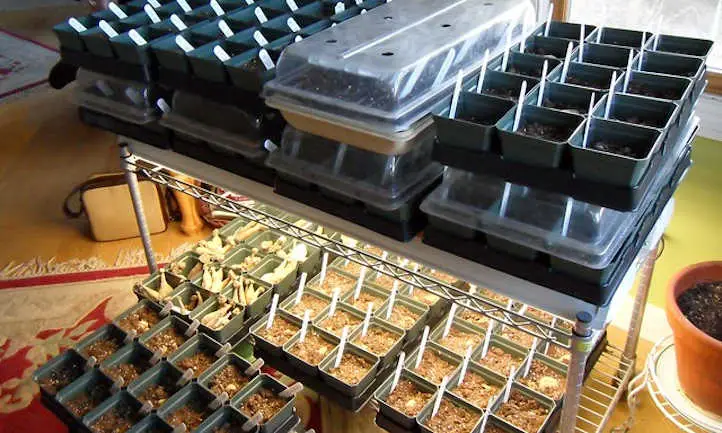
Plastic propagation trays are a popular way to start with a seed-friendly potting mix. Because of their small, narrow size, they help seedlings develop a good root system. These can be easily cleaned and can be reused year to year. These often come with a clear plastic top to increase humidity.
We like the Epic 6-cell propagation trays that we sell at the Epic Gardening shop. 12 of these fit perfectly into a 1020 tray. They’re easy to move around, and the large hole at the base allows you to pop your starts out with ease. Transplanting is very easy with these!
You can get large plastic sheets of cells to fill with growing medium and place into a 10×20 tray. Many different sizes exist, providing you a wide selection to choose from.
Flat Trays
Flat seed trays work well for seeds that you’re sowing in large quantities, such as microgreens, or ones you can easily separate like onions. They can also be used to hold blocks from a soil blocker.
Pellets and Plugs
These are a neat and tidy, soilless way to start your seeds. Pellets are small discs of dry growing medium, typically made with peat moss or coconut coir. Hydrate them and place in a tray. Plant directly into the moist pellet. Once your seedlings have enough growth, these can be planted directly in the soil.
Root trainers are another type of propagation plug. They open at the side, making transplanting easy! The insides train the roots downward along little indentations.
Fiber Mat
These are primarily used for microgreens or sprouting. Pre-soak the mat to hydrate it, and then spread seeds on top of it. Keep it moist during growth. For more information, check out one of our in-depth microgreens guides!
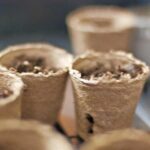
Small Pots
These work well for direct seeding or for transplanting into as you harden them off to go outside. There are many different options of container ranging from the standard plastic or pottery container types to peat pots, manure pots, or coconut coir.
With peat pots, manure pots, or coconut coir pots, they can be directly planted into the garden, making them a great choice for root systems that are difficult to transplant or that have sensitive roots. Your seedlings grow well in all of these containers.
Other Useful Equipment
Here are a few other products that might make your gardening go a bit more smoothly!
Heating Mats
For seeds to germinate, it needs to be warm. If you live in a cold area that gets below freezing, it will be important to place your sprouts on seedling heat mats. Many plants prefer temperatures of 70 degrees or more to sprout, so even in warmer climates, these can be useful.
Grow Lights
Many plants need up to 16 hours of light once they’ve sprouted. Keep the lights above the seedling trays to mimic sunlight. We’re especially fond of T5 fluorescent lights, but many LED lights are good options as well for your seedling lighting needs. If you have a sunny location, you may not need lights, but they’re still handy to have during the winter months! Be careful, as some lights can provide a lot of heat too.
Soil Blockers
This is a very useful tool that allows you to go pot-free. Use pre-dampened medium and then place the tool on top of a pile of soil, clamp it together, and then release it into a tray. You are left with small blocks of growing medium with indentations for planting into. When it’s time to get out and start gardening, you can transplant these directly into the garden and reduce your reliance on plastic containers.
Hand Seeders
Some seeds are tiny and you need help placing them in the soil. Hand seeders work really well for gaining more control of the situation.
Dibbers
These help you make holes in the soil to start your seeds, although a pencil may also be used. Some are calibrated, helping you to accurately measure the depth at which you’re planting.
Plant Tags
We´ve all been guilty of forgetting what we planted! Use them to mark the date of planting and the variety.
Cloches
These are a more attractive alternative to plastic covers, creating a warm environment for your seedlings and added protection without sacrificing light.
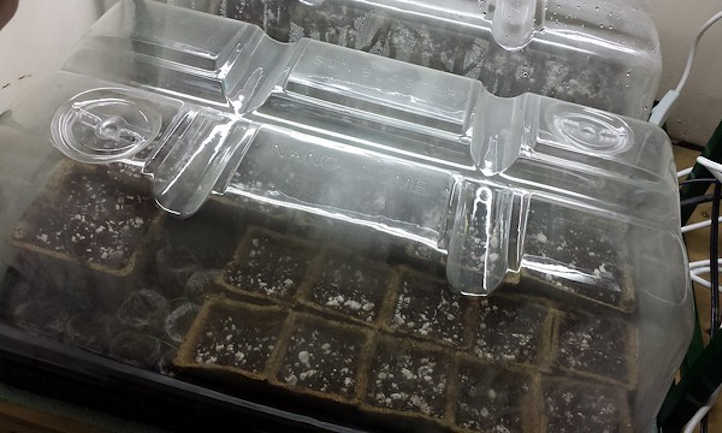
Mini Greenhouse
You can make these with old plastic bottles or milk cartons, or you can buy one. It creates a warm, humid environment for seedlings to grow. This can speed up germination time for some plants and can also be used outside during cooler seasons to give seedlings a little more protection.
How To Start Seeds
Let’s talk about how to actually sow the seeds! Keep in mind, this can differ per the variety you are planting, so always follow directions on the seed packet.
Many seeds require some pretreatment. For instance, sweet peas can be soaked overnight or given a little nick on the seed coating to break it and help them sprout faster. Some seeds only take a few days to appear, while others can take two weeks or more. Consult the seed packets for specific instructions.
First, gather your supplies. Either dampen your medium or have water ready. For tiny seeds, moisten the medium first so they don’t get washed away. Larger ones can be watered afterward. Use a container with drainage holes.
A good rule of thumb is to plant seeds at 2x the depth of their size. When you are planting, it can be a bit tricky to plant tiny ones and a hand seeder may help. You can also dampen a toothpick or a fingertip to pick up just one seed to plant.
Typically 2-3 seeds are planted per cell and thinned later. It is nice to have a few in there in case some don’t sprout. Some growers like to plant 2-3 per cell for this reason, and also for the option of keeping them together for a bushy plant. For larger ones, place one per cell.
Fill your container with a lot of soil, as once you water, the soil will reduce and pack together. When you initially put the soil in, don’t pack it too tightly, but be sure to press it a bit to remove any pockets of air.
Give your seedlings good air circulation. Do not keep your seedlings too wet but you do want to keep the soil moist. One method to see if your need water is to lift your propagation tray and feel the weight. If the container feels very light and looks dry, water. If it is a bit heavy, there’s still moisture. Don’t let your seedlings dry out all the way.
Each vegetable or herb has a different germination time. For instance, radishes will sprout in a matter of days, while pansies will take weeks to show their first leaves. It is nice to have a plant marker with the vegetable or flower name and the date it was planted. Consult your seed packets for specific germination times.
Most seeds need to be in the dark to sprout, so you want them covered with soil or even a sheet of paper. Let them develop in a dark corner, and then bring them into the light once you see leaves. A few seed types do require light to germinate, so double-check before you plant! Once they’ve sprouted, plants grow best with light, particularly as they develop their first true leaves.
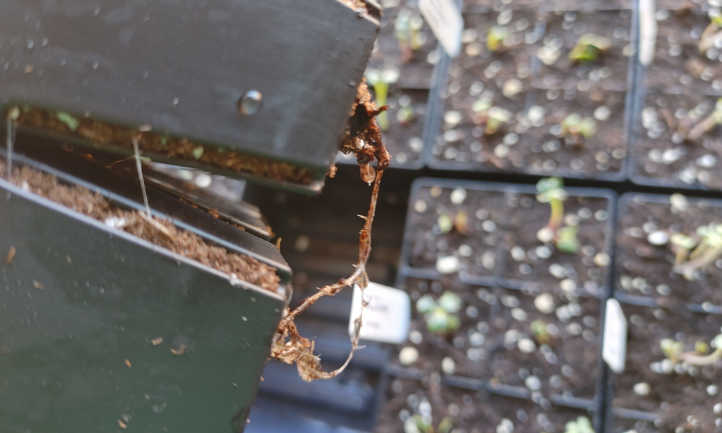
If there are many seedlings close together, thin them out so they have more space to grow. This is typically done just before you move them to their larger pots. Use snips to clip the excess seedlings off at the soil line so you don’t disturb the desired sprout’s roots.
After the seedling has its true leaves, transplant it into a larger pot to give it room to grow. Don’t upgrade them to a gigantic container, though; only transplant them into the next size larger.
When they’re ready to transplant into the garden, start the process called hardening off. This is when you take your seedlings outside for gradually increasing periods of time. This lets them acclimate to outdoor conditions before you transplant them into their permanent outdoor location.
Frequently Asked Questions
Q: Do you need a grow light to start seeds indoors?
A: Seedlings need 14-16 hours of sunlight and a sunny window cannot always provide enough. A south-facing window is ideal but if you are starting seeds in the winter in a cold, dark climate, you will need a grow light to ensure the best growth. Without the proper amount of light, the seedlings get leggy or don’t develop well.
Q: Can all seeds be started indoors?
A: Some seeds can benefit from being directly sown outdoors and there’s no need to go to the effort of sowing them early inside. Timing is important here. If you have a short growing season, it is helpful to start plants indoors in the heat of your home or greenhouse so they can get a head start. Check the best practices for your climate or zone.
Publicaciones relacionadas:
 Cómo cosechar menta y almacenarla para más tarde
 Cosecha de papas: cómo saber cuándo están listas sus papas
 9 variedades de col rizada que querrás cultivar
 Macetas de turba: macetas biodegradables para tu jardín
 Curar batatas adecuadamente para su almacenamiento
 Echeveria Elegans: cultivo de bolas de nieve mexicanas
 Los muchos beneficios del fertilizante líquido Kelp
 Rhaphidophora Tetrasperma: maravilla tropical de hoja partida