
Beans are one of the most powerful and versatile plants you can plant in your garden. They yield a massive amount of pods, and are nitrogen-fixers, meaning they add valuable nitrogen back to your soil. Learning how to grow beans can not only give you tons of produce, but it can be good for your soil!
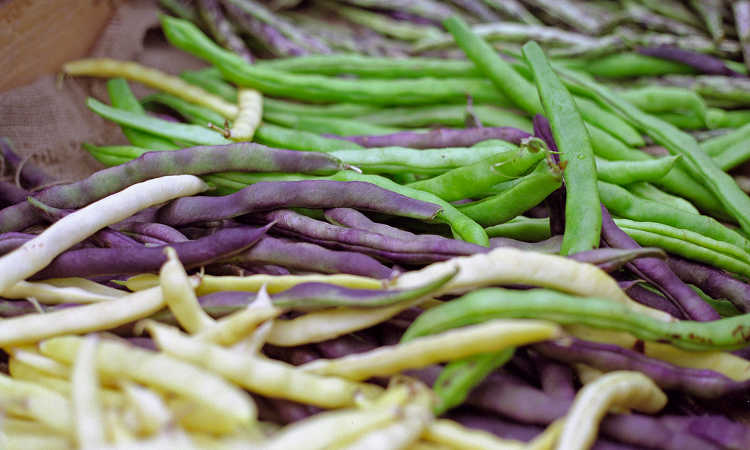
No matter how they’re eaten – shelled, whole, dried, or fresh; snap beans, pole, runner, or bush – beans are one of the most popular veggies in the garden for many reasons. The popular string beans are commonly used in culinary delights all over the world.
They grow easily and there are enough varieties that you can find one to fit just about any climate or growing condition combination that is out there. And best of all, they taste good!
Let’s start out with a short video on growing bush beans in a vertical tower system, then go into the wide and varied world of all beans.
By the time we’ve finished, you’ll know how to grow pole beans or bush beans – maybe even your favorite snap beans – for shelling or fresh-eating! You’ll learn to dry beans. And you’ll always be able to provide a steady supply of this delicious staple vegetable for your fridge or pantry.
Quick Care Guide for Growing Beans
| Common Name | Beans, pole beans, snap beans, runner beans, string beans, and many other cultivar names |
| Scientific Name | Phaseolus vulgaris |
| Days to Harvest | 50-100 days depending on cultivar and type |
| Light | Full sun |
| Water | Moist, even watering (1” or less per week) |
| Soil | Sandy or silty loam, well-draining |
| Fertilizer | Compost, or alternately a 5-10-10 slow-release fertilizer as needed. |
| Pests | Mexican bean beetles, spider mites, aphids, thrips, cucumber beetles, Japanese beetles, cutworms, leafhoppers, woodchucks. |
| Diseases | Susceptible to sclerotina (white mold), bacterial blights, anthracnose, bean rust, downy mildew, and the bean mosaic virus. |
Recommended Bean Varieties
Shopping for bean seeds can be a bit complex because there’s a lot of terms that are thrown around. Bush beans or pole beans? Shell beans or runner? Let’s go over some of these types of beans to understand them a bit more. That way you can harvest and dry beans for later use.
Shelling Beans
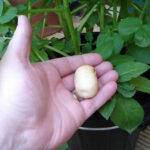
Shelling beans are typically beans meant to be eaten out of their pod, whether dried for storage or fresh. Some popular varieties of shelling beans include pinto or black beans, kidney beans, and the like. While some types of shelling beans can be eaten in their green young stage as green beans, most are grown for their distinctive bean seeds.
- Dainagon: 90 days. Adzuki shelling bean from Japan, late maturing variety with large seeds. Bush type.
- Yin Yang: 75 days. Striking black and white beans with a flavor similar to turtle beans. Bushing habit.
- Ojo De Tigre: 75 days. Sometimes called Tiger’s Eye. Shelling bean that can also be eaten young as snap beans. Brilliant yellow seed.
Pole & Runner Beans
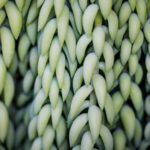
Pole beans and runner beans are climbing bean varieties usually grown as snap beans. These can also be dried for storage, but pole beans tend to be more popular as an edible-pod bean. Runner beans can be particularly pretty due to their distinctive flowers. Pole beans also often include the “yard long” bean types with extremely long pods.
One note about the runner bean varieties: these typically like cooler weather than most pole beans. If you live in an area which has a shorter growing season or cooler temperatures, these may be great performers for you. Those of us who live in more desert-like climates may have a more difficult time of growing runner beans than pole beans.
- Red Noodle: 85 days. High-yielding burgundy-colored pole beans with pod lengths of up to 20″. Color fades when cooked.
- Scarlet Runner: 80 days. Roughly 8″ long bean pods on a climbing plant with beautiful red flowers.
- Kentucky Wonder: 72 days. Nice long green bean pods on a vigorous plant. One of my favorite green beans.
Bush Beans
Bush beans don’t climb like pole beans or runner beans do. These tend to stay in a compact, bushy mass, rarely growing over 3′ tall. Bush beans also tend to produce for shorter periods of time than the vining varieties do. However, bush beans are great for people who don’t have space for trellising and can be vigorous producers during their shorter seasons.
- Dragon’s Tongue: 57 days. Pale yellow bush beans with purple streaking, very unusual. Purple fades when cooked.
- Royalty Purple Pod: 60 days. Bright purple pods which form on compact plants. Snap beans with pods that turn green during cooking.
- Provider: 50 days. Nice snap beans with maroon-colored bean seeds inside. Sturdy bush structure.
- Golden Wax: 55 days. Stringless golden beans that are buttery and tasty! Try succession planting for an extended harvest all season long.
- Jacob’s Cattle: 90 days. Excellent dry beans that becomes more flavorful and holds its shape for cooking. We love to cook it with herbs from the garden to make tasty bean soup.
Unusual Beans
Edamame beans, fava beans, and lima beans fall into this category, as do a few lesser-known varieties. Some are definitely shelling varieties (such as edamame or fava), where others are just wildly colored and rarely seen in a commercial market setting.
- Borlotto Di Vigevano Nano: 60 days. The bean seeds are pink and white in tone and make great shell beans. The red-splashed cream or yellow pods can also be eaten as snap beans.
- Mappe Green: 70 days. Mung beans like Mappe are most popular for bean sprouts in 7-10 days, but can also be cultivated for green beans.
- Vroma: 75 days. This fava bean variety produces large pods, each with 4-5 big seeds. Cook like a shelling bean.
Planting Every Kind of Beans
Even though there’s a huge selection of beans from which to choose, they all tend to grow in a similar fashion. Let’s go over the basics!
You can start planting from seed a week or two prior to the date of the last expected frost.
For bush beans, continue planting them about every two weeks throughout the growing season to ensure constant production. These bean plants will die back quicker than pole beans will.
Most pole beans and runner bean varieties will produce all season long from their vines. For these, you can sow once early in the season, and then if you’d like, start a second batch a month or two later. That will give you an abundance of beans come harvest time. Be sure to harvest regularly to encourage more beans to form.
Full sun is ideal for beans, and so it’s important to plant them where they’ll get lots of light.
Bush varieties are lower to the ground, so should be in a location where they won’t accidentally be shaded by other plants. Pole beans will climb up above the height of most other plant types, so they need to be somewhere where a trellis or support system can be located.
You can grow beans in raised beds or directly in the soil, along fencelines in garden beds, or virtually anywhere else, as long as they have full sun and moist soil.
For most varieties of bush bean, plant 2″ apart and 1.5″ deep in rows for best growth. Doing that will give you a nice, dense mat of bean plants as they mature. Plant another set every two weeks to continue getting regular harvests throughout the summer and fall months.
Plant pole beans in single rows 3 to 4 feet apart or double rows spaced 1 foot apart. Sow seeds 2 inches deep and 8-10 inches apart. Pole beans will vine out significantly as they grow, so can be spaced much further apart than bush beans can.
Alternately, you can start your pole beans ahead of time and then plant out transplants when your plants are 6-8″ tall. However, it’s generally easiest to just direct-sow and let the beans grow on their own.
You can plant multiple varieties near each other if you are not planning on collecting seed. However, if you’re going to harvest seed to plant the following year, keep different cultivars separated so they don’t cross-pollinate.
Caring for Bean Plants
As long as your beans have everything they need, they will grow without much guidance or tweaking from you. So let’s run down the list of everything you need for optimal growth.
Sun and Temperature
Beans are sun-worshipping plants, and they really need full sun, even through the hotter months. Ensuring that they have at least eight hours of light per day will provide you with the best harvests.
Seed germination is slowed when the soil temperature is below 60 degrees Fahrenheit. However, the young plants are tolerant of cooler weather. Optimal temperature range for good bean growth is between 70 and 85 degrees.
When the temperature starts reaching 90 degrees, flowers will drop off vines and your bean pods may not develop. It’s important to plant your beans early enough in the year that you get a crop before the peak heat of summer. You may be able to get a second harvest season if you time new plants to reach adult stages once the summer’s heat has died back down again.
Watering Bean Plants
It’s important to avoid frequent light waterings for beans, as they prefer to have consistent moisture around their roots. Watering to a depth of 4-6″ and mulching around young plants will keep them happy and coerce them into setting deeper root structures. Light watering encourages them to have their roots up close to the soil’s surface, and the plants are more at risk from pest and heat damage.
Drip irrigation or soaker hoses offer an added benefit for beans – you can water whenever the plants look like they need it. If you’re watering by hand with a sprayer or using a sprinkler, do it very early in the morning so the leaves of the plants have time to dry in the sun. This helps reduce fungal issues on the leaves.
The most important times for watering to be consistent is when you are germinating seeds and when the plants are flowering and developing seed pods. At those times, your beans like about an inch of water per week to keep them producing.
Soil for Growing Beans
An ideal soil for your beans is a sandy or silty loam. Clay soils should be amended to break up the soil and allow the roots breathing room. Mixing some compost or other organic material through your soil prior to planting will help to keep clay-like soils from compacting around the plants. Similarly, you want well-draining soils which won’t allow for pooling water that will drown your plants.
Fertilizing Bean Plants
Beans are considered to be a nitrogen-fixing plant, and in fact aren’t very heavy feeders. For best production, you can work a compost that’s rich in organic matter through your soil, and that should provide most of the nutrition your plants need. If you feel the need to supplement, opt for a 5-10-10 slow-release fertilizer. Avoid excess nitrogen as it will convince your plants to produce more vines or leaves and less flowers and seed pods.
Training & Pruning Beans
Pole beans and runner beans do need some form of trellis to hold onto as they grow, but bush beans don’t. You’ll want to be sure your trellis is well secured and can hold the weight of the plants as they spread. Popular options include wooden trellises, metal cattle panels, or mesh fabric which the tendrils can wrap around.
As younger plants develop, they extend out tendrils and search around for something to grow up along. You can gently encourage those tender tendrils towards the trellis material, but be careful not to bruise the young growth. Usually wrapping the tendril once or twice around a bit of netting or hooking it onto the trellis will suffice, as the plant will secure itself from there.
Planting pole beans around a tripod support is a fun project to try if you’re gardening with children, but it will be more difficult to harvest the beans than from a simple vertical trellis.
While bush beans do not require trellising, they can benefit from a little support. Using some support strings anchored off to stakes can offer extra assistance to younger plants. However, it’s better if your beans support themselves under their own power, so try not to give them too much extra support!
Propagation
Beans should be propagated from seed. They’re extremely quick to develop, so other propagation methods aren’t required.
If you started your pole beans in pots, you can transplant them while they’re still very young, no more than 6-8″ in height. Once they’ve gone too far beyond that height, they’ll have already started spreading out their roots and won’t tolerate being moved. Bush beans are even less tolerant of being moved, and should only be direct-sown.
If you wish to grow sprouts from beans (especially mung bean varieties), rinse off your beans thoroughly to remove any debris, and then soak your seeds in water for at least 12 hours. Place them in a dark location in either a sprouting tray or jar, and rinse them 2-4 times per day to keep them moist. You will have bean sprouts within 6-10 days.
Harvesting and Storing Beans
Harvesting your beans is surprisingly simple. But what do you do with them once you’ve picked them? You can of course always eat them fresh. I know I do – and they’re delicious right after being picked.
But if you’re anything like me, you’ll have way too many beans to eat in one sitting. So how do you preserve them for later use? Let’s go over that.
Harvesting Beans
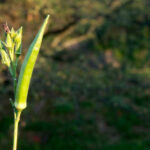
When green beans have reached the estimated pod size for their variety, harvest them by snapping them off the vine. Do not pull them off, as that risks damage to the vine. They should be firm enough to easily snap through.
If you are growing beans to be shelled and wish to use them when fresh, you can harvest them just as you would green beans once the seeds inside have reached full size. Again, don’t tug on the vine or bush to prevent plant damage.
Finally, if you plan to dry beans, most bean varieties can simply be left to dry on the plant. When the pod has dried out completely, the beans will rattle around inside and the pod should be crunchy and paper-thin. Harvest when 90% or more of the leaves of the plant have gone brown and dry.
If weather conditions are going to prevent you from accomplishing dry beans in the garden, you can pull up your plants and hang them indoors, plant and all, to finish drying out the pods.
Storing Beans
If you are shelling beans such as lima or fava beans to use them fresh, it’s best to use them on the day you harvest them. Otherwise, you can store them in their pods inside a paper bag in the warmest part of your refrigerator for a day or two. If cooked, your shelled beans will last in the refrigerator for up to a week.
Fresh shelled beans can also be frozen. Shell your beans, then blanch them a pound at a time in 5 quarts of boiling water. Small beans should be blanched for 2 minutes, medium sized for 3 minutes, and large for 4 minutes. Cool your beans in an ice bath after blanching for the same amount of time as you blanched them, then place them in a collander and allow the surface to dry.
Spread your blanched shelled beans out on a cookie sheet in a single layer and place it in the freezer. Once they are completely frozen, transfer them to freezer bags and label them with the type of beans and the date. Remove as much air as possible before storing in the freezer. They can be kept frozen for up to six months.
Once your bean pods have completely dried, remove them from their pods. If they’re still soft to the touch, you can try to get dry beans after a few more days spread out on a cookie sheet in a dark, dry location. You can compost the emptied pods.
Removing your beans from the pods should be relatively simple, but once removed and dried, they need to be sorted. Any beans which are broken should be removed. Those can be used right away but will not hold up to longer-term storage. A hair dryer can be used to blow off any remaining pod debris or dust.
Once dried and sorted, place your beans inside the freezer for at least 24 hours to kill off any bugs that may still be present. You can then store your dried beans in an airtight container like a mason jar with a dessicant packet to keep moisture at bay. Keep them in a cool, dry and dark location like a cupboard until use.
Like fresh shelled beans, fresh green beans will last for a few days (usually 5-7 days) in the refrigerator. Store your unwashed beans in a bag in the refrigerator until use.
If you want to freeze your beans, that is also an option, as green beans freeze surprisingly well. You will need to wash them and then blanch them prior to freezing. Small beans should be blanched in boiling water for 2 minutes, medium for 3 minutes, and large for 4 minutes. Once they have blanched, immediately place them in ice water for the same amount of time that you blanched them, then drain in a colander.
Allow your blanched beans to become dry beans on the surface, then spread them out on a single layer on a cookie sheet and freeze them solid. This prevents your beans from sticking together. Once fully frozen, you can place them in a ziplock freezer bag. Remove as much air as you can from the bags, label them with the type of bean and the date, and store in the freezer for up to six months.
This same process works for in-pod edamame, but as you can’t eat the pod of the edamame, the process to use the beans is slightly different than normal frozen green beans. You can either simply thaw them and eat the pods cold with a little salt, or you can reheat them in some salted water on the stove or in the microwave.
You can preserve your beans by canning, both shelled and whole fresh versions. However, this process requires a pressure canner to ensure that there is no risk of botulism. Follow the canner’s manufacturer’s directions, or find a reputable recipe for canning low-acid foods like beans.
Alternately, you can make pickled canned beans. Green beans can make an exceptionally-good pickle, in fact. As pickled beans have a much higher acid content, these can be canned using a water bath method or stored in the refrigerator.
Blanched green beans can also be preserved by dehydrating or freeze-drying. Be sure to wash and blanch your beans first, then thoroughly dry the outside before placing them in your dehydrator or freeze-dryer. Follow your dehydrator or freeze dryer’s manufacturer’s directions to dry beans of this kind into a crunchy snack or long-term storage option.
Troubleshooting
There’s an array of problems which might impact your beans. From simple-to-fix issues through more complex and potentially plant-fatal problems, let’s go over everything that might cause your bean crop to fail.
Bean Plant Growing Problems
If you’re noticing your flowers falling off the vine, it’s either too cold or too hot for the plant to set fruit. Temperatures below 55 degrees can cause your plant to start trying to protect itself from the cooler weather. Over 90 degrees, your plant is trying to keep itself alive in the heat. While the only thing that will fix hot weather conditions is a nice cooling trend or possibly some shade cloth, there’s a solution for cold weather. Spread floating row covers over your plants to offer them added warmth.
Seeds not germinating? The soil is likely too cold. Bean seeds won’t germinate until the soil temperature is consistently over 60 degrees, and they prefer the outside temperature to be in the 70’s for best growth potential. You can place a cold frame over the soil to try to add a little extra warmth, or plant in raised beds which may be warmer quicker. Alternately, just wait a little longer to plant.
Pests
There’s a wide variety of pests which will happily attack your beans, but the worst is the Mexican bean beetle. These beetles will rapidly skeletonize the leaves of your plants and scar your beans. Hand-pick them off your plants, and keep them from sticking around by spraying your plant with an azadirachtin spray.
Spider mites, aphids and thrips can suck the sap out of bean leaves, causing them to yellow, curl inward, or distort. To combat these tiny little garden pests, spray all surfaces of your bean plants with neem oil.
Adult cucumber beetles will nibble holes in the leaves of your plants while the larval stages will attack the roots. Using a pyrethrin spray will help wipe these pests out.
Japanese beetles will also happily chew bean leaves into little tatters. Repel these pests with a thorough spraying of neem oil.
The cutworm will literally make young bean plants collapse at the base, chewed cleanly through. Use a bacillus thurigiensis spray to kill off these little caterpillars.
Leafhoppers, too, may find your plants to be appetizing targets. With the aid of a neem oil spray, you can clear these pests out of your garden.
Finally, a surprising non-insect pest that most don’t consider is the woodchuck. While it’s not something tiny and rapidly-breeding, that doesn’t make it any less dangerous! Woodchucks will devour your crops if left unchecked. You can sprinkle a blend of blood meal and ground black pepper around your garden to deter these pests, or use a predator urine spray to keep them at bay. If those options don’t work, you may have to resort to traps and contacting animal control to haul them off.
Diseases
Sclerotina, also known as white mold, is a common fungal disease of beans – especially soybeans. While there are professional fungicides which can be utilized to combat this disease, there are few organic options. The best solution for the average home gardener is to avoid the causes of white mold. Avoid consistently wet leaves that can develop fungal issues, remove debris and fallen plant matter from around the base of the plant, and maintain good garden hygiene.
The bean mosaic virus is one of many mosaic virus varieties spread by leafhoppers and aphids. Once your plants are affected, there are no cures for this virus, and all impacted plants need to be removed and destroyed. Thus, your best protection is prevention. Avoid aphid and leafhopper infestation. Control weeds and remove plant debris. You can use a floating row cover over your plants to provide some mild protection if the weather is not too hot as well.
Both anthracnose and bean rust are other fungal diseases which can affect your plants in overly-moist, debris-strewn conditions. Garden hygiene around your bean plants is essential! Also, keep the leaves dry to prevent fungal spread. There are many cultivars that are resistant to these fungal diseases, so planting resistant strains can prevent outbreaks.
Downy mildew is especially a problem on lima beans, although it can be an issue for other large shell beans like favas as well. Avoid overly-moist conditions, and maintain good air circulation around your plants. A neem oil spray can help reduce the spread of downy mildew, anthracnose, and bean rust.
Finally, bacterial blights can occur if bacteria develop on wet leaf surfaces and air circulation is hampered. Avoid crowding your bean plants and ensure they have plenty of air circulation. Also, avoid watering in the afternoon or evening when water will remain on your plants for longer. Opting for a ground-level watering system like a drip hose to keep moisture off your plant’s leaves is a good choice.
Frequently Asked Questions
Q: Are beans easy to grow?
A: Relatively, yes. As long as you give your bean plants their base needs, they’ll do just fine.
Q: How long does it take to grow beans?
A: Bush beans take about 50 to 55 days. Growing pole beans takes a bit longer at 55 to 65 days.
Q: Do beans need a lot of water?
A: Growing beans requires about 1 inch of water per week. That amount is similar to other plants.
Q: Do beans need a trellis?
A: Pole beans need a trellis, but bush beans do not.
Q: How many beans do you get from one plant?
A: You’ll get roughly 120 beans per plant.
Q: Which bean is easiest to grow?
A: Shell beans are easiest and require less care than pole or bush beans. Growing beans is pretty easy overall, though.
Q: Can beans grow in pots?
A: Absolutely. I grow mine in grow bags to prepare them for future plants that need the leftover nitrogen content in the soil.
Q: What month do you harvest beans?
A: The month depends on your region and the variety you’re growing. When you’re growing beans, you’ll likely harvest beans anywhere from July to September.
Publicaciones relacionadas:
 Cómo cosechar orégano para uso posterior
 Plantas complementarias de camote que debes cultivar
 Cultivo de brócoli chino: delicioso Gai Lan
 Weigela: Arbusto De Flores Espectaculares
 Cultivo de papas en un balde: pequeñas papas espaciales
 Cola de burro: cultivo de plantas de cola de burro
 Okra en crecimiento: comida sureña en el jardín
 Cómo Cultivar Espárragos: Todo Lo Que Necesitas Saber