

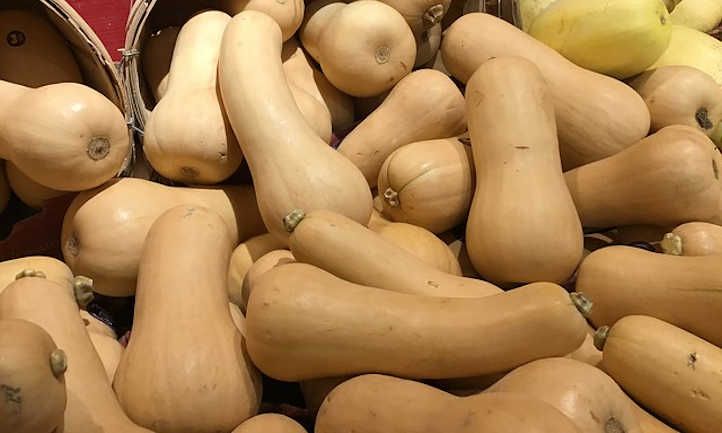
Nothing quite signals the arrival of autumn as a steaming bowl of butternut squash soup. A type of winter squash, it grows during the spring and summer but will last well into winter on a pantry shelf. Butternut squash can be made into any number of dishes, from being roasted and added to tacos, to pureed and made into pie. For any gardener or home cook growing butternut squash, patience is key.
Like all squashes, butternuts are native to the Americas and have a long history there. Butternut squash is a modern variety of winter squash, as squashes have been cross-pollinating and creating new varieties for millennia! Today’s butternut squash was developed by Charles Legget of Stow, Massachusetts in 1944. Since then, even more variations have been grown from this one type including miniature versions such as the Honeynut squash and Butterbaby.
Squash plants produce incredibly nutritious fruits, and butternut squashes are full of vitamins A, B6, C & E while low in calories. The seeds, when eaten, are even thought to be useful in calming the nerves. With a wide range of uses, and a long storage time, you’ll find many gardeners and homesteaders treat this as a staple in their pantry.
Quick Care Guide
| Common Name(s) | Butternut squash, butternut pumpkin |
| Scientific Name | Cucurbita moschata |
| Days to Harvest | 110-120 days plus curing time |
| Light | Full sun |
| Water: | 1 inch of water per week |
| Soil | Rich, well-draining, with pH of 5.5-7.0 |
| Fertilizer | A balanced fertilizer (10-10-10) at planting, flowering, and setting |
| Pests | Vine borers, squash bugs, cucumber beetles |
| Diseases | Powdery mildew, downy mildew, anthracnose |
All About Butternut Squash
Butternut squash plants, or Cucurbita moschata, are one of the most popular and recognizable winter squashes. Known in Australia as the butternut pumpkin, this vegetable from the Americas has since been introduced to the rest of the world, with each nation putting their own twist on how to use it!
Butternuts are a variety of winter squash along with acorn, kabocha and spaghetti squash. They’re cousins to summer squash such as zucchini or patty pan squash. While they grow during the same growing season, the differences between the two lie in the thickness of their skin. While summer squash has a thin skin and short shelf life, the thicker skin of winter squash means that they can be grown in summer, harvested in fall, and eaten in winter. Depending on the variety, winter squash can keep on a kitchen counter or cellar shelf for between 2-6 months!
Even within the butternut species, there are quite a lot of types to choose from! While the grand-daddy of them all is the Waltham butternut, probably the one you think of when you hear butternut squash, there are numerous subtypes. For home chefs cooking for one, there is the Honeynut or Butterbaby squash which are miniature butternuts. For those cooking for the entire block, there’s the huge Tahitian Melon squash that can weigh as much as a toddler!
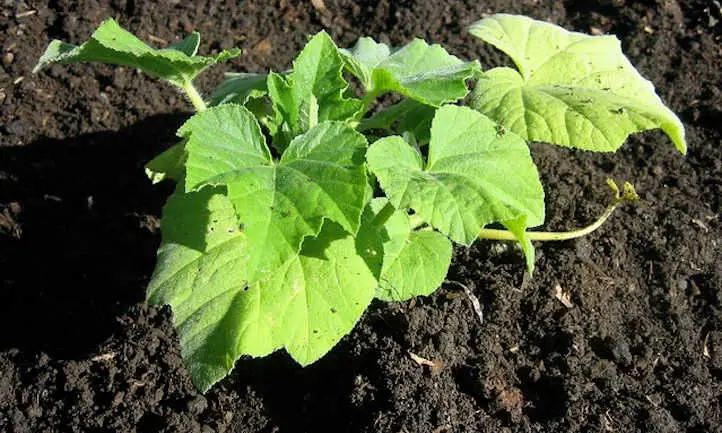
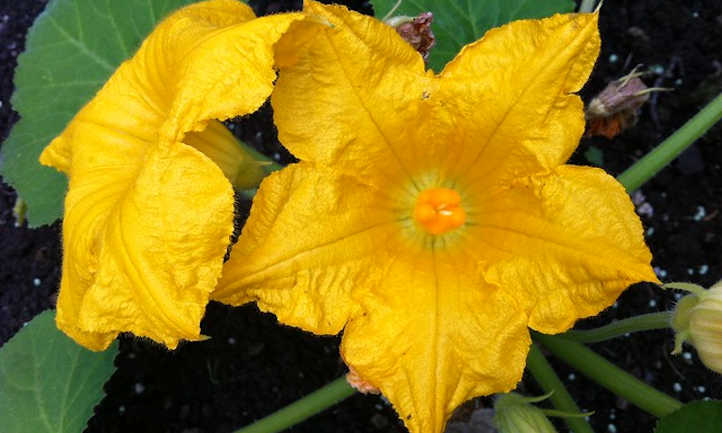
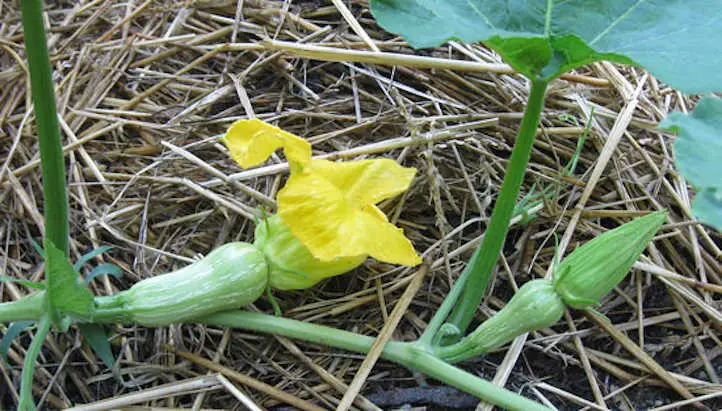
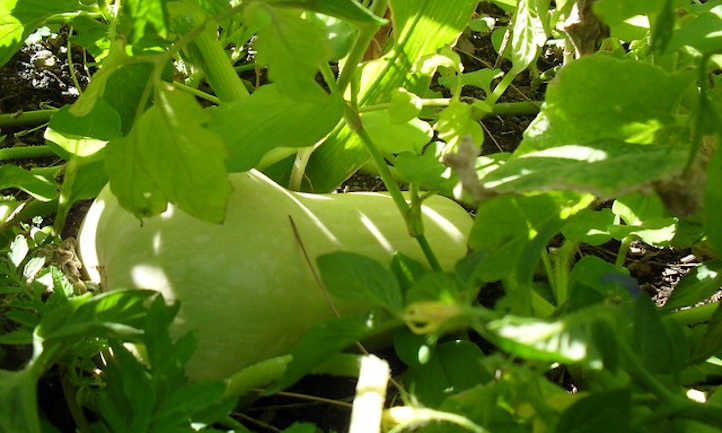
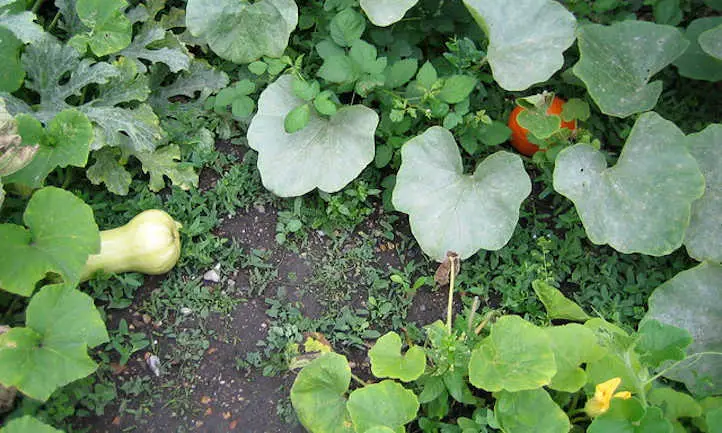
A garden full of butternut squash plants can look a bit overgrown. The squash vines can snake their way through plants and fences and even up small trees at times. Large spade-shaped leaves emerge to shade the fruit of the plant and keep the soil moist. Yellow flowers pop up from the vines to help pollinate the squash. Baby butternuts with a flower attached are the females, and flowers on long stems are the males. Depending on the variety, you can expect between 3-15 squash per plant.
You don’t need to be an expert gardener to grow squash! Squash seeds germinate very easily under the right conditions. Often grown as part of the Native American growing tradition called The Three Sisters, seeds were often sown in mounds of earth along with beans and corn in the springtime. As the soil warms faster in mounds, the seeds are quick to germinate and suppress any weeds sucking up nutrients.
Planting Butternut Squash
Butternut squash plants are annuals grown in the spring and summer. While they can take just 110 or so days to grow, they do need 2 weeks or so to cure in the sun if you intend on storing them, so count backward from your first frost to make sure you have enough growth time.
When starting squash seed, start indoors in cooler climates and transplant out once all danger of frost has passed. In warmer climates, you can direct sow in an area of the garden where the soil is warm enough (70 degrees Fahrenheit) for germination. Ideally, sow in mounds several feet apart, with 4-5 seeds per mound. Make sure they have been well mulched, preferably with well-rotted compost as these plants can be heavy feeders.
Squashes are vigorous growers and can amaze you and your neighbors with how quickly they can take over your yard. Due to that, they need full sun and well-draining soil. If grown in containers, make sure the container is sufficiently large (18 inches wide, 18 inches tall) and has enough room for these space hogs!
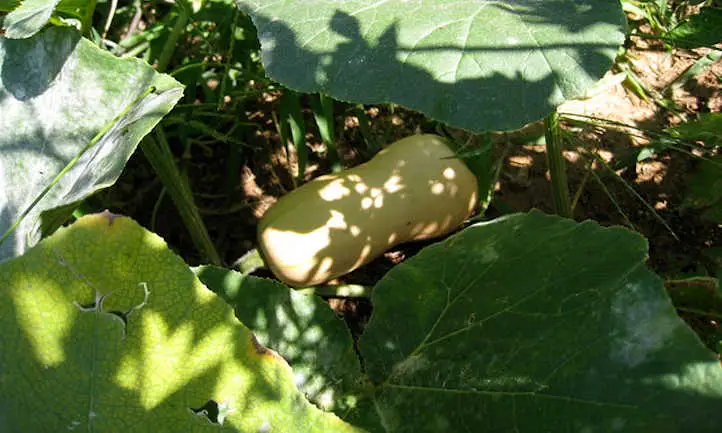
Once the seeds have sprouted, thin them out to 2-3 plants per mound, and water at the base of the vine once a week. Be careful to keep the leaves from getting wet as that can invite pests. After a few weeks, small butternuts will appear where flowers once stood and will grow rapidly. Place a barrier in between the squash and the soil to prevent pill bugs from eating its underside. Cardboard works as a great barrier. Leave the squash to grow and slowly change color. Don’t rush to cut them off, they need to turn fully tan and their stem needs to completely dry out before you can harvest.
Care
Butternut squash plants will almost grow themselves under the right conditions. All the home gardener needs to do is find the right spot in their garden and watch these vines take off!
Sun and Temperature
When you set out to grow butternut squash, find the portion of your garden with the most sun and warmth. Butternuts require full sun not just where the seeds are sown, but throughout the large area they will take up. These plants will only stay alive once the danger of frost has passed and the days have reached 70 degrees Fahrenheit.
A single frost can kill even a well-established plant. During the heat of summer, excessive heat can cause the leaves to wilt during the day, be careful not to overwater as they will perk up later in the evening. They grow well in zones 3-10 but have a longer growing season the further south you get.
Water and Humidity
It’s best to water throughout the growing season once a week at the base of the vine preferably on a drip line or soaker system. Each plant needs at least one inch of water per week during early growth, and 1-2 inches once large fruit has set. Be careful not to water too often as this can lead to cracking as the plant absorbs water at a rate faster than it can create more skin. Once the squashes have tanned and are starting to dry, stop watering to further avoid cracking.
Soil
Squash needs well-draining, loamy soil as they are a shallow-rooted plant. Try to keep the soil moist but not wet, especially while the squash is still young. The plant can survive poor quality soil but may produce fewer squashes as a result. They aren’t too picky about pH needing something in the range of 5.5-7.0. Mulch well to provide nutrients and help retain soil moisture.
Fertilizing
In order to grow butternut squash, you’ll need to fertilize three times throughout the growing season. They are heavy feeders and require a good amount of a balanced (10-10-10) fertilizer to help it while young, and then a fertilizer low in nitrogen when fruiting. Nitrogen encourages leaf growth at the expense of fruiting, so be careful you don’t introduce too much nitrogen into the soil.
Pruning & Training
If you plan on letting your squash roam freely in the garden, you probably will not need to train your squash much. Once a vine has 3-4 fruits, clip off the end of the vine to stop further production. The quality of the butternut squash produced can decrease if too many squash are growing on a single plant.
A way to save space in the garden is to train your squash up a trellis or arch. This is also a great way to keep the vines up off the ground where they may come in contact with more diseases and pests. While young, train the vines up a trellis, anchoring them using string or wire. Be sure to do this while the plant is still small as moving larger plants can result in them breaking and stunting growth. Once the butternuts form and begin to hang, give them extra support so they don’t snap off. You can aid them by tying them up with pantyhose, old t-shirts or kitchen towels.
Propagation
Most butternut squashes are grown from seed. Unless you live in a warmer climate or have a large greenhouse, starting seeds is the only viable method to start butternut squash.
Rarely do people try and root a clipping. This is done when attempting to preserve an heirloom variety or to resuscitate an accidentally damaged vine. Use a rooting hormone and place the end of the cutting in soil mixed with vermiculite.
Harvesting and Storing
Butternuts are prized in the garden in part because they do well when stored over winter! They make it possible to have a taste of summer when there is a layer of snow outside!
Harvesting
Butternuts are ready to harvest when the stem connecting the fruit to the vine is completely dried out and the skin of the butternut cannot be pierced with your fingernail. Cut the stem about an inch away from the fruit and allow it to dry in the sun for about two weeks. This is a process called curing. If you plan on long term storage, after curing, wipe down the skin with a solution of water and bleach to kill mold spores and insect eggs that can destroy your squash when stored for a long time.
Storing
Once the butternut squash has been properly cured and cleaned the squash can last 2-5 months at 50-60 degrees or in a well-ventilated cellar or pantry. Do not stack squash on top of one another, they need air circulation. Check regularly for rot as one rotten squash can cause others to rot.
You can also cube the butternut squash and pressure can it using a tested and safe recipe. Freezing is also a great option; dice up your butternut and lay it on a parchment-lined baking sheet until frozen, then store in a freezer bag. It’s possible to dehydrate cooked squash as well, although the texture may be odd afterwards.
Troubleshooting
From fruit not setting, to wilted leaves and a white substance covering the butternut’s leaves, several problems can plague you during the growing season.
Growing Problems
One of the most common growing problems is the failure of female flowers to set fruit. Small butternuts appear but then turn yellowish-brown and fall off, disappointing gardeners. This happens when the male flowers fail to get their pollen into the female flower in time. Pollinator insects normally do this but can sometimes be nowhere to be found. You may need to hand-pollinate to ensure you get your squash to grow!
Splitting happens when the plant receives too much water in a short period of time. The plant tries to take in too much water all at once and the insides of the plant expand more rapidly than the skin does. If it’s far enough along in the growing process, you can still eat it within 48 hours.
Pests
One of the most annoying parts of growing vegetables is dealing with the pests that want to eat them too! There are a few main predators in insect form to watch out for!
Squash vine borers will attack any squash plant and bore into the main stem, sucking out the juices and eating the plant. This will cause small holes in the vines and deposit frass, a sawdust-like matter around them. You can discourage vine borers by spraying neem oil, which will kill the eggs. Wrapping the base of vines in aluminum foil prevents them access to the vines entirely, thus protecting your seedlings from severe damage.
Squash bugs are small gray or brown bugs that travel in packs. They lay their eggs on the underside of a leaf and, once hatched, suck the juices from the plant itself. Use insecticidal soap or neem oil to smother their eggs. Pyrethrin works well to kill off adult beetles.
Cucumber beetles are small insects with yellow and black spots on their backs. They go after seedlings in particular and can carry wilt diseases with them. Both pyrethrin and spinosad are effective against these beetles.
Diseases
Most butternut squash diseases can be avoided by choosing varieties that have proven resistance to diseases. Additionally, keeping the garden well weeded and promoting air circulation helps dramatically in reducing disease.
Anthracnose appears first on butternut squash leaves as small circles or indents, but can soon spread to cover an entire plant. Treat early with a copper fungicide as it can quickly kill an entire plant. Make sure affected plants never find their way into a worm bin or compost pile!
Downy mildew, like most fungi, thrives in moist conditions and can be fatal. This disease presents as pale grey or yellow spots on leaves and is also best prevented by using a copper-based fungicide. Neem oil is a good preventative against this annoyance.
The telltale sign of powdery mildew is a white powdery growth covering the tops of the leaves and stems of butternut squash plants. This growth will spread to the entire plant and will stunt the growth of the entire plant if not kept in check. Remove infected leaves and spray with neem oil.
Frequently Asked Questions
Q: How long does it take to grow butternut squash?
A: It takes between 100-120 days to grow, but another 2 weeks to cure it if you intend to keep it in long term storage.
Q: How many squash do you get from one plant?
A: Depending on the variety and growing conditions, you can expect between 5 and 20 butternut squash per plant.
Q: Do I need to dry butternut squash seeds before planting?
A: Yes. Butternut squash seeds need to be fully mature before they’re planted.
Q: Can I plant seeds from store bought squash?
A: You can, however you may find that the seeds cross-pollinated while growing and will grow to create a different type of squash.
Publicaciones relacionadas:
 Growing Wheat: Bread From The Backyard
 Menta de Córcega: cultivo y cuidado de Mentha requienii
 Tomillo limonero: hojas diminutas con un toque cítrico
 Luces de cultivo T5: nuestras 7 mejores opciones para 2022
 Cómo cultivar microvegetales de orégano rápido y fácil
 Problemas comunes de microverdes
 Lo que NECESITA saber sobre las soluciones de nutrientes hidropónicos
 Virus mosaico: una categoría de problemas