
Have you heard of the Back to Eden gardening method? If not, you should. This gardening technique will greatly improve your soil tilth and fertility over time. It promises a major reduction in tough weeds and the ability to grow almost everywhere. Water conservationists should rejoice, as this technique is great for drought conditions.
But what exactly is the Back To Eden gardening method? Let’s break it down to a barebones layout of how it works and how to do your own. It does take time, but it will reduce your labor over future years and make gardening an enjoyable, easy task.
v
Origins of the Back To Eden Gardening Method
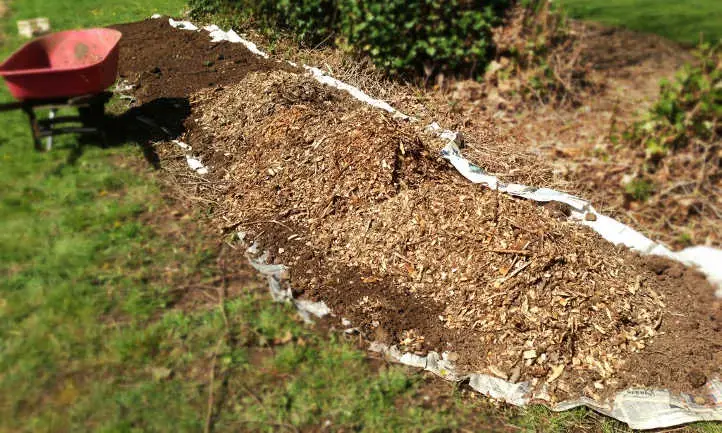
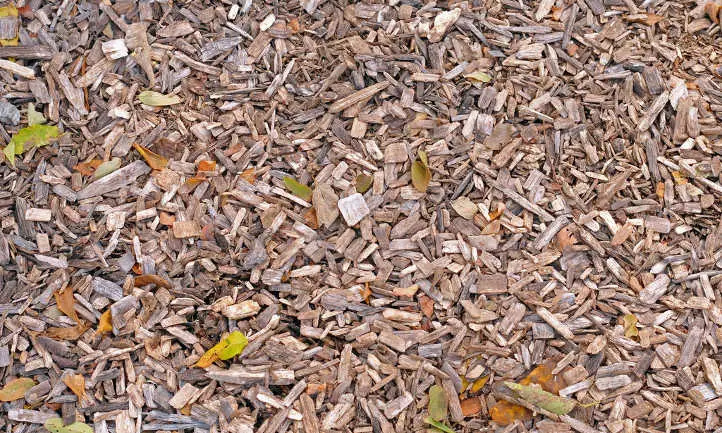
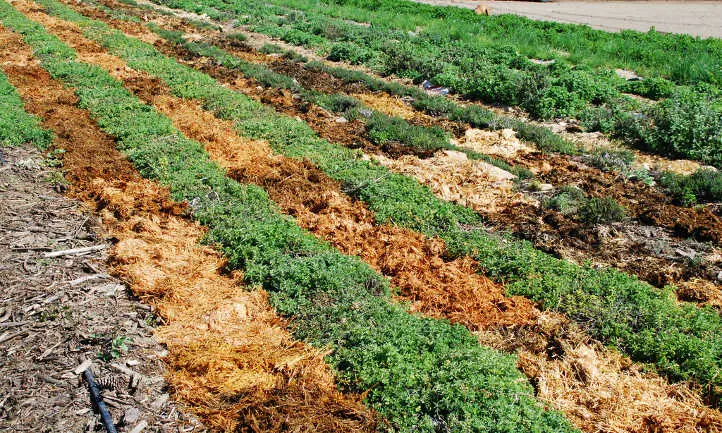
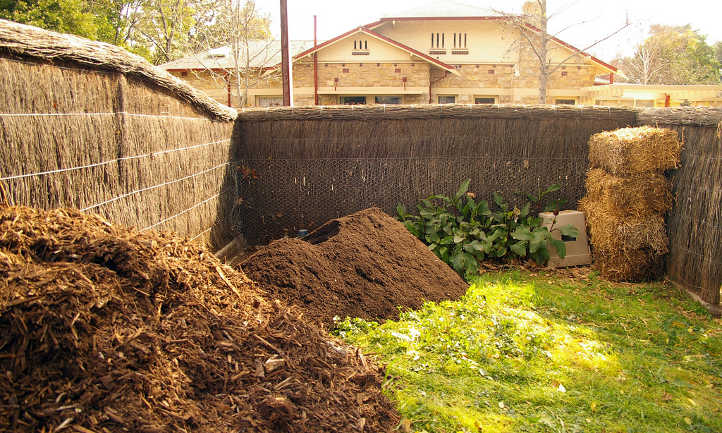
 Back to Eden gardening is a layering method which develops good soil structure. Source: Wellington Family Farm
Paul Gautschi, the creator of the Back to Eden method, is a devout Christian. His beliefs are consistently mentioned in the documentary film about the method. But it’s those beliefs which inspired him to garden as he does.
Named after the Biblical “Garden of Eden”, this method focuses on nature’s process. In the Garden of Eden, Paul reasons, everything grew without man’s touch. There was an abundance of every plant needed to sustain life.
And yet, nobody was out fertilizing the soil. How could these things grow?
He found his answer by examining the forest floor near his property. Years of decomposed leaves, twigs, and other plant matter had formed rich mulch. From there, his game plan focused on how to get mulch like that to develop with human aid.
Since the soil is protected with this thick layer of decomposing matter, it is less prone to erosion. It does not bake in the sun, and it retains significantly more moisture. He experimented around his orchard trees and found that the method worked very well. But would it work the same for other plants such as vegetables?
The answer, in short, is yes. Once the garden has become established over time, it becomes heavily productive. The thick natural mulch forms new soil over time and protects the older soil. Watering is almost completely unnecessary in his Pacific Northwestern environment. The mulch stores the rainwater, preventing it from evaporating away.
The film delves deep into his spirituality and where it interlinks with his garden. It’s clear when watching it that he is a man of strong faith. But the truth is plain for both believers and nonbelievers alike. In replenishing the rich, natural mulch that coats the soil, we have a chance at our own personal Eden at home. And that’s worth striving for!
If you’d like to view the entire documentary yourself, by all means do! It’s a beautiful film and explains the origins of Back to Eden gardening completely. A free link to the video’s below, and you can purchase a DVD of it on the Back to Eden website.
In the meantime, read on to see my in-depth description of how to start your own Back to Eden garden. I’m going to provide some of the pros and cons of this method, and help you make it work with what you’ve got at hand.
How To Do Your Own Back To Eden Garden
I won’t lie to you. Starting the process entails time, some initial hard work, and a whole lot of mulch. It’ll take some planning, too. But once your garden is established, the hardest work ends. Then it’s simple maintenance and care, and your plot will become more fertile with the passing of time!
Select Your Supplies
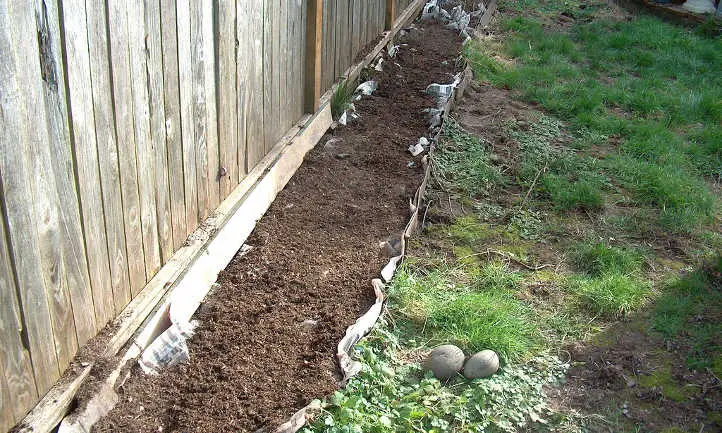 A layer of compost goes in before the mulch in your bed. Source: kightp
The goal of this method is to use what’s readily available in your area. While for Paul that’s wood chips, for other people it may be dry leaves or wheat/rice/oat straw. Grass clippings are a popular mulch as well.
But it’s not as simple as putting out these materials in the fall and forgetting about them until spring. While that does in fact work, you can significantly speed up the process. Traditional composting methods will kickstart your Back to Eden garden. In the spring, you’ll have rich, fertile black soil awaiting you!
In essence, you’re using a “brown” material such as wood chips or dry leaves to protect the soil’s surface. These brown materials will decompose slowly over time. It’s possible to layer in lots of wood chips and let the process happen over years, which is what Paul’s done.
For fast decomposition, you’ll need some “green” or nitrogen rich materials. If you’re using a batch of arborist wood chips, you’ll be getting a healthy mix of fresh green material in the browns. New shoots and fresh green leaves are nitrogen-rich sources of material. This makes it a nearly perfect material to use for the Back to Eden method!
But what if you don’t have access to truckloads of wood chips?
The entire point of Back to Eden gardening is that you should use what comes naturally in your area. There’s no reason this should have any costs associated with it whatsoever. Let nature provide for you.
Look around your neighborhood in the fall. Are trees dropping leaves everywhere? If so, you’re set. Go ask the neighbors if you can rake up and haul away their leaves. Most of the time, they’ll be thrilled. Feel like mowing lawns? You can haul the clippings away.
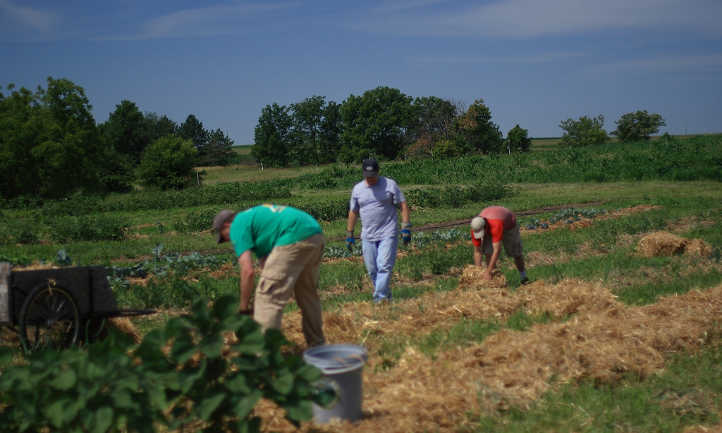
You’ll need a green waste to break down brown wastes, though. I like to use coffee grounds. Nitrogen-rich, they’re often thrown in the trash by local restaurants. Stop by the local coffee shop and see if they’ll fill up buckets of coffee grounds for you. Failing that, fresh grass clippings work well. Check with local golf courses or community parks and offer to haul off their lawn trimmings. Local chicken farms may have droppings you can haul away too.
There’s no reason that this stuff should cost you a small fortune. In fact, if you’re willing to put in a little work for it, often it’ll be no cost at all. Your garden will love it, and you will too.
Putting It All In Place
 A side view of the layering method. Source: Back To Eden Film on Facebook
With the Back to Eden gardening method, tilling isn’t required. In fact, you can start a Back to Eden bed right on top of an existing lawn if you want. It’s best to start this process in the fall so that your garden will be ready in the spring.
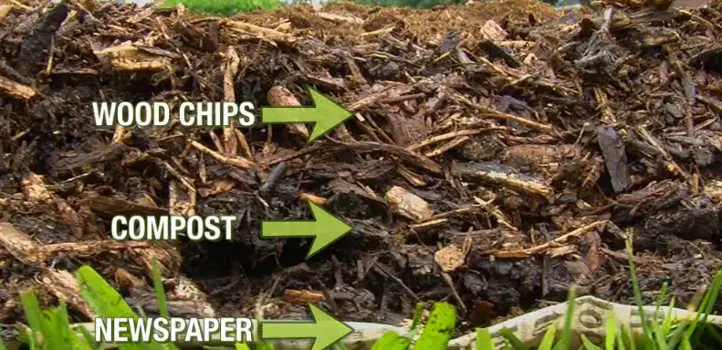
Begin by putting down layers of newspaper or cardboard. The goal is to have a nice, thick layer that will help prevent weeds or grass from growing up through your mulch. If you’re using newspaper, use at least 5-6 sheets deep to make a barrier. Lightly moisten the newspaper or cardboard to help keep it in place while you work.
If you have high-quality aged compost or another nitrogen source, put down a layer of that next. Usually 2-3 inches of compost is plenty to act as a starter in the spring. I prefer using well-composted manure as a base, as it makes for very rich soil. You can opt for a blend of screened soil and compost, too.
Finally, top this off with a thick layer of wood chips, 5-6 inches deep. You can use dry leaves or pine needles, too. The goal is to completely cover your soil layer with your mulch. This keeps the soil from eroding away during rainy periods.
And that’s it. You’ve got the basic plot ready. If you would like, you can drape black plastic over it to act as a warming agent and speed the decomposition more. You shouldn’t even have to do that much if you don’t want to! Now it’s time for nature to do its job.
Planting & Reaping The Rewards
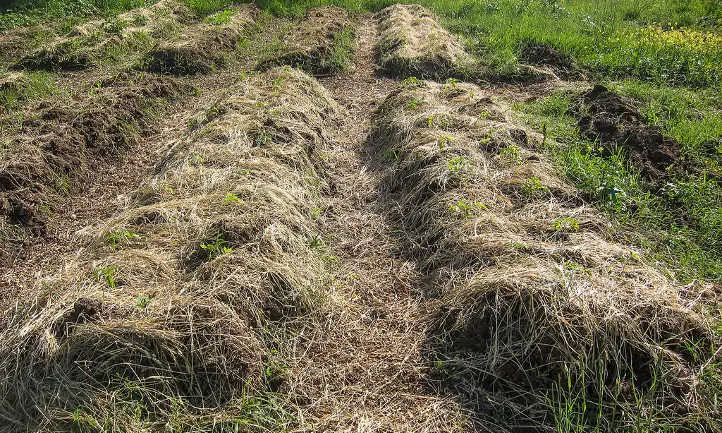
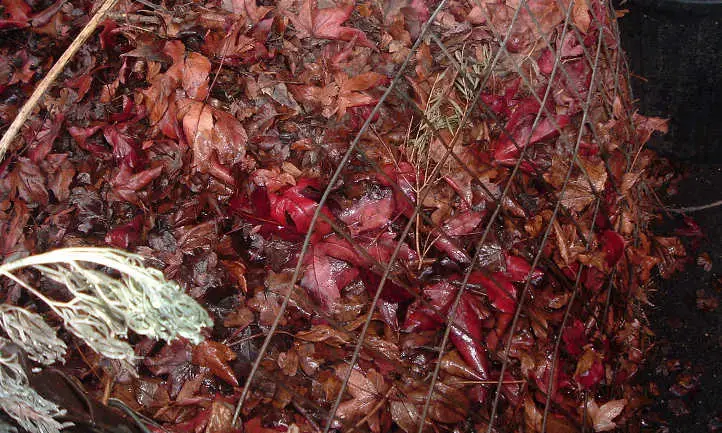
 This sheet composting method keeps the soil moist for your plants. Source: hardworkinghippy
In the spring, your mulch layer should have significantly decreased in thickness. What was six inches of mulch should be down to two or three inches. Instead, on the surface you’ll have slowly-reducing particulate matter and aged mulch materials. This is perfect.
When planting, it’s important to get your seeds down into the soil layer. Remember that aged compost you put down below your wood chips? Gently pull the chips back to expose that, and plant your seeds there. The roots will develop in that and will be able to penetrate your cardboard or newspaper layer.
As the seeds germinate, the mulch should remain pulled back from the soil to allow the sun to reach it. But as your plants develop and grow, begin sliding the mulch back around them. This protects the soil at the base of the plants and helps keep moisture in the soil.
Watering in the Back to Eden gardening method is easy, too. All that mulch will hold moisture. While you’ll need to water when you’re starting seed, once the mulch is back in place it’ll be less and less.
As the soil builds up a heavy stockpile of organic material as time goes on, it’ll hold its own water. In particularly hot weather, you can place a soaker hose under mulch to add extra water if you think it’s necessary. You might find it’s not needed!
Subsequent Years In The Back To Eden Garden
Once you’ve started using the Back to Eden gardening method, how do you maintain it over time? Here’s a few tips for maintaining your Back to Eden garden and keeping it going for years to come!
Weeding In The Back To Eden Gardening Method
 As the wood chips break down, you’ll be building looser soil that’s easy to weed. Source: edebell
Weeding is very simple in this gardening method. Because the weed seeds will be landing in the mulch, they won’t have the benefit of the soil below the mulch layer. As long as you maintain at least 3″ of mulch around your plants, their roots will be shallow and they’ll be easy to remove.
In most cases, you can grasp the weed at its base and lightly pull upward, and it’ll slide right out of the mulch. In cases where the weeds have a deep taproot, it should still be very easy to remove. The soil beneath the mulch should be moist enough that a little tug will free the weed.
No gardening method is truly weed-free, no matter how much we’d like it to be. And Back to Eden gardens will still have their share of weeding to do. But it should be significantly less weedy than bare soil gets, and removal is much, much easier.
Maintaining Your Back To Eden Garden
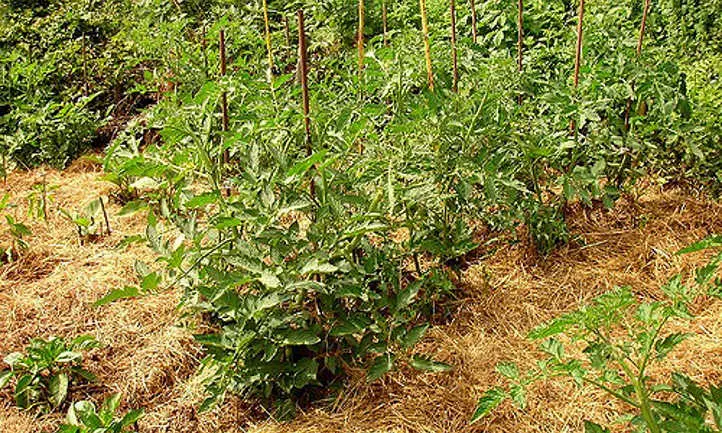
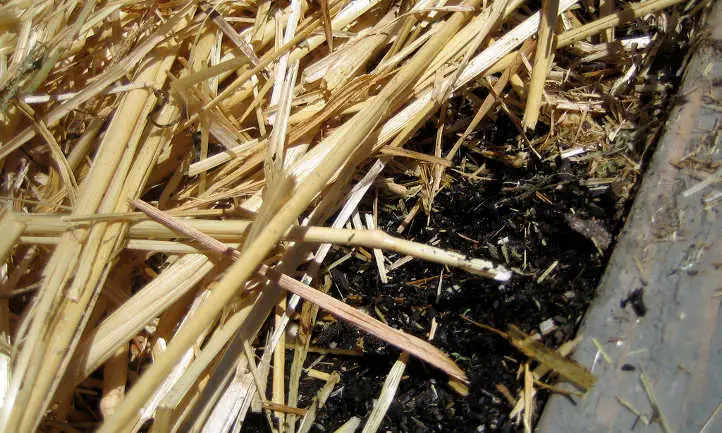
 Straw mulches can be used with great success. Source: Sarah Cady
Over time, your mulch covering does break down. That’s good, because it’s doing exactly what you want it to do! But as it breaks down, it needs to be replenished.
Using more of the same mulch can work over time, especially if it’s fresh arborist’s chips. Since those have plenty of green waste in the brown waste, you have a nearly perfect compost material. Even then, the brown wastes will tend to linger, especially larger chunks.
Look at what you’ve already put down, and see what remains. Is it a lot of bigger chunks? Those are going to take time and more nitrogen. Is it all small particulate? You may need a brand new layer of mulch just like your first year.
I personally recommend using a variant of lasagna gardening techniques. Don’t try to mix new material through your old mulch. Instead, place a new layer overtop of whatever new material you’re adding.
In the Back to Eden film, Paul adds a layer of composted chicken manure over his mulch. Mixed through that manure is a mixture of broken-down yard waste, too. By doing that, he’s adding a good nitrogen source. That’ll keep the decomposition active and ensure even the larger bits break down.
For those who aren’t using arborist’s chips, it may be a bit more complex. If you’re using straw, for instance, it has some nitrogen like a green waste. But about 70% of straw acts as a brown waste. A layer of composted manure or grass clippings might help.
You also want to avoid making a dense mat. Stuff like straw, grass clippings, and pine needles will get matted together. While that’s great for preventing soil erosion, it can slow decomposition. And if that mat’s been absorbing water for too long, it may develop mold or get slimy. That’s not fun to work in!
You’ll need to vary your treatment to suit your specific location’s needs. That’ll be a process of trial and error at first as you settle into a pattern that’s right for you. But in time, you’ll have great benefits as you develop rich, fertile soil.
What About Fertilizer?
 In the first couple years, fertilizing may be necessary. Source: bobydimitrov
In the first few years, you might find that fertilizer is going to be more necessary to kickstart plants. There’s nothing wrong with that. After all, in a more traditional garden, you’d be using it anyway!
But there’s a distinct reason behind why fertilizer is necessary. As I’ve mentioned throughout, this is a form of sheet composting. You’re breaking down material directly on the soil you’re planting into. And composting requires a certain amount of nutrients to work.
In those first few years, any nutrient needs may be pulled directly from the soil itself. Often, you’ll find you have a nitrogen deficiency, and the plants will look stunted as a result.
What fertilizing will do in those first few years is to ensure you can still get growth from your plot. Meanwhile, you’re creating organic-laden soil that will hold moisture. Over time, it’ll hold onto additional nutrients, too, and you’ll have to fertilize less.
After many years, many avid Back to Eden gardeners find they seldom have to water. They also seldom use a commercial fertilizer, whether liquid or solid. But these gardeners are using other natural products like compost which are themselves fertilizers. They’re rarely using a single mulch material and getting perfect soil.
Once you’ve found that perfect pairing for your beds, it’s like magic! But until you find what works best for you, feel free to fertilize.
Does Back To Eden Gardening Work?
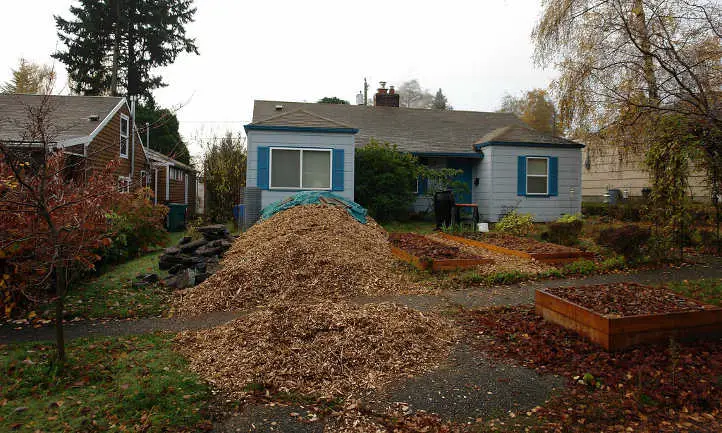
 It’ll take a whole lot of wood chips to maintain your garden. Source: vetaturfumare
Yes, but…
I hate using the phrase “yes, but…”, although in this case it’s warranted.
Yes, Back to Eden gardening works. And for those who it does work, it works amazingly well.
Other people report that it’s been far less effective for them. In most of those cases, it’s because they don’t understand the principles of composting. In some cases it’s a poor choice in mulching material. And in others, it’s sterilizing their soil. Let’s go over some of these problems.
Why Sheet Composting Is Slow
Instead of building a large pile and turning it, you’re building a short and flat sheet. Normal composting methods will build up heat inside the pile. That heat kills off weed seeds, sterilizes the future soil, and speeds decomposition.
But in the Back to Eden method, you’re not building up anywhere near as much heat. Weed seeds don’t get killed off, so if you’re using hay or other weedy mulch material, you might find lots of weeds. Larger items don’t get broken down quickly.
Sheet composting works well if you do it right. That means carefully maintaining the surface. You’ll need to layer finer materials with chunkier ones to ensure there’s airflow. But no matter what you do, it’s still going to be slower than a large, regularly-turned pile.
Microbes May Be In Danger
 Consider non-acidic mulches like straw in your beds if soil microbes are important to you! Source: Suzies Farm
Soil microbes also may be at risk in the Back to Eden garden. Many people cultivate a healthy microbiome, encouraging beneficial bacteria to dwell there. Using the wrong wood type can wreak havoc on that microbial population. Acidic wood chips are especially dangerous.
If you’re trying to maintain a microbial population, this method may be difficult. You’ll need to be very selective in your mulch types, and very particular about what your needs are. It can be done! It’s just a bit trickier.
Sour Mulch Needs More Time
Another issue comes from sour wood mulch. Sour mulch forms in large mulch piles. As air can’t get into the center of the pile, it will be breaking down anaerobically. The bacteria that form in an anaerobic environment are the wrong type for gardens.
If sour mulch is spread right before planting, the plants which are placed there may wilt and yellow. Particularly vulnerable plants may die. It’s best to be sure you allow at least two weeks of time between spreading and planting. This allows the negative microbial population to die off.
But how do you tell if you have sour mulch? It’s actually quite simple, as the smell gives it away. Sour mulches smell like vinegar, ammonia, silage, or sulfur. Fresh mulch will smell woody or like soil.
Fungi, Fungi Everywhere
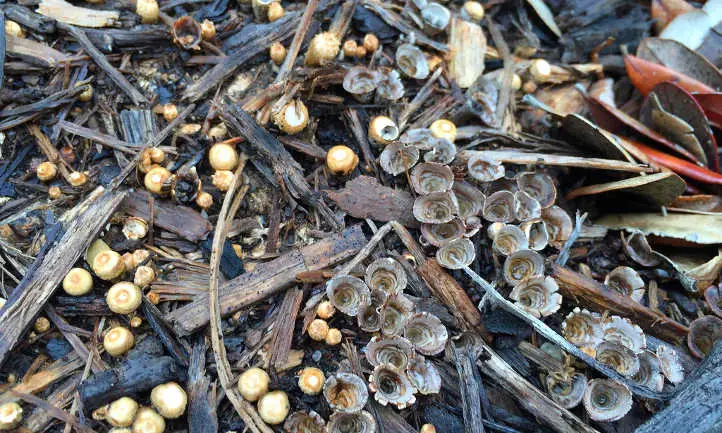 Some bird’s nest fungi growing on decomposing mulch. Source: CameliaTWU
Are you starting to see signs of fungal growth on your wood chips? It may not always look like mushrooms, although those may happen too. It can be white and stringy or black and dingy. Naturally-forming fungal growth is essential for breaking down wood chip compost.
But to some people, it’s unsightly. Most wood chip fungi won’t harm your plants, and in most non-mushroom cases won’t harm you either. But it doesn’t look “good” to most people.
If you’re aiming for a perfect garden environment, fungi will be part of it. Most people want some fungi in their soil as it can help with plant nutrient intake. But they’re not enthusiastic about signs of decomposition taking place on the surface.
For Back to Eden gardening to work, you’ll have to be tolerant of chip-dwelling fungi. Most of it doesn’t look all that bad, just different. It takes getting used to! And unless you’re in that rare minority who has a harmful fungi, it’s pretty harmless to us and our plants.
You Need Fresh Mulch, Not Aged
 Aged dry wood chips will decompose more slowly than fresh chips. Source: robotson
One of the biggest assumptions is that any wood chip mulch will work. Just spread it and forget it, right? But that’s not the case.
Fresh chip mulch of the type which an arborist can provide is the best for this technique. It’s especially great if it’s all material from branches including green leaves. While trunk mulch will also work, it takes longer to break down than shredded branches do.
Using aged or thoroughly dried mulch is great in planters. In that situation, it’s intended to act as a weed barrier and moisture retainer. It breaks down much more slowly than green chips do, and that makes it fantastic for landscaping. But in Back to Eden gardening, aged mulch lacks the nutrients it needs to break down. You’ll have to supply virtually all the nitrogen your plants need. And even then, the chips will still be there, potentially pilfering your nitrogen supply. Keep the aged mulch as a top-dressing.
Slugging It Out With Slugs
Do you like slugs? I don’t. They show up and devour my plants during the rainy season. It makes it hard to get an early start on lettuce and other leafy greens in the spring.
Unfortunately, in wet climates, slugs also love mulch. It gives them a helpful layer to creep across where they’re not likely to drown. And with Back to Eden gardens, you’re basically creating a slug habitat if you’re in a soggy climate.
There is a workaround here. If you use very fine mulch, the slugs are less interested in it. In essence, if it’s fine enough that it already looks like a chunky compost, it’ll work even in moist regions. But getting it that fine is difficult. Arborist drops won’t give you that grade, for certain!
If you’re in a region where you get a lot of rain, it might be best to opt to spread 2-3 inches of quality compost as mulch. It will work in a similar way to improve your soil, but it’s much less likely to become a slug factory.
Matting Can Happen
 Pine straw can become matted over time and need to be broken up. Source: Carlin Joe
So you can’t get wood chips, but you’ve got ample supplies of straw. That’ll work, right?
… yes, but. Straw does do a wonderful job at being a top dressing around plants as a mulch. It retains water beautifully, and once it breaks down into the soil it continues to do that. It has small amounts of nutrients and can improve the soil quite a lot.
Straw, hay, grass clippings, non-shredded leaves, and pine needles have one tiny flaw. Over time as they compact down, they can form a dense mat on the surface of the soil. And if fungi move into your compost, you may have a dense mat that no longer allows water to permeate.
Ironically, the way to prevent this problem is to keep it wet at all times. If it hasn’t rained and your mulch is drying out, wet it down. Be sure it stays damp and that water’s still easily flowing through it. When water stops going through it, use a fork to loosen it up and break up the matting.
Big Idea For A Small Space
 You’ll need large quantities of wood chips to maintain this method. Source: RJL20
Doing Back to Eden gardening is easy if you have a lot of land. There’s plenty of space to have wood chips delivered. You can put the garden anywhere you choose. But what if your yard space is limited?
It’s still possible to do this method in a small yard, or even in containers or raised beds. But doing so may be more trouble than it’s worth. Mulching your plants is a no-brainer. But containers are subject to a lot of nutrient loss when using this method.
You’re going to have a harder time sourcing arborist’s wood chips this way, too. Most of the time, they want to deliver by the truckload. If you only need a garbage can full, you may need to ask if you can pick up from their dump yard. Some services might allow that, others won’t.
Consider using something more portable, like straw or alfalfa bales. Shredded leaves are great for the small-space gardener, too. Be creative with your available space.
Great Sources For Back To Eden Materials
Probably the hardest part of this method is finding mulch in the right amounts. It takes a lot of mulch to do Back to Eden gardening, especially on larger plots.
Finding Wood Chips
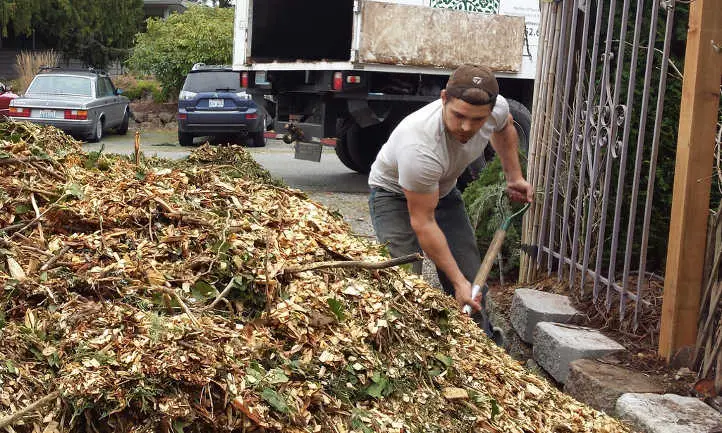 Tree services are a great source of fresh wood chips. Source: Wonderlane
One universal possibility is arborist’s wood chips. Now, when I say arborist’s chips, I mean fresh wood chips. These will be run through a shredder, leaves and all. To your local tree service, this is refuse, something to get rid of. But to us, it’s the start of a beautiful plot.
Services like ChipDrop may be able to assist. This free online service links tree trimmers with garden enthusiasts. You can specify if you want only wood chips, wood chips with some logs, wood chips with a lot of logs, or logs-only. (Yes, this is a great source of potential free firewood, too, although it won’t be aged.)
Chipdrop also allows you to make requests, such as avoiding specific woods. You’ll need to have a place available for the load to be dumped at any hour, and they won’t show up on a specific schedule. And it may be a massive load of wood chips, so be prepared for a mountain!
But if Chipdrop isn’t available in your area, or you don’t have space for a mountain, talk to local tree services. You may be able to visit their truck yard and haul away some of their mulch. Similarly, talk to your local power company. Personnel who’re maintaining power lines sometimes remove branches, and they might have chips.
Alternative Mulches
 Rice, oat, or wheat straw can be used as a mulch material. Source: stellar678
In the United States, we pride ourselves on our “amber waves of grain”. Rice, wheat, and oats all are excellent sources of straw, and for most farmers it’s a waste product. In fact, the rice farmers in my area do agricultural burns at the end of the season to get rid of it!
If you happen to live in an area where rice, wheat, oats, or even alfalfa are grown, it doesn’t hurt to chat with the farmers. Often, they’re looking for someone who wants to haul off their plant debris. While some do compost it themselves, many don’t and just want to be rid of it.
If you do opt to go this route, you may also want to find out what chemicals they used on their crops. For organic gardeners, this is especially important. After all, the remnants of the plants will still have those chemicals in the stem and on the surface. That means they’ll be in your beds!
Community Clean-Up
 Collecting leaves can be a great free source of mulch material! Source: Gavin Anderson
Do you live near a local park? If so, find out if you can rake up some of their leaves. Using leaf mulch works very well! You can make leaf mold to simulate that fine particulate on the forest floor if you want. Alternately, shred the leaves and use them just as they are. They will decompose on their own. Parks are also a great source of pine needles.
Don’t forget your neighbors! In most urban areas, there’s a plentiful supply of trees. If you’re lacking a green canopy, your neighbors might be willing to share their leaves or needles. If you’re willing to rake them up and haul them away for no cost, they’ll be even more grateful.
Find out when local parks or golf courses do their mowing. For that matter, find out when your neighbor’s planning on mowing the lawn. More often than not, these grass clippings are just thrown out. You can put those clippings to great use.
Manure Happens
 Pre-composting of animal manure may be necessary. Source: Making Special
A great nitrogen source can be animal manures. If you’ve got a local cattle ranch, chicken farm, or even a horse stable, you have a great potential source. Go talk to them! It’s quite possible that they’d love to share with you rather than dispose of it themselves.
Don’t forget that home sources of manure do in fact exist. People who have pet rabbits or chickens have a constant source of manures. Hamsters and chinchillas are also great sources of droppings.
Just remember that with most animal manures, it’s best to try to compost them first before using them. This will eliminate the pungent smell they give off when fresh. It also ensures that the nitrogen released isn’t too harsh for your plants.
In some cases, you’ll get manure mixed with straw, wood shavings or sawdust. This is most common with horse stables, as the wood absorbs urine on stall floors. That’s good too! But this is especially important to pre-compost. You’ll need to break down the urea and mellow it to more of a soil-like consistency before use.
Never use cat or dog wastes for your garden. These can harbor dangerous pathogens for humans. While they do break down, the pathogens can remain in your soil. They may possibly contaminate your produce. It’s safer to avoid them as compost sources.
Check Local Businesses
Seeking other nitrogen sources and you don’t have a manure supply near you? Stop by your local restaurants and coffee shops. Coffee grounds are a quickly-decomposing source of nitrogen.
For that matter, places that serve breakfast are also a good source for newspaper. If the greasy spoon on the corner is amenable, you might be able to get twice the benefit. Leave a bucket for them to dump coffee grounds into, and offer to haul off their old newspapers. This keeps stuff out of the dumpster and provides you with garden material.
This is by no means a complete list! With some creativity, you can easily find sources for your Back to Eden mulch supplies.
Frequently Asked Questions
 If all goes well, you should eventually have a layer of fine composted humus over soil.Source: USDAgov
Q: Are there any materials I shouldn’t use?
A: Absolutely. When getting wood chips, avoid black walnut, eucalyptus, and tree of heaven. All three of these tree types contain naturally-forming chemicals that will inhibit germination. While this is great for pathway materials, it’s horrible for your garden beds!
Cocoa mulch and walnut hull mulch are dangerous, especially around pets. Cacao beans, the hulls of which make up cocoa mulch, are toxic to dogs. Walnut hulls develop a mold which can cause major health issues for both dogs and cats. If you’re trying to make a safe garden space for pets, avoid those items!
Pine needles are a point of contention. Anyone who has soil that tends towards acidic should avoid using them. If your home is surrounded by pine trees, you likely fit this description! But if you’re out of the cover of the pines, and your soil pH tends towards alkaline, they can be extremely effective. In other words, people who have an abundance of pine needles likely don’t need them. Those who don’t may want them.
Q: All I have is rocks. Can I mulch with rocks?
A: Actually, yes. Smaller rocks can be an effective mulch. Unlike the other mulches we’ve discussed today, they don’t break down, so it’s best to use those as a top layer. Put another material like straw underneath them. Pull the rocks aside when you’re adding other material to your beds, and then put them on top. They’ll keep the soil warm and moist and allow everything else to break down.
Excited to start this method? Sheet mulching in the Back to Eden gardening method is a great way to go! What mulch resources do you have in your community? Have you used this method yourself? Tell us about the layered mulch techniques you use in the comments!
Publicaciones relacionadas:
 Zona por Zona: Qué Plantar en Agosto
 Cómo usar arena verde en el jardín
 Cómo secar orégano y almacenarlo correctamente
 Las 14 mejores plantas de sombra para interiores para habitaciones con poca luz
 Jardinería para ancianos: envejecer con gracia
 Cuidado del agave ovatifolia: cultivo del agave lengua de ballena
 Candytuft: plantas fronterizas perennes de fácil crecimiento
 Growing Star Apple: A Fruit You’ve Never Heard Of