
Are you just starting to grow from seed? That’s ok! It’s a great time to start! Growing from seed is a wonderful option for people who love gardening. All those seedlings can add up in price, and oftentimes there is a whole world of variety available to people who grow from seed. If you’re just getting started, and even if you’ve been growing from seeds for a while, it’s a good idea to soak seeds before planting. This can have a dramatic effect on your germination rate and overall success with gardening!
Soaking seeds supplies your plants a jump start right at the beginning of their lives. The water both softens the seed shell and supplies water to the seed interior. Once soaked, seeds and the plants inside them use that moisture to grow and push out new growth.
By soaking seeds before planting, especially in a well-lit place, you’re mimicking the rainy weather and light conditions that seeds in nature would be exposed to. The difference is that you’re doing it in a bowl on your counter instead of outside in the elements. If possible, expose your soaking seeds to some warmth as well, warm enough for a cozy room, but not too much that it would be too hot to touch.
Not all seeds do well if soaked. Some seeds such as violas need moisture and darkness. Some are too tiny to soak, and will just disintegrate. Others have been biologically programmed to sprout after going through a fire… why? Because that is when the competition for light and water has just died off! Some seeds have a very thick shell and are used to passing through the digestive system of an animal and thus can benefit from a method called scarification before soaking. Every seed is different. With a little research, you can discover what the optimal conditions for your seeds are.
Before you get your seeds soaking, assess the size of your seed. Is it large enough to handle once soaked? Is it papery? Or hard? Do a little research and make sure that soaking seeds before planting what needs to happen with your seeds. Each plant has its own needs in terms of heat, light, and water.
Is Soaking Seeds Necessary?

Gardens are often pretty forgiving. The plants we see all around us wouldn’t be here if nature didn’t have that wonderful little trick of finding a way to survive. That being said, we’re often trying to trick plants from the other side of the world into growing in a place that isn’t their natural climate or growing conditions. Because that is so often the case, soaking your seeds is a great way to start your seeds life.
The natural way to germinate seeds is to let nature be nature. Nature leaves seeds on the ground for animals to eat and poop out or leaves them for the elements to get wet to start the germination process. This is the way that people find ‘volunteers’ in their garden from a previous year’s crop.
However, if you’re excited to grow a specific type of hot pepper, or just trying to grow a special type of flower you’ve never grown before, you won’t want to leave it to chance. Plants produce thousands, sometimes tens of thousands of seeds in the chance that just 2-3 will survive and reach adulthood and reproduce. When you’ve gone to the trouble of purchasing seeds or getting them from a friend, those aren’t the odds you’ll be ok with.
As a general rule of thumb, your seeds will sprout even if you don’t soak your seeds before planting, but with soaking the germination time decreases, and the germination rate increases. Seeds that have a continual flow of moisture to uptake have much higher chances of success. If you’re on a schedule, or the climate only gives you a short window in which to grow – soaking your seeds can make all the difference to getting the most out of your garden.
What’s Happening When You Soak Seeds?
Seeds are made up of baby plant parts surrounded by a seed coat. While the insides of a monocot and dicot seed are different, the seed coat in both cases exists to protect the baby plant until it’s the right time to sprout. They contain the parts that will sprout and become the plant’s first leaves and stem as well as food for the initial growth. The seed coat is a part of the seed’s natural defenses against the harsh forces found in nature. It prevents the seed from sprouting when conditions are not at their finest. By seed soaking, you’re telling the seed that it’s the right time to germinate and begin becoming a plant.
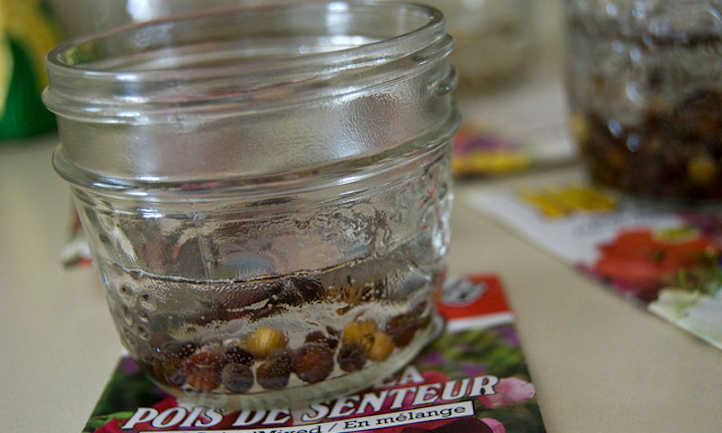
Let’s think about a sweet pea for example. Sweet peas are early season crops. They produce gorgeous flowers and a wonderful scent meant to entice bees to pollinate them. After blooming they grow seed pods that look much like other pea pods but a bit furrier. They stay on the vine and mature and eventually dry out. A single pod has many seeds in it, sometimes 10 or more, and the plant produces up to around a thousand seeds. Those seeds then go through a hot summer (which can be wet or dry), a fall, and the winter. Those seeds need to keep from germinating until the seed senses that it’s cool enough and wet enough that the plant will be able to live a full life and reproduce.
For gardeners who seek out their precious sweet pea seeds and bring them safely inside for storage, those seeds won’t come up against the normal forces they would in nature that over time would wear down the seed coat. It might pass through a digestive system, or be walked over by animals, or stuck between rocks. Come late fall or early winter when it’s time to start the growing process, a gardener would soak the seeds after nicking the seed coat and soaking for 24 hours. This process mimics what the seed would go through in nature, but does it when and where the gardener wants it to grow. This process is called seed scarification.
What Type Of Seeds Need A Presoak?
Not all seeds are easy to soak. Small seeds in particular can clump together in water and be a nightmare to work with afterward. Larger seeds with thick seed exteriors are ideal for soaking to kickstart the germination process. Others that are wrinkled seeds, like peas, do especially well after soaking. After putting those seeds in water, they’ll plump up and be ready to direct sow.
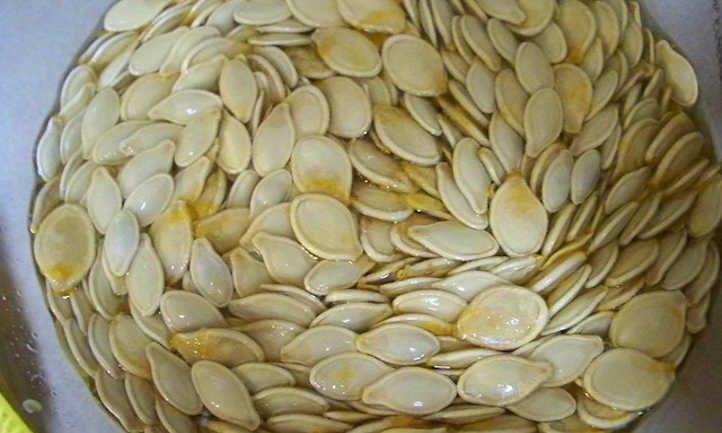
A short list of seeds that like to soak are peas, beans, pumpkins and other winter squash, chard, beets, sunflower, lupine, fava beans, and cucumbers. Most other medium-to-large vegetable and flower seeds with thick coats benefit from soaking.
What Types of Pre Soaked Seeds Can Be Direct Sown?
After soaking your seeds for 12 to 24 hours, many larger seeds can be direct sown into your garden. The benefits of this are that seeds do their best when direct-sown – the process of transplanting out seedlings somewhat stunts the growth of a plant and keeps their roots from reaching the depth they would have otherwise grown to. While this isn’t an option for everyone, especially those growing with limited space or in regions with frost, direct sowing should be done whenever possible.
Are There Seeds You Shouldn’t Soak?
There are plenty of small seeds that won’t really benefit from soaking. Not so much because they don’t have a seed coat that needs moisture to trigger germination, but because they are so small that planting wet small seeds is just not practical.
Smaller seeds such as basil, chia, tomatoes, lettuce, black-eyed susans, foxglove, and lisianthus are all examples of times when you should not soak your seeds. Simply by sowing them in trays or direct-sowing in areas you can keep the soil evenly moist should be sufficient. They still work in much the same way – their seed coats need to be moist in order to germinate, but by watering first thing in the morning and keeping the area shaded you’ll speed their germination time and get growth in no time. In particular, tomatoes, basil, and chia all have a seed coat that absorbs and holds moisture around the seed to improve germination, so keeping the soil moisture consistent is all they need for survival.
There are also seeds such as zinnias and bachelor’s buttons that have a paper-like seed coat. These seeds come from very dry regions where seeds will sprout at the first sign of rain. These seeds can be direct sown into moist soil without presoaking.
Other Germination Methods Besides Soaking
Seeds can germinate by other methods too. For smaller seeds like tomato or pepper seeds, try placing them on a damp paper towel, wet sphagnum moss, or fine-textured moistened vermiculite. Keep the medium evenly moist using filtered water (not tap water). This way, the continual moisture helps the seeds to germinate. These seeds shouldn’t be submerged in water as they’re apt to stick together or to disintegrate if around too much water. Seed starting is pretty straightforward using this method.
Allow the seeds to soak up the water and watch for signs of germination. Be sure to spritz every 12 hours so it doesn’t dry out. As soon as the seeds have germinated, transfer them to seed trays or directly into your garden. Remember that seeds generally need to be planted at the depth of twice the seed width unless otherwise indicated by your seed supplier. And if the seed has stuck to the paper towel, then tear out the segment of paper towel it’s stuck to and plant it!
There are some other unusual ways to start seeds that result from the wide range of climates that exist throughout the world. Different plants have evolved only to germinate at certain times during a year, or after major events like a fire.
Some seeds, especially tree seeds like tulip trees, golden rain trees, oaks, and sweetgums need to experience chilling for an extended period of time before they get to the right conditions for germination. These can benefit from a short period of time in the refrigerator crisper drawer before soaking and planting.
How To Soak Seeds
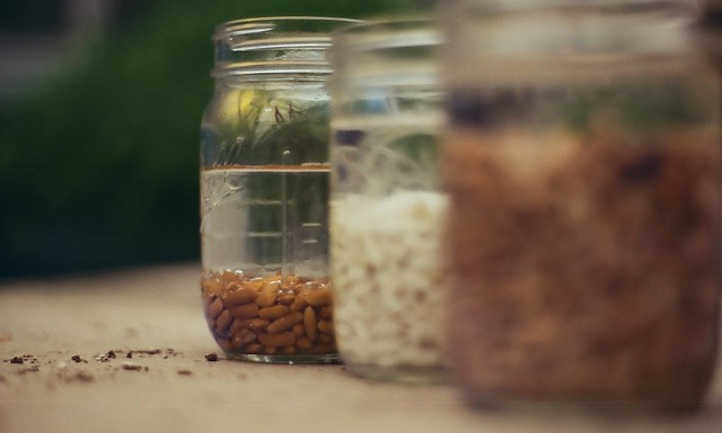
To soak your seeds, use any regular bowl or jar and fill it with filtered warm water. If the water is too hot for you to leave a finger in, it’s too hot for your seeds. Aim for water that is just barely warm to the touch, but not hot. Place the seeds in water and let the pre-soaking process continue for 8-24 hours depending on the seed size. Try to use filtered water instead of tap water if it’s available, and don’t let them soak for more than 24 hours.
Immediately after the seed soaking period is over, the seeds need to be planted out. They cannot dry out again as that would keep them from germinating at all. Be sure to know where the seeds are going and to have either your garden prepped, or seed trays ready to go when you start soaking seeds.
After soaking the seeds and transplanting them, be sure to keep the soil moist continuously for the first few weeks of growth. While your seeds are in this tender and young state, they can’t dry out without the risk of dying. While young, their roots only extend a few inches deep into the soil and they need moisture near the soil level. After they become established, you can begin to water less frequently and prepare to enjoy the fruits of your garden!
Publicaciones relacionadas:
 Cómo usar recortes de césped en el jardín
 Zapote Mamey: Una Delicia De Bayas Tropicales Gigantes
 Hyssop Plant: hierba encantadora y señuelo polinizador
 Ideas de enrejado de cama elevada para ahorrar espacio
 Cómo cosechar col rizada: cortar y volver
 Sansevieria Ballyi Care: cultivo de plantas de serpientes enanas
 Harina de huesos: esto es lo que debe saber
 Muhlenbergia Capillaris: Algodón De Azúcar En El Jardín