
Summer is coming and with it comes back yard barbeques, cool evenings on the patio, and refreshing beer. This year, why not up the summer experience by growing and making your own beer? You’ll get that satisfying, home-brewed beverage and a beautiful addition to your garden: hops!
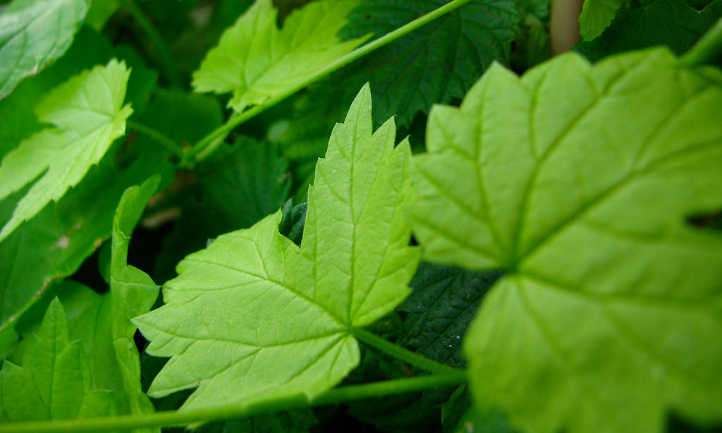
Hops, a key ingredient in beer, is a tall, ornamental climber. It grows fast and large, making it perfect for pergolas and other screen covers. The abundant, green leaves and unique flowers will fill any structure quickly. Plus, this plant has a pine fragrance and attracts butterflies! It’s just what you need for a relaxing, summery vibe.
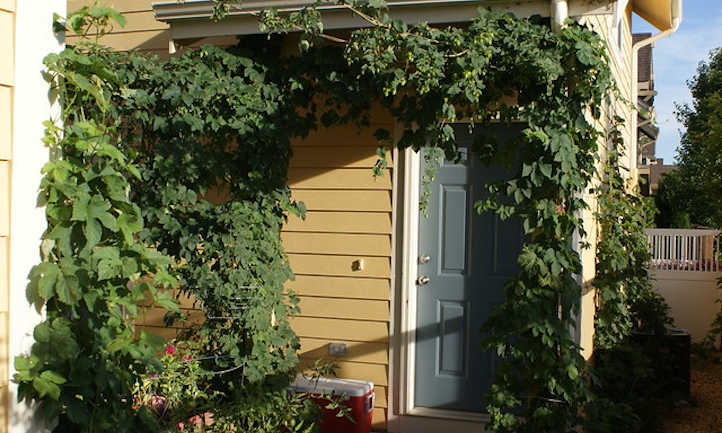
This plant is fairly low-maintenance, but still takes commitment. One hop plant will live for 15-20 years (the same lifespan as a housecat!). It’ll become part of the architecture, reaching up to 20 feet tall. In fact, most gardeners let the hops climb up the side of their house.
There’s a lot of information out there about growing your own hops, so in this article we’ll cover all the basics. Once you’ve got those down, you’re ready to take up the niche hobby of growing and homebrewing beer!
Quick Care Guide

| Common Name(s) | Common hop, European hop, hops |
| Scientific Name | Humulus lupulus |
| Days to Harvest | About 120 days |
| Light | Full to partial sun |
| Water: | Medium; consistent |
| Soil | Good drainage, slightly acidic |
| Fertilizer | High-nitrogen early in the season, then balanced slow-release |
| Pests | Aphids, spider mites, cutworms |
| Diseases | Powdery mildew, downy mildew, verticillium wilt |
All About Hops
Hop plants are native to Europe, southwest Asia, and North America. However, the hop plants used in commercial production in the United States are usually a European variety. There’s a large variety worldwide, though some are patented by commercial growers. Most varieties are meant to be either bittering or aromatic agents. Some types grow quicker than others, so do your homework and choose a variety that fits your area’s growing season.
Humulus lupulus, which literally means “little wolf”, is an essential part of homebrewing. Its varieties are largely responsible for bitterness, aroma, and preservation. In fact, in 1516 the Germans laid down the ‘Bavarian purity law’, mandating that hops be used in beer. They’re brewed to extract alpha acids and essential oils, which provide bitterness and aroma, respectively.
These are dioecious plants, meaning they are either male or female plants. The female flowers are what we use for beer-making, and the male flowers can pollinate female flowers to cause them to go to seed. Seeds in the hop cones cause negative results in your later beer’s flavor, so you’ll want an exclusively feminine hops garden. As planting from seed doesn’t guarantee that you’ll get all female plants, rhizomes are the preferred planting method. Rhizomes will grow a clone of the original plant.
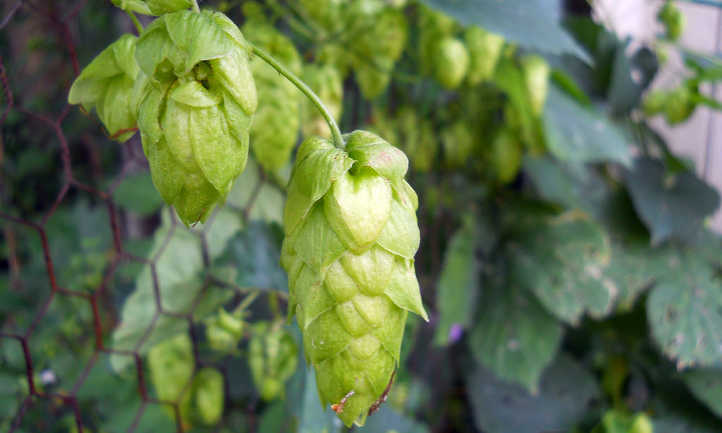
Female hop flowers are strobiles, just like in pine trees. In fact, they look like small, very leafy pinecones. The plants themselves are “bines”, which sounds like a made-up word, but actually means they climb with shoots instead of tendrils. Underground, the rhizome root system grows both vertically and horizontally.
You’ll get some hop cones in the second year of this plant’s life, but it takes 3 years for the rhizomes to produce a good harvest. Each year, after harvesting, every bine should be cut to the ground. The rhizome root system will overwinter and produce new shoots in early spring.
The one downside is that you have a 3% chance of getting dermatitis when you grow your own hops. There’s something about the juices exposed when harvesting that causes a reaction in some gardeners, plus the bines have little hooked hairs that can cause skin irritation. We highly recommend wearing work gloves and safety goggles while working with your plants.
Planting Hops
It’s hard to transplant rhizomes once they’re established, so planting them in the right area is essential. Here’s what you should know to grow hops rhizomes.
Preparation
Let’s start with location. Hop plants need 6-8 hours of direct sunlight every day. If you’re going to grow hops up the side of your house, south-facing is best. Till the soil so it’s well-aerated and even, removing any rocks or debris. Add a high-nitrogen fertilizer to the soil such as blood meal. Mix in the fertilizer at least a foot deep (the rhizomes will appreciate it!).
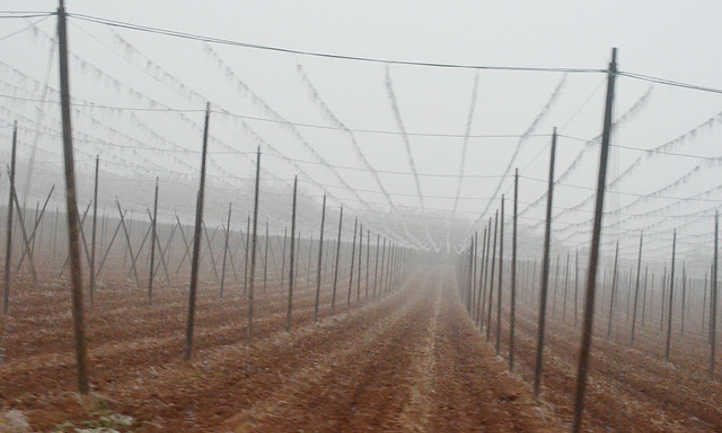
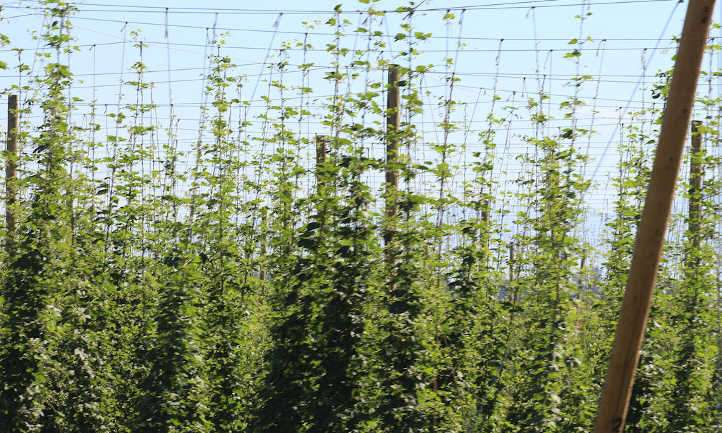
Make sure you have enough vertical space. The bines only take up 3 feet horizontally but need lots of vertical growing space. They absolutely require a support system that’s at least 12 feet tall (18-20 is preferable). Hop bines grow well on vertically-draped twine. You’ll need one piece of heavy-duty twine per plant, with your twine strands spaced 3-5 feet apart. String it up from a tall post, fence, or the edge of your roof.
Planting
As we mentioned, we’ll be planting from hop rhizomes instead of seeds. Choose a trusted rhizome source, since many diseases can be passed through rhizomes. A bad hop rhizome will grow an infected plant, which can spread disease to the rest of your garden.
Plant your hop rhizome as soon as all chances of frost are gone. While waiting, keep the rhizomes slightly moist in a dark, cool place.
Plant the rhizomes horizontally at ground level, right in front of the trellis, and top them with a mound of soil. To keep moisture in and weeds out, cover the rhizome mounds with mulch (compost is preferred). Keep the soil continuously moist from here on out.
Train
In time, most rhizome varieties will grow about 5 shoots, which we’ll train to climb the trellis. When they’re about 6 inches long, gently wrap the bines clockwise around the support. You’ll have to monitor their growth for at least a week to make sure they climb neatly.
Care
The day-to-day care of this hardy, perennial plant is pretty simple. With a little practice, your hop yard bines will grow just as well as any commercial hops varieties.
Sun and Temperature
In zones 4-8, most hop varieties will survive year-round. In the winter, they can usually withstand temperatures down to -20°F. The ideal temperature during the growing season is 60-65°F (depending on variety). However, they should be fine in warmer temps as long as the other growth conditions are met.
As mentioned, hop vines need 6-8 hours of full sun. They can also tolerate partial shade. The best thing you can do to ensure good lighting is to choose a sunny location.
Water and Humidity
The younger your hops are, the more water their roots need. The soil should never dry out, so you’ll be watering at least a few times a week. Only water at the soil level, since excess moisture on the leaves can invite bacterial growth. If you want to use an automatic watering system, drip irrigation is best.
A good rule of thumb for most plants is to water in the morning so extra moisture dries with the sun. Because hops are temperate plants, average humidity should be fine. Hop plants are somewhat drought tolerant, but we don’t recommend you push it.
When you grow hops at home, you don’t need to water during the winter. The roots will have plenty of moisture and nutrients stored up.
Soil
All that watering makes good drainage a must. A good, loamy soil should hold some moisture without getting the roots soggy. You’ll also need a rich soil to grow hops. Before each growing season, add some organic matter or fertilizer to boost the nutrients. You should also keep the area free from weed growth.
The hop plant needs a soil pH that’s slightly acidic (6.0-8.0). There are many soil additives out there that will raise acidity, including blood meal. If you don’t know your soil’s pH, check out our recommendations for a pH testing kit.
Fertilizing
For optimal growth, fertilize your hop plants once a month during the growing season. From spring to early summer, use a high-nitrogen fertilizer (like blood meal). Plants need lots of nitrogen for green-growth, especially ones as tall and vivacious as hops! For the rest of the season, use a balanced fertilizer, preferably one that’s slow-release to provide gradual but continuous nutrition.
Pruning/Training
Pruning is essential for any type of vine growth, bines included! Starting the second year, clip back new shoots very early in the season before training begins. This will ensure strong and full secondary bines each year. Check your variety to establish what time this early pruning should take place, as different varieties have different needs. In addition, first-year plants should not be pruned in this fashion; this only applies to subsequent years.
Training your bines often begins in early May for people in the Pacific Northwest, but might be earlier or later for other regions in the United States. Take 3-4 bines and wrap them in a clockwise spiral around the twine support. You will want to make sure they continue to spiral upward until they go out of easy reach; at that point, the bines should continue up the twine on their own.
You can also prune the bottom leaves in midsummer. As long as the upper vines have plenty of leaves, these are no longer needed. They can actually be a hindrance since pests like to hide in low-hanging foliage. You’ll also run less risk of moisture accumulation and disease.
Each hop plant also must be cut back at the end of the season, which we’ll discuss more in the harvesting section.
Propagation
Mature hop plants produce runners, which can be cut up and planted. In the spring, clip off some runners and cut them into 6 inch sections. Each piece must have at least two buds. Stick the cuttings upright in small hills (2-3 per hill). With adequate moisture, drainage, and sunlight, they should take to the ground and trellis in no time.
If your hop plant is several years old, it’s a good candidate for rhizome division. In the spring, dig up a section of the hop plant, using a spade to chop the rhizomes in two. Depending on its size, you may be able to get a variety of cuttings out of it. Like the runner cuttings, each section must have a bud before planting.
Harvesting and Storing
After a long summer of planting in the dirt, it’s finally time to harvest! Then, you can get started on your very own batch of brew.
Harvesting
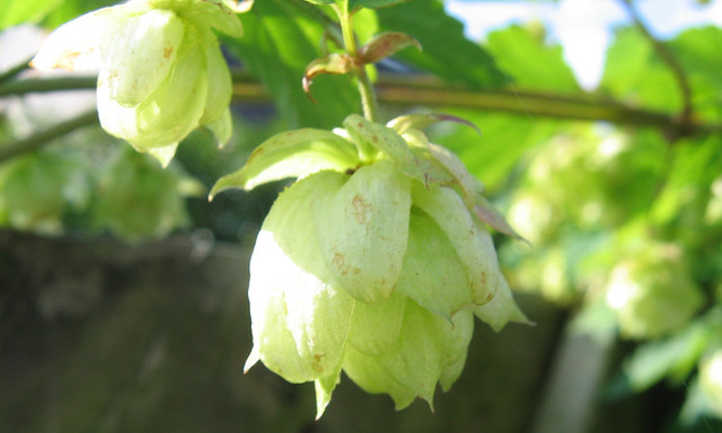
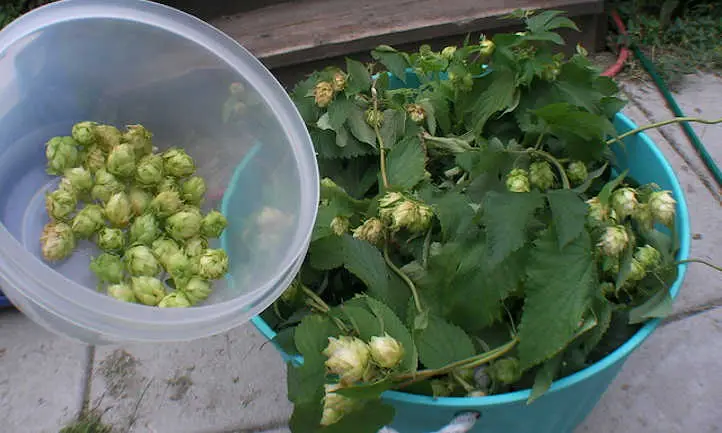
The growing season depends on where you live, but you’ll likely be harvesting in late summer or early fall. In warm climates, you might be able to harvest the last cones as late as December! By now, you’ll have watched your hops grow lots of light-green cones. As they mature, they’ll start to dry out inside. When squeezed, they’ll feel light and spring back into shape after. A harvested hop cone will smell distinctly of grass and onions. If they start to reek and become discolored, they’re overripe.
Pick the hops as they ripen or cut down the entire bine and harvest them all at once. From there, you’ll need to dry out the hops completely. Spread them out in a dark place, flipping them over as needed. Once dry, they’ll snap in half when you bend them.
After harvesting, make sure to prep the plant for winter. Cut down the bines to just above the soil surface. Don’t worry, they’ll grow back next year! For extra protection in cold climates, top the soil with mulch or a tarp. You may also want to take down the trellis so it doesn’t weather over the winter.
Storing
After your hops are dry, it’s time to get homebrewing! The Homebrewers Association has some great tutorials on how to make beer, as well as the ingredients and tools you’ll need.
Fresh hops should be stored in a sealed container or plastic bag in the fridge for up to two days. After that, if you’re not going to use them to make a wet-hopped beer, move the hops to the freezer. They should last a few years in there, though it’s always best to use them as soon as possible.
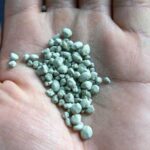
For dry storage, you can use a dehydrator. Be sure your dehydrator never goes above 140 degrees Fahrenheit. Too much heat will degrade the flavor of the hops. This is preferred by most homebrewers because dry hops are about 10% moisture content, comparable to commercially-available dry hop pellets.
Troubleshooting
You shouldn’t encounter too many problems with this plant. Hops are pretty sturdy! However, there are a few things to be on the lookout for.
Growing Problems
If you notice stunted growth in a hop plant, one of its basic needs isn’t being met. Check that it’s getting the right amount of sun and water, that the soil pH is good, and that it’s free from pests and disease. If everything checks out, try adding some extra nitrogen and water to the soil. If your hop plant is still in its first year, it’s normal for it to grow more slowly than usual.
Pests
Is there anything aphids don’t eat? These common pests will feed on hop cones, leaving a weakened plant behind. Luckily, insecticidal soap is good at eliminating them. You’ll also find that neem oil is a good remedy and preventative. Beneficial insects such as ladybugs and lacewings are also great options.
Spider mites have the same effect on plants as aphids, along with yellow patches on the leaves and super-fine webs. They like to hide out and lay their eggs on the underside of leaves. Spider mites can be controlled with pyrethrin spray as well as neem oil. To prevent them, fight fire with fire by having beneficial mites prey on the spider mites. Ladybugs and lacewings are also pretty useful here.
You might also come across cutworms, especially on young plants. These hungry caterpillars will chew holes through hop leaves. BT spray is very effective at poisoning these pests. Diatomaceous earth is also a great choice for eliminating cutworms. A good way to prevent cutworm infestations on your hops is to use coarse mulch around the base of plants. The texture will irritate the caterpillars, deterring them from the location. You can also place cardboard toilet paper tubes around the bines as they grow to prevent cutworms from reaching them.
Diseases
Powdery mildew is a fungus that looks like a heavy dusting of flour. It can appear on and hurt any green part of the plant. When they get infected, the cones turn reddish brown. You can treat this fungus with sulfur spray or copper fungicide. If that fails or the infection is severe, you’ll have to remove and destroy the diseased sections.
Downy mildew is first noticeable in young shoots. It will stunt their growth, cause discoloration, and make them brittle. The cones will stop growing and turn brown. The rest of the plant can rot if left untreated. Like powdery mildew, treat downy mildew with sulfur spray or copper fungicide or by destroying diseased parts.
There are two strains of Verticillium wilt, one that’s nonlethal and another that will wipe out your plants in a snap. The nonlethal strain will cause wilting and discoloration of the leaves and vine. If you find either strain on your plants, the best thing you can do is remove the infected vines and destroy them away from your garden (if possible, check the rhizomes too). Use a sulfur-based fungicide to treat the rest of the plant and prevent future infections.
Frequently Asked Questions
Q: Are hops easy to grow?
A: Hops are easy to care for, but take a good amount of work to plant and harvest. They’re pretty sturdy plants though!
Q: Do hops grow back every year?
A: Yes! In fact, they don’t produce a full yield until after their first year. The bines have to be cut back each year, but the rhizomes overwinter well.
Q: Are hops invasive?
A: They aren’t too mischievous above ground, but hop rhizomes really spread out over time. You may not want to plant the rhizomes close to plants with small root systems.
Publicaciones relacionadas:
 Zona por Zona: Qué Plantar en Agosto
 Cómo usar arena verde en el jardín
 Cómo secar orégano y almacenarlo correctamente
 Las 14 mejores plantas de sombra para interiores para habitaciones con poca luz
 Jardinería para ancianos: envejecer con gracia
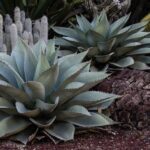 Cuidado del agave ovatifolia: cultivo del agave lengua de ballena
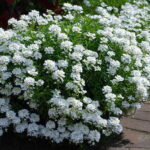 Candytuft: plantas fronterizas perennes de fácil crecimiento
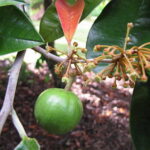 Growing Star Apple: A Fruit You’ve Never Heard Of