
There are so many alliums that we treasure. Growing chives in a pot or garden bed is easy enough to be one of the first things most kids grow. Their oniony or garlicky flavor is mild enough to eat them straight, but they also make a phenomenal topping for your baked potatoes or other foods.
Not only are the leaves edible, but the flowers are edible too. Looking for a little color to add to your salads? Chive flowers are perfect for that purpose!
But have I mentioned yet how easy they are to grow? Because really, these are some of the best plants to start with for the new gardener in your life. They readily grow from seed, look great in the garden, and are well worth the time and effort.
So let’s go over everything you should know about chives. Allium additives for your future feasting will be at your fingertips!
Quick Care Guide
 Growing chives is relatively simple and provides wonderful oniony flavor to dishes. Source: Juan_Sanchez
| Common Name(s) | Chives, onion chives, rush leeks, garlic chives, Chinese chives |
| Scientific Name | Allium schoenoprasum and Allium tuberosum |
| Days to Harvest | 30-60 days |
| Light | Full sun to partial shade |
| Water: | Even and consistent moisture |
| Soil | Rich, fertile, well-drained soil |
| Fertilizer | 3-3-3 granular, every 2-4 weeks as needed |
| Pests | Thrips, onion maggot |
| Diseases | Damping off (fusarium or pythium-based), downy mildew |
All About Chives
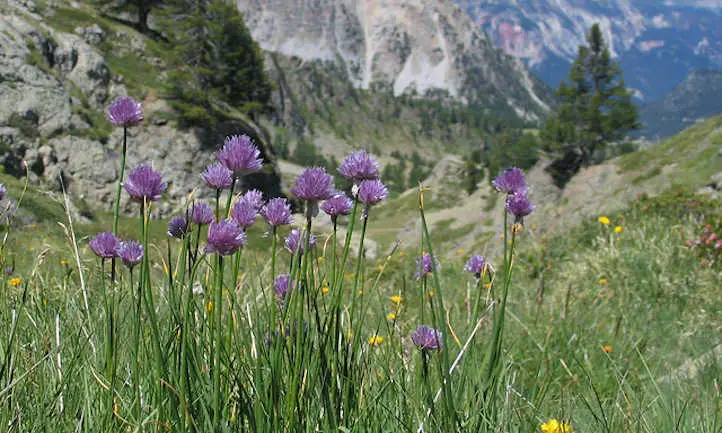
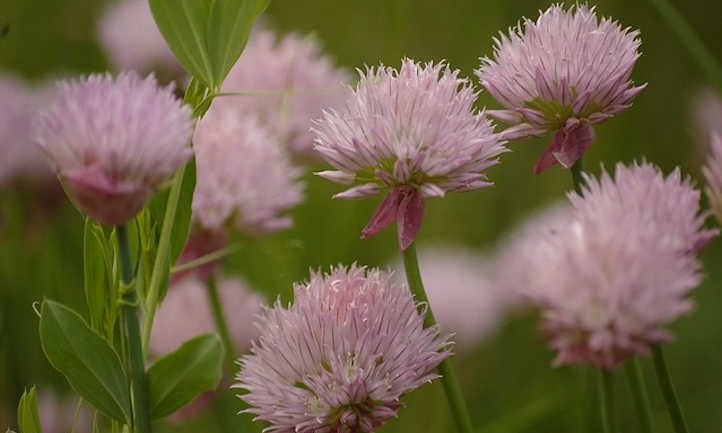
 Allium schoenoprasum can produce lots of flowers if it’s densely-planted. Source: anro0002
First, let’s talk about what we refer to as chives. Allium schoenoprasum is the most common botanical name for this tubular-leaved delicacy. It’s widespread, found worldwide in the wild. In fact, it’s the only species of Allium that’s native to both the Old World and the New World!
A valuable asset for pollinators, chives flower in round inflorescences of pinkish-purple blooms at the top of their scapes (flower stalks). Each of the flower buds opens with six long petals that form a star shape. They cluster together in groups of between 10 and 30 flowers per inflorescence. These flowers produce tons of nectar for pollinating insects, and have been ranked in the top ten for nectar production in the UK.
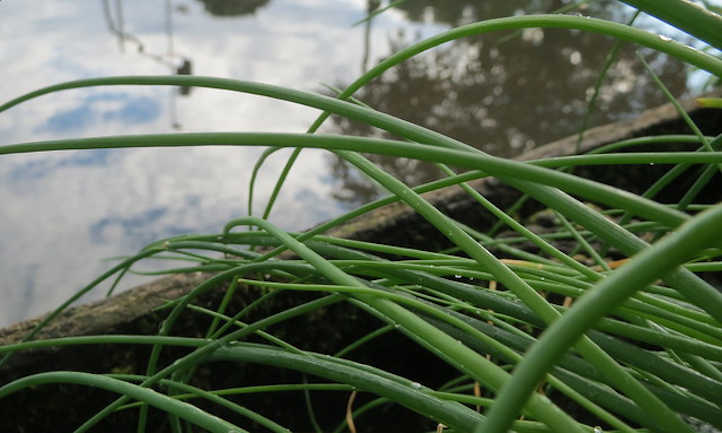
The portion we are most familiar with looks very similar to a green onion but in miniature. The leaves are long, cylindrical, and hollow, forming in layers from the basal bulb. Multiple plants can be clustered closely together, creating a mat of this grass-like plant.
But both the scapes and the flowers that form at their tips are also edible. The usage of chives culinarily dates back 5000 years. Romans believed they had medicinal properties, and the Romani or Roma people thought they were useful for fortune-telling. Their common names ranged from just “chives” or “onion chives” to “rush leeks”, with many other variations.
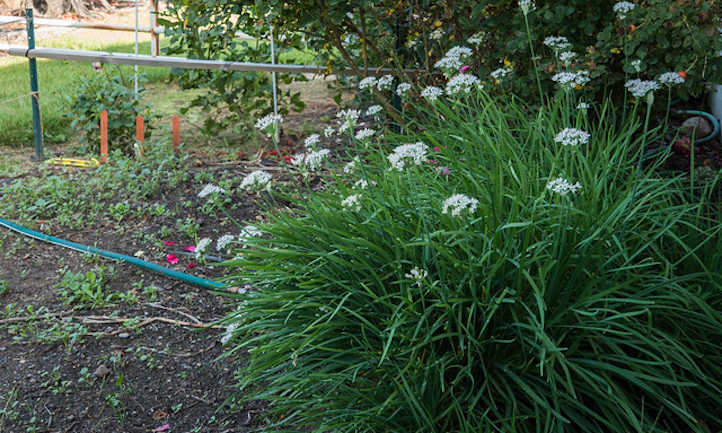
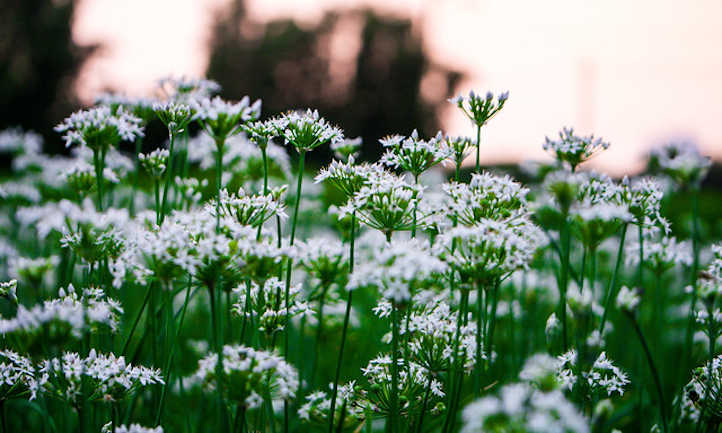
Another species, Allium tuberosum, is more commonly known as “garlic chives” or “Chinese chives”. Looking much more like grass than their scallion-like counterparts, garlic chives produce white inflorescences of flowers atop flat leaves that have a slight taste of garlic. Like Allium schoenoprasum, garlic chives grow from a bulb, but can more readily spread on their own. If you like the purple flowers of your average chive, but prefer the flavor of garlic chives, try Siberian garlic chives.
Both have similar growth habits, and both have a mild onion flavor. Neither gets above a foot in height at its maximum size; the onion chive is often harvested at about 8 inches tall. Giant Siberian chives, on the other hand, grow to 2 feet tall. The garlic chive can be harvested at a similar height. Therefore, when you grow chives, you have choices!
Planting Chives
 Allium tuberosum, the garlic chive, has flat leaves and a garlicky flavor. Source: F. D. Richards
Chives are a cool-season perennial, meaning that they often go dormant during the summer months. Plant either in the early spring to give them time to mature prior to heat dormancy or in the fall to allow them to grow well into the winter. They require a soil temperature of 60-70 degrees Fahrenheit to germinate.
Chives will come back year after year in the same location. Establish a dedicated bed where you plant chives or grow chives in pots. Full sun conditions are best in cooler weather, but they tolerate light shade as long as they get at least 6 hours of sunlight.
For a good head start, sow them indoors 6-8 weeks before the last frost. You can then plant chives out once all risk of frost has passed. You can also sow seeds directly in the garden once the soil has warmed up. Sow the seeds about 2 inches apart and no deeper than ¼” deep. Once they begin to grow chives, space plants to 4-6 inches apart.
Caring For Chives
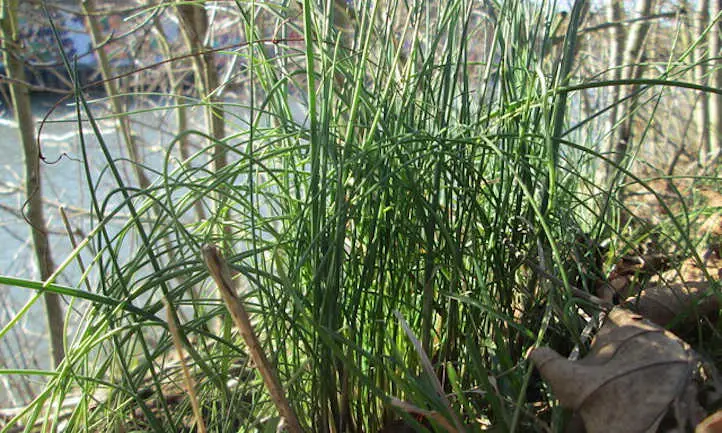 Chives grow wild in multiple countries around the world as well as in gardens. Source: anro0002
But now that we’ve discussed planting, how to grow chives to maturity is also important. Here’s a quick run-down on everything you need to keep your chive plants happy!
Sun and Temperature
In most climates, full sun is ideal for growing chives. At the bare minimum, a goal of 6 hours of sunlight a day is fine, but 8 or more hours of sun is even better for good growth.
Most chives are cold-tolerant perennials down to zone 3 and perform best during the cooler seasons. Spring and fall are perfect times of year for your chives to take off. Temperatures down into the 40s won’t bother them in the slightest bit. Once it dips down into the 30s, a thick layer of mulch will protect the bulbs from cold damage.
Heat is where your chives may have an issue. Many chive plants will go dormant during the hottest parts of the summer. They’ll return in the fall, so don’t panic! Just make sure they have full sun to start regrowing when the time is right. If you live somewhere hot all year round, try growing chives indoors in a container.
Water and Humidity
The best time of day to water your chives is in the morning. This provides plenty of time for the long leaves to dry off and for excess water to soak down through the soil. You can opt for soaker hoses at their base if you prefer, and that’s usually a good choice too.
Chives are moderately drought-resistant but really prefer regular and consistent moisture. Ensuring they get regular water will help the plants put on more growth and enable repeated harvesting. Try to keep the soil moist but not soggy. Using mulch around the plants can slow down soil moisture evaporation. If you’re growing chives indoors, mulch is not necessary as the temperature will remain relatively consistent.
Soil
The soil for your chives should be moist as stated above, but it also needs to be rich and well-drained soil. Sandy soil can allow for good drainage but should be amended heavily with compost to provide nutrients and moisture retention. Regular potting soil is a decent amendment for sandier soils.
Before you plant chives, work in 6-8” of good, rich composted material if you’re planting in a bed. In containers, use a high-quality potting mix that’s enriched with lots of composted cow manure or horse manure. Pot-grown chives benefit greatly from the nutrition provided by rotted manures.
Fertilizing Chives
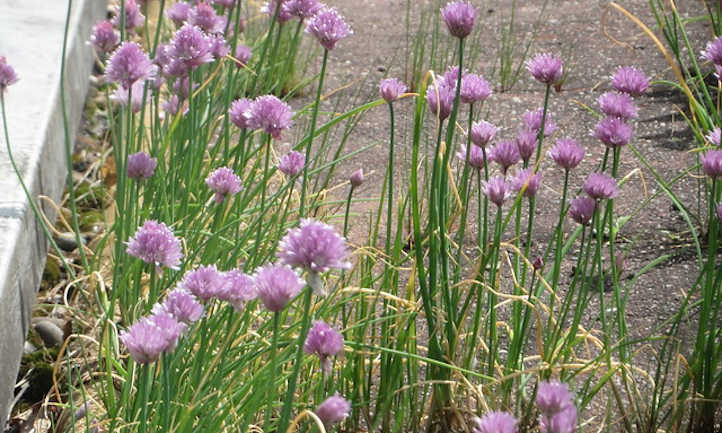
 Onion chive’s purple flowers. Source: AnneTanne
A balanced granular fertilizer, such as a 3-3-3 NPK formula, can be applied every 2-4 weeks throughout the growing season. This provides plenty of nutrition for your plants. Lightly scratch the fertilizer into the soil around the base of the plants and water it in well.
It’s also an option to use manures or composted plant material as a fertilizer, provided that it’s well-aged. This provides slightly-less nutrition to your plants but improves the soil overall.
Pruning Chives
For a chive plant, pruning is more about harvesting than plant maintenance. But that doesn’t mean you shouldn’t prune! In fact, pruning can help spur additional growth if it’s done right.
Since we’re going to discuss harvesting in a bit, let’s focus on maintenance for the moment. Deadheading spent flowers ensures that your plants look healthy. It also reduces the likelihood of seed spread outside of your planting area.
When chives go dormant, some of their leaves will turn yellow. Trim these off close to the ground and compost them. If your plant experiences a disease or pest damage, you can also prune off these leaves, but be sure to avoid composting diseased material.
Propagation
The chive plant is propagated through seed or by division. While we’ve discussed planting chives in the garden above, division is a fairly simple process. In the spring, select a large, thick clump of chives and carefully remove it from the soil. Be sure to loosen up the soil to reduce the chance of damage to the roots.
Using your fingertips, dust off excess soil and then gently pull apart clumps of 3-5 bulblets. Make sure each clump has a good root system, then replant the clusters of bulbs in a similar well-drained soil.
Harvesting and Storing Chives
 Chive leaves are tubular, similar to green onions, but with a different flavor. Source: anro0002
Now that you know how to grow chives let’s talk about how to harvest them properly. You’ll be able to enjoy their mild onion flavor immediately, but we’ll talk storage too!
Harvesting
Asking when to harvest chives? They don’t really have a set harvest time. Most people are going to be harvesting chives when they have a need for the onion flavor they provide.
To harvest chives, wait until they reach 8 to 12 inches tall. Use a sterile pair of garden shears to snip off the chives close to the base of the plant. Like green onions, you can cut off the entire green portion of your chives as long as you leave an inch or so above ground to regrow.
If you’d like to use the chive scapes or flowers for cooking, trim those close to the base of the plant as well. You’ll know it’s time to harvest the scapes when they’re at least 12 inches tall and have a tapered tip. For flowers, wait until they’re in full bloom and brightly colored, then harvest them before they begin to fade.
Storing
Garden fresh chives should be eaten right after harvest for the best flavor. But if you can’t eat them right away, there are ways to store them once you’ve brought them in from the garden.
Fresh chives can be placed inside a plastic bag with the air pressed out of it. They will last for a few days in the refrigerator this way but will start to wilt quickly.
Finely chop your chives and place them into ice cube trays for longer-term storage. Use just enough water to cover the chives, and then freeze them. Defrost in a mesh strainer over a bowl to allow the water to drain off before use.
While chives can be dehydrated, they will lose a lot of their flavor. Freeze-drying is a better process for preparing chives for dry storage.
Troubleshooting
 Garlic chives have white flowers that are distinctly different from onion chives. Source: S.R.G – msucoo93
Chives are absolutely delicious and definitely worth a place in your garden. But what new problems could you encounter while you’re growing these delectable delights? Let’s talk about that!
Growing Problems
Occasionally, a clump of chives can become old enough that the center dies out. This doesn’t mean the rest of the plant’s not viable, though. Remove the plant from the soil carefully to not damage roots, and pull off the living bulblets from the outside of the clump. You can then compost the center and replant the newly-divided segments in well-drained soil.
Are your directly-sown chive seeds not germinating? That’s probably because the conditions were too hot or cold for them to come up. Try indoor sowing 6 to 8 weeks before the last frost and planting when the soil is ready to be worked in early spring.
Pests
Chives are susceptible to two common pests. Thrips are really fond of chive flowers. When growing them, you’ll want to keep a watchful eye out for these pests, as they suck vital saps out of the plant. Neem oil or insecticidal soap will keep these annoyances away from your chives.
As with shallots, green onions, or most other alliums, the onion maggot poses a risk to your chives. This nuisance is the larvae of the onion fly, which burrows into and destroys the bulbs. Apply beneficial nematodes to the soil, as they’re a beneficial predator that will consume the maggots. Beneficial nematodes may also reduce the risk of thrips!
Diseases
Damping off is a fungal problem that lives in the soil. Caused by fusarium or pythium fungi, it causes newly-germinated plants to fall over and die and can also cause root rot to older chives. Some biofungicidal agents like MycoStop are effective against the fungal spread. Only plant seed from sources that guarantee disease-free chive seeds.
Downy mildew can cause patchy discoloration or greyish, fuzzy-looking patches on leaves. If left in place for too long, the leaves can yellow and droop. Copper-based fungicides or neem oil are effective against this issue.
Frequently Asked Questions
Q: Do chives grow back after cutting?
A: Absolutely! These perennials will continue to grow back for years.
Q: How long does it take for chives to grow?
A: Chives can take anywhere from 30-60 days to fully grow, mature, and become ready for harvest.
Q: Should I let chives flower?
A: You can if you’d like. It won’t reduce the plant’s ability to make new leaves. However, if you want to avoid self-sowing of chive seeds, remove the flowers as they start to fade.
Q: Do chives prefer sun or shade?
A: They do best in full sun but do tolerate light shade.
Q: How do you harvest chives so it keeps growing?
A: Snip them at the soil line to encourage flushes of new growth.
Q: Do chives come back every year?
A: They will, especially if they are planted in an area where you can mulch over winter. This protects their roots in cold.
Q: What can you not plant with chives?
A: Bad chive companions are asparagus, beans, peas, and spinach. Instead, plant them near peppers, potatoes, carrots, and radishes.
Q: Do chives multiply?
A: They will if their flowers are allowed to self-seed after they bloom and fade.
Publicaciones relacionadas:
 Zona por Zona: Qué Plantar en Agosto
 Cómo usar arena verde en el jardín
 Cómo secar orégano y almacenarlo correctamente
 Las 14 mejores plantas de sombra para interiores para habitaciones con poca luz
 Jardinería para ancianos: envejecer con gracia
 Cuidado del agave ovatifolia: cultivo del agave lengua de ballena
 Candytuft: plantas fronterizas perennes de fácil crecimiento
 Growing Star Apple: A Fruit You’ve Never Heard Of