
I’ll be the first to admit it. For a while, I thought wheatgrass was one of those “health foods” that people raved about just because they thought they were being healthy. Like, who wants to eat a blade of grass?
But I knew I could learn how to grow wheatgrass myself, so I experimented with it.
After I realized just how easy to grow it is and that it legitimately has some nutritional benefits, I changed my opinion on it. Sure, it’s not the panacea that some people think it is, but it’s cheap and simple to grow.
Also, it’s a great addition to any juice I make with one of those fancy wheatgrass juicers everyone has hidden away in the cupboard.
So are you ready to start growing wheatgrass, too? Let’s get growing!
Subscribe to the Epic Gardening Podcast on iTunes
Good Wheatgrass Seed:
- PowerGrow Organic, Non-GMO Hard Red Wheatgrass Seed
Good Trays:
- Black Plastic Growing Trays with Drainage Holes
Good Choices of Soil or Soil Alternative:
- FoxFarm FX14053 Ocean Forest Organic Potting Soil
- FoxFarm Coco Loco Potting Mix
- Plantation Professional Grade Vermiculite
- TerraFibre Hemp Grow Mat
- Biostrate Growing Mat
- Micro-Mats Growing Mat
Other Good Supplies:
- Durable Spray Bottles
- Hydrofarm 48″ x 20″ Heat Mat
- Liquid Kelp Natural Seaweed Fertilizer
Quick Growing Guide
| Common Name | Wheatgrass, common wheat |
| Scientific Name | Triticum aestivum |
| Germination Time | 2 days |
| Days to Harvest | 7-10 days |
| Light | Indirect light initially, full sun later |
| Water | Mist twice per day, more in dry conditions |
| Temperature | 60-75 degrees Fahrenheit |
| Humidity | Can take dry to moist conditions |
| Soil | Potting soil or soil alternative |
| Fertilizer | Liquid kelp fertilizer diluted in water |
| Pests | Fruit flies, black grass bugs |
| Diseases | Mold, stem or root rust, smut, ergot |
Wheatgrass Growing Materials
Realistically, if you have wheat seeds, potting mix, and some well-draining container to put them in, you can grow wheatgrass at home. However, there’s a wide array of alternative growing medium choices available. Speeding up your germination with the use of certain products can get your grass growing more quickly. Let’s explore the choices you’ll have to make prior to getting started.
Wheatgrass Seed
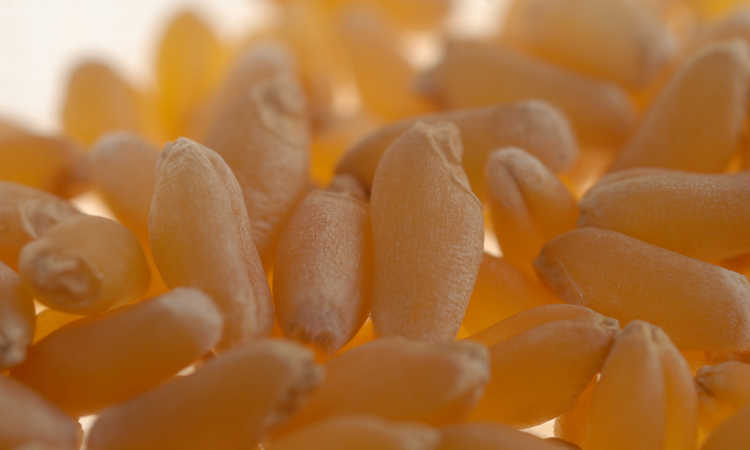 Wheat seeds ready to be planted. Source: CIMMYT
While most varieties of common wheat (Triticum aestivum) can be used for growing wheatgrass, it’s typically the hard winter wheat varieties that are used. Winter wheat requires a period of vernalization to form seed heads, but not to develop the grass itself.
Purchasing seed which is intended for growing as wheatgrass is generally better, as it tends to have high germination rates. Due to the necessity of using a large amount of seed to start a tray, I recommend buying larger bags of seed so you have enough to work with. Thankfully, purchasing hard winter wheat such as this organic non-GMO hard red wheatgrass seed is inexpensive.
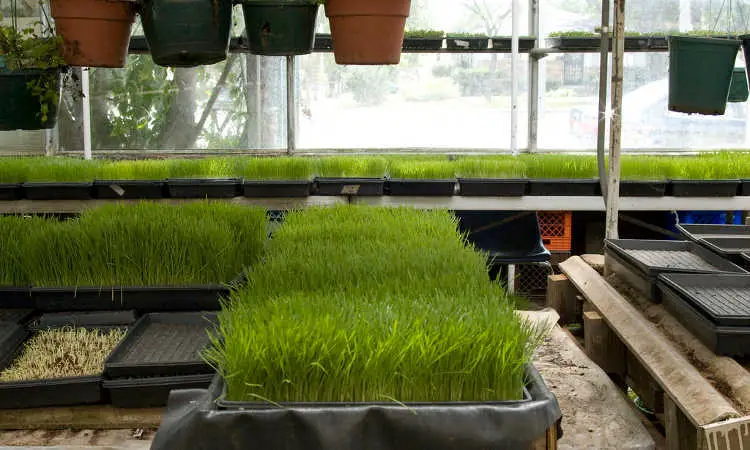
Planting Trays
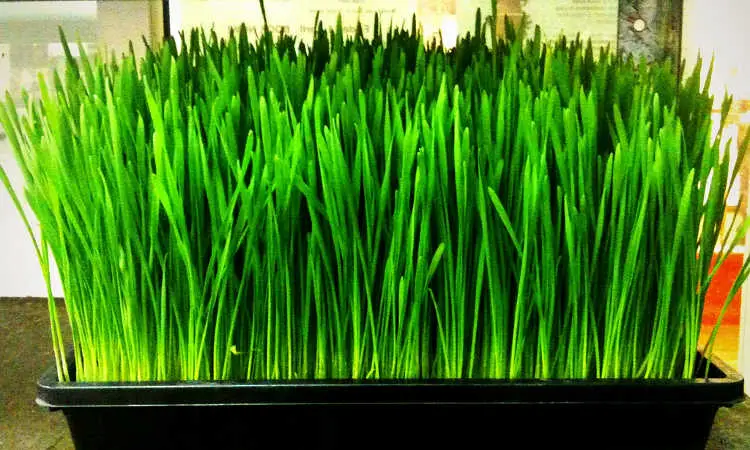
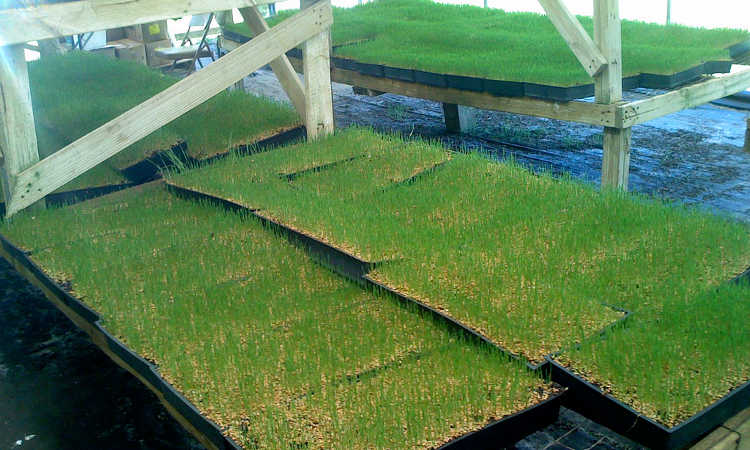 Multiple trays of wheatgrass. Source: hyperlinkguerrilla
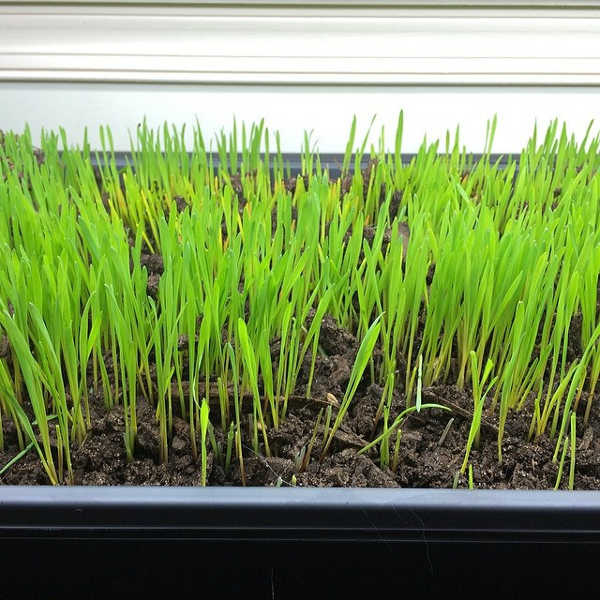
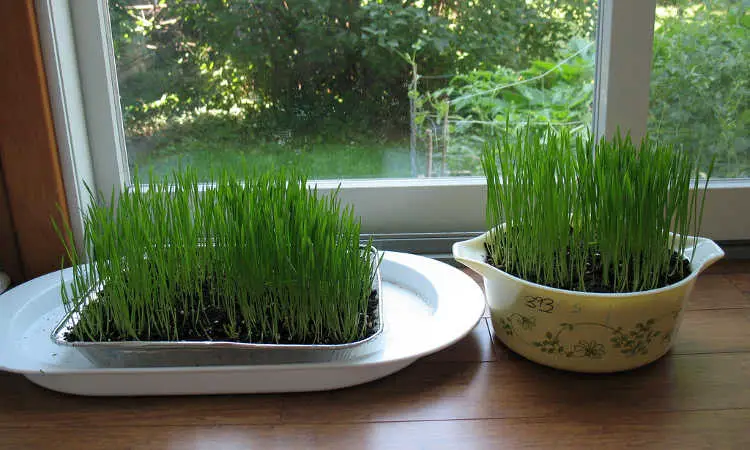
You can use a number of types of containers to grow your wheatgrass indoors. Containers for do not need to be very deep, as it doesn’t need a lot of space for root structure. Shallow dishes with a few holes in them will work, as will plastic or terracotta plant trays.
I prefer these roughly 10″ x 20″ plastic trays with drainage holes, as they provide an ample amount of grass for very little effort. Simply water the tray and you’re good to grow.
It’s important to use trays that have drainage built in. If you opt for an alternate container, be sure you select one that has excellent drainage. This prevents your young grass from drowning or developing mold problems.
Soil or Soil Alternative: Which To Use?
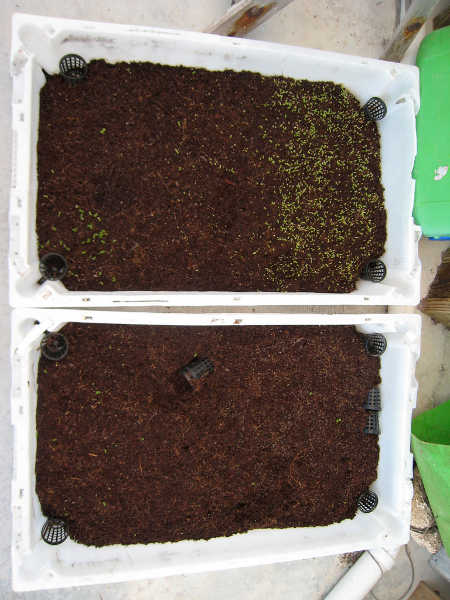 Trays of coconut coir growing medium. Source: wormjava
Good, sterile potting soil works just fine, and most of us have some in the shed. It comes packed with nutrients that your grass will use to good benefit. However, some people like to use the entire young plant, roots and all. That necessitates a lot of extra washing. However, your young grasses have all the nutrition they require without any added fertilizers.
However, there’s a lot of soil alternatives available now that will reduce the need to rinse away bits of stray dirt.
Coconut coir holds more than its own weight in water while still allowing your plants to have good drainage. A soilless potting mix like Coco Loco, which combines coconut coir’s moisture-retention with perlite and additional nutrients, is a great alternative. You can also use coconut coir without the perlite and additives, but you may need to add some nutrition in the form of a kelp fertilizer.
Using a combination of vermiculite and a kelp fertilizer will also provide a good seed starting medium. Vermiculite itself is a mineral and thus doesn’t have many plant nutrients, but the kelp will readily supply everything needed for good growth.
Finally, there are various natural fabrics which are perfect for use in growing all types of sprouts, microgreens, and grasses. Some examples of these are TerraFibre (made from industrial hemp fiber), Biostrate (a natural fiber felt), or Micro-Mats (felted wood fibers). Tencel fabric is also a good option. Natural fabrics like this may require the use of kelp fertilizer to grow a healthy, vigorous crop.
Overall, potting mix is going to offer the most nutrition to your grasses, followed by coconut coir and vermiculite. However, the natural fabrics can reduce the spread of fungal growths. These options all will work, it merely depends on what you want to use.
Other Required Equipment
So you’ve gotten some wheatgrass seed, you have your grow tray (with good drainage!), and you’ve selected a growing medium. What else is necessary?
I recommend investing in a package of durable spray bottles. You will need to mist your wheatgrass as it grows to keep it hydrated. Having multiple bottles on hand means that you can always have a bottle available with plain water, and another with a blend of kelp fertilizer and water in case you need to kickstart growth.
If it’s winter and you’re growing stuff in the cold garage, you may want a seedling heat mat to help bring the temperature of your medium to a good germination point. However, if you’re starting your wheatgrass in the house, the ambient temperature of your house is fine.
Planting Wheatgrass
Quick-growing crops like wheatgrass aren’t hard to grow, once you’ve learned the basics! A tray of wheatgrass can be grown year-round, so you can start it at any time.
Pre-Sprouting Your Wheatgrass
 Newly sprouted seeds. Source: snakegirl productions
While you can just plant directly into trays, you’ll have much better results if you sprout the seed before you plant. It doesn’t take a lot of extra time and makes your harvest much more productive – so do it!
Put your seeds into a bowl and add twice to three times as much water to the bowl. Make sure it’s around 60-70° for optimum sprouting. Let soak for 12 hours.
After your seeds have soaked, drain the bowl. You can use the water to water other plants you’re growing, as it’s full of nutrition from the seeds.
Rinse your seeds with more water and drain again. Spread your sprouts out on a paper towel on a counter top that’s out of direct sunlight. Repeat the rinse and drain process until you see the beginnings of a root on most (or all) of your sprouts.
Preparing Your Tray
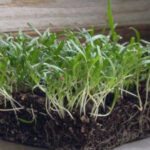
 Two days of growth. Source: Henna Sooq
If using a good potting soil, add it to your planting trays. Moisten it liberally with water, but don’t get it too wet – you don’t want any puddles forming in the medium. Be sure to check that the soil is wet all the way at the bottom with your fingers. You want 6-8 cups of it for a 10″x20″ tray. Trays don’t have to be full, they just need at least 1/2″ to 1″ of soil in them to provide root space.
For vermiculite or coconut coir, use 6 cups for a 10×20″ tray. Make sure it’s at least 1/2″ deep. Spray water across the surface and spread it out. For vermiculite, use a quart of water. For coconut coir, just make sure that it is moist, but not soggy (coconut coir retains water very well).
Natural fiber growing mats should be cut to fit in your tray and should be moistened as indicated on their packaging. Most of these recommend a short soak in water to hydrate them, but they shouldn’t be too soggy or else they may begin to fall apart.
If you’d like, you can add a light splash of liquid kelp to your water when moistening your planting medium. This isn’t necessary for potting mixes, but can be beneficial with other mediums.
Planting Wheatgrass
 Three days of growth. Source: Henna Sooq
Spread your seeds evenly across the soil. If you want, you can rinse them one last time before you spread them out to ensure that they’re moist and ready to be planted. Most people tend to under-plant at the start, so feel free to spread lots of seed across your tray. It produces a smaller plant than the seed itself.
Cover your tray with another tray flipped upside down. This is crucial during the early stages of growth to keep the growing area dark and moist. This tray should also have holes so air can circulate in and out of the cavity.
Place your trays in a low light area that’s room temperature.
Wheatgrass Care Tips
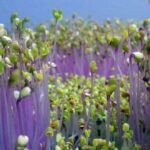
 Five days of growth. Source: Amy M. Youngs
Your grass is planted! Now let’s go over the best way to coax quality growth from your tiny turf.
Light
Pre-sprouted wheatgrass needs to be kept in the dark, at least initially. This simulates the darkness below the soil’s surface. After 3-5 days, you can remove that cover. At that point, your grass should be about an inch in height. It may look a little pale, but that’s because it hasn’t had regular access to light.
Place your uncovered tray near a window in bright, indirect light. It will begin to green up. If it gets direct sun for short periods of time, that’s fine too. The goal is to encourage that brilliant green hue. I find that mine does well in indirect bright light or under a grow light.
After a couple more days, you can move your tray to a location where it gets direct sun for much of the day. However, it might need more water at that point, so check your growing medium regularly to ensure it’s got what it needs.
Temperature
When starting your crop, you want the temperatures to be between 60 and 75 degrees. That makes growing it indoors your best option to start, as you can maintain the optimal range.
Once your young grass has reached 1/4″ to 1/2″ in height, it can tolerate lower or hotter temperatures, provided that its roots stay comfortable. However, for the best crop, it really does like that 60-75 range.
If the temperature is over 80 degrees, be sure that any covered wheatgrass trays have adequate ventilation to prevent mold or fungal growth.
Watering
 An overhead view. Source: samuda
Water it lightly twice a day using a misting bottle. Initially, you’re just trying to keep the sprouts moist enough that they can get their roots into the soil or medium. Once they’ve set their roots down, you want to keep the potting medium or growing medium moist, but not wet. This keeps your sprouts moist and creating vibrantly-green growth.
If your tray is in full sun regularly, check your growing medium regularly. It may need more than twice-per-day watering at that point. If the soil or medium isn’t very moist, go ahead and spritz it a little more often.
You should never have water pooling over the top of grow mats, coir, or potting mix. Too much water can cause your wheatgrass to drown.
Fertilizing Wheatgrass
If you want to boost the growth of your wheatgrass, you can dilute some liquid kelp in the spray bottle you’re using to water with. You shouldn’t have to use this every time you water, but it can definitely push up the growth!
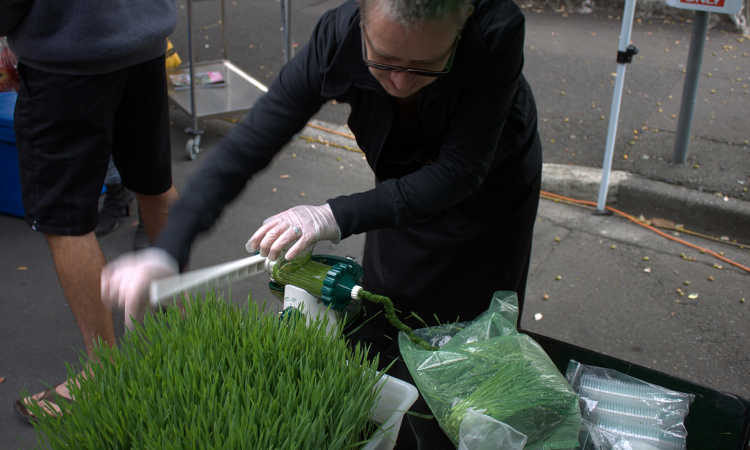
Harvesting & Using Wheatgrass
Once your wheatgrass reaches at least six inches in height, it’s getting close to harvest time. Now’s the time to prepare to harvest it and use it.
Harvesting
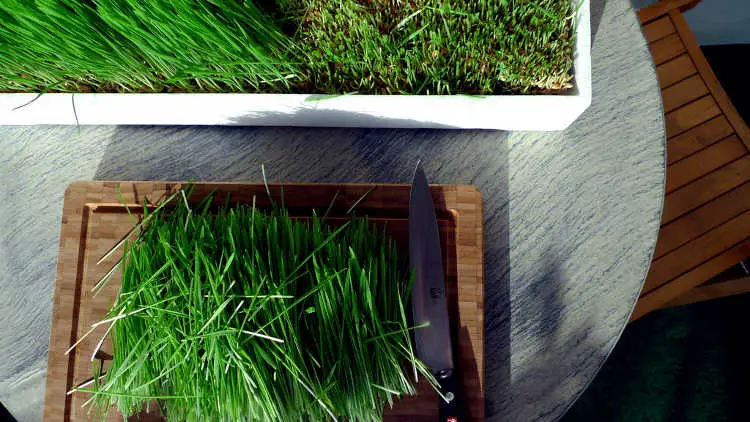 Freshly-harvested crop. Source: Kristoffer Trolle
The best time to harvest wheatgrass is when it has reached the jointing stage. At this point, the leaf is beginning to split or form a secondary leaf. This is generally when it’s 7-8″ in height. You can harvest it as young as 6″ in height, though!
To harvest, I recommend cutting the grass off with a sharp pair of clean scissors just above the root joint or any seed remnants. A super-sharp knife will also work as long as it slices cleanly through the grass without yanking it out.
You can usually get multiple crops out of a particular batch of seeds without noticeable changes of flavor. However, be sure to add a little liquid kelp fertilizer after harvesting to encourage fresh growth. Usually, people get two to three crops off of a given tray before they replant.
Harvesting right before use is the best way to ensure freshness.
Storing
 Fresh wheatgrass juice can be stored by freezing in ice cube trays. Source: Gauravonomics
To store wheatgrass, make sure it’s as dry as possible. Dry wheatgrass keeps much better than wet. Put it into a produce bag with a dry paper towel wrapped around the bunch to absorb excess humidity. Use it as quickly as possible so it doesn’t wilt or spoil. It will keep easily for 3-4 days stored like this.
Since a tray is usually ready to be harvested at the same time, you can also juice it all and freeze any excess juice in ice cube trays. These little green cubes can then be tossed into your morning smoothie or glass of fruit juice.
If you’re familiar with wheatgrass powder, you might be interested to know that there’s a way to make this handy additive at home using a dehydrator. Rinse off your wheatgrass thoroughly once you’ve harvested it to be sure there’s no dust on it, then spread the grass out in a thin layer on dehydrator trays.
Once it’s fully dehydrated, you can powder it and store the powder in an airtight container with a dessicant packet to remove any residual moisture. Use it as you would any storebought powders.
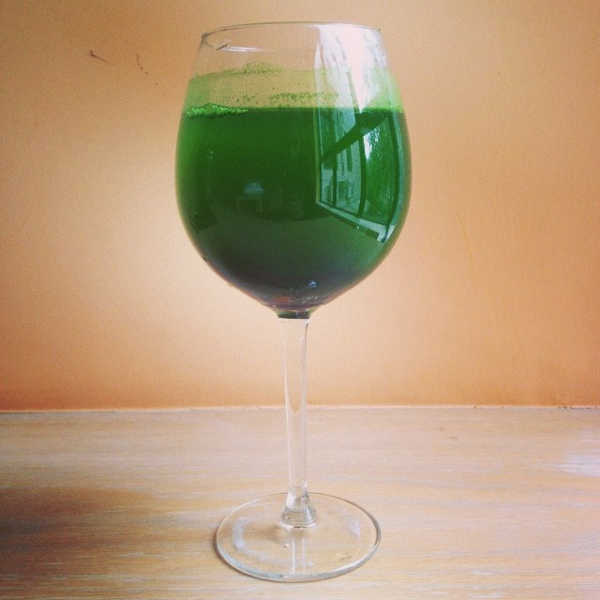
Juicing Wheatgrass
 Juicing with a masticating juicer. Source: RaviGogna
Since wheatgrass is a grass rather than a fruit, it can be a bit tricky to extract the juice. A masticating juicer will extract the juice most easily. Centrifugal juicers don’t grind up the grass and release the juice.
You can also finely dice up your grass and grind it in a mortar and pestle. Make a thick paste of the ground-up harvest, then add a little water and grind for a little longer. Empty the mortar into a piece of cheesecloth over a strainer and allow most of the juice to filter through while you prepare more wheatgrass paste. Once you’ve ground it all up and allowed the juice to flow off, carefully pick up the cheesecloth and squeeze out any extra juice.
There’s a third method that can also be utilized to prepare wheatgrass juice, although there are people who claim it oxidizes the juice and is an inferior method. Place your diced-up grass and a little water into a food processor and pulse it until the liquid is brilliant green and the majority of the wheatgrass has been pulverized. Then, prepare the strainer with cheesecloth and extract the liquid.
It takes approximately 1/4 cup of grass to make a serving of juice.
Wheatgrass For Pets
 Cat eating grass. Source: wabisabi2015
If you’ve ever grown cat grass, you quite likely were growing wheatgrass. Cat grass can be made up of wheatgrass, oat grass, or barley grass, or a combination of the three. Dog grass, although less common, is the same.
While cats and some dogs like chewing on grass, it’s not for the same reasons as why we eat plants. Cats and dogs are carnivores, and don’t have the right enzymes to digest grasses properly. While they do get some nutrition benefit (mostly the vitamin E content, although to a lesser extent some B vitamins as well), it’s more likely that they will throw up the grass.
And that’s actually why cats and dogs nibble on grass. Grass can cause cats to throw up, which helps them to get rid of hairballs or other indigestible material. That will make them feel more comfortable and can prevent constipation. In dogs, wheatgrass has a bit of a laxative effect, and helps eliminate constipation. It can also settle an upset stomach.
You don’t have to do anything special to prepare it for your pets. Simply grow a smaller patch meant specifically for pet use and let them chew on it when they feel the need.
Rather than letting your cat or dog chew on the lawn, which may have pesticides or other contaminants or pests in it, growing them their own dedicated grass will provide them a safe snack.
What Should You Do With The Pulp?
 Trays and trays of green goodness. Source: Scrap Pile
There’s all sorts of ideas out there for using up wheatgrass pulp. Everything from poultices to put on bug bites to fibrous additions to breads have been recommended. But honestly, I don’t recommend trying to use it medicinally or as a fiber additive in food.
What I recommend doing with your pulp is adding it to your worm composting system if you have one. If you don’t do worm composting, you can mix the pulp with some shredded newspaper, mulch, or sawdust and put it in your compost pile or compost tumbler. Wheatgrass pulp will decompose quickly and offer added benefit to your regular garden. You can also add it to a bokashi bin or bucket.
Storing Your Seed
Chances are good that you’ll have extra seed after your first planting. Wheat seeds are best kept in a cool, dry location. You can keep them in the freezer if you’re sure there is no moisture in the bag. A fridge is also a good spot if you’re going to use your seed more frequently. Place your bag of seed into a freezer bag and remove as much air as possible when storing them. If you have a dessicant packet, you can add that to help keep them dry.
Troubleshooting Problems
 The incredible root structure. Source: thebittenword
99.9% of the time, you won’t have a single problem growing this plant. This stuff is super-easy to grow! However, let’s cover what few problems exist while growing wheatgrass and how to repair them.
Growing Problems
If your crop begins to lean over and turn yellow, you’ve probably let it go for too long before harvesting. But yellowing can also be a sign of over or under-watering, too little light, or a lack of nutrients in the growing medium.
Plants that are under six inches in height and are yellowing should be checked to make sure that the growing medium is not soggy. If it’s too wet, avoid watering until it improves. Also, give your grass access to more direct sunlight, as that can help evaporate off some of the excess moisture.
If your grass is over six inches in height and is starting to yellow, you may have missed the optimal harvesting period. To be sure, you can add a little liquid kelp to your next watering spray session. If it starts greening again, you’ve rescued it. If not, go ahead and harvest as normal, but dispose of the wheatgrass blades in your compost pile and wait for a new batch to grow.
Also, be mindful of your seed density. You will almost always run into fungal growth issues if you plant your seeds too densely. This isn’t a huge deal as you can just rinse it off of the plants come harvest time, but it doesn’t look very appetizing and some people flat out can’t stand it.
To avoid this problem altogether, just plant less seeds in your tray. If that still doesn’t solve the problem, moving your trays to an area with more airflow will help. You can also grow outside to maximize sun and airflow.
Pests
Fruit flies can use your trays of wheatgrass as a home, and little clouds of these tiny flying pests will drive you nuts (especially in a greenhouse). The easiest way to repel these is to keep air circulating around your growing area. Placing a fan on a low speed facing your trays should keep these bugs at bay. However, you may need to water more often as evaporation is more likely with lots of airflow.
The most damaging pest is the black grass bug. These insects pierce the blades of grass and suck the moisture out of it. As we want that grass juice, this is a big problem! If your grass blades are developing white spots on the upper portion, you may have an infestation near your wheatgrass. It’s easiest to simply dump your current batch to eliminate any eggs, and start a new batch indoors.
Diseases
Mold is by and large the most common disease among wheatgrass growers. This is caused by excess water in and around the grass’s base and root structure. While the mold is not harmful, it will the taste unappealing. You can wash off most molds if they develop, but if there is any damage to the grass, discard the damaged portion. To prevent mold, keep the soil moist but not wet, and ensure there’s good airflow around your grass.
Some stem and root rusts can affect wheatgrass. To prevent these, simply use a sterile growing medium and harvest regularly. Don’t allow it to become overgrown.
Smut is another issue. This black, dusty growth is another form of fungal infection. If you discover smut, throw out the entire batch including the growing medium. Do not add it to a compost pile. Thoroughly wash and disinfect your growing tray with a mixture of bleach and water to kill any remaining fungal spores before reusing it.
If you let your wheatgrass go to seed, you have a minor risk of an ergot fungus forming. Claviceps purpurea is the most common ergot on wheat and can develop only in the seed heads. The grasses themselves are not at risk. Ergot can be dangerous to both humans and animals, but it’s easy to prevent: just don’t let your it go to seed!
FAQs
 Young growth. Source: thebittenword
Q: Should I reuse my growing medium?
A: In most cases, it’s better to replace your growing medium. Potting soil can get fungal spores in it which can infect future batches, as can coconut coir. The various natural fabrics simply aren’t meant to be reused.
You can add your basic potting mix or coconut coir to your compost and just replace it. Natural fabrics usually require industrial composting facilities, although the hemp fiber fabrics (like TerraFibre) can also be shredded up and added to a normal compost pile. They just take a while longer to break down than the rest of your compost.
Q: Is wheatgrass gluten free?
A: It can be, depending on how you harvest it. Wheat gluten, the protein that many people are sensitive to, does not form in the young grass itself. It forms only in the grain, the seeds of the plant. Therefore, it can be gluten free, provided that there’s no possible chance that the seeds make their way into your finished product.
If you’re harvesting carefully above the seed remnants, it should be gluten-free. However, if you’re growing on a soilless medium and plan to consume the whole plant, there may be seed remnants that contain wheat gluten.
Commercially-produced wheatgrass juices and powders are also tricky. While we can be sure not to allow seed bits into our foodstuff at home, commercial producers are working on a very large scale. Small quantities of seeds can accidentally make their way into commercial products. Because of this, it’s important to be sure that the product you’re purchasing is labeled as gluten-free and that you trust the quality and safety of that company’s products.
As with any other natural product, if you’re at all uncertain about using wheatgrass, consult your doctor or nutritionist prior to use. It’s always best to be safe rather than sorry.
Q: Is wheatgrass actually good for you?
A: It may not be the miracle cure you’re looking for, but yes, wheatgrass can be good for you. Like any green, leafy plant, it contains vitamins and minerals that are essential to keeping healthy.
Wheatgrass juice contains high quantities of vitamin E. That particular vitamin is used by our bodies as an antioxidant and boosts the immune system, helping us to fight off the common cold or flu. Otherwise, it’s comparable or lower in nutrient content than most other leafy greens. You’ll find more iron, potassium, magnesium, calcium, and vitamins B and C in green leafy spinach than you will in wheatgrass, although it does contain those in lesser amounts.
Generally speaking, it’s no worse for you than other leafy greens are, and in terms of vitamin E content it’s definitely better than most. But it’s not likely to cure cancer or be the panacea that some sources suggest it is.
Publicaciones relacionadas:
 Growing Arugula For Great Salad Success
 Cómo cultivar microvegetales de espinaca rápido y fácil
 Mantenimiento de microvegetales
 Flor de globo: cultivo de la campanilla china
 Enfermedades de cobertura comunes y cómo tratarlas
 Cómo propagar un collar de perlas: suculentas rápidas
 Mejorando el suelo arenoso: enmendándolo bien
 Solucionar problemas y reparar las hojas amarillas de Dieffenbachia