
Where would the world be without peanuts? They’re such a popular food that we doubt the culinary universe would be the same. Knowing how to grow peanuts should be an absolute necessity, as we eat them in practically everything – sandwiches, salads, sauces, desserts. Raw peanuts are roasted, boiled, pureed, and turned into oil. They’re ubiquitous!
For such a popular food, the peanut plant is a bit underrepresented in the home garden. This is a shame because it’s actually really easy to grow. By planting peanuts in your garden, not only are you able to make some yummy homemade peanut butter, but you’ll also be taking part in the lengthy history of growing peanuts.
When we say lengthy, we mean it. The domesticated peanut plant is about 5-6 thousand years old, dating back to at least 3000 BC. It slowly made its way from Central and South America around the globe, used for food, folk medicine, and manufactured goods like fabric. Its popularity rose not just because of its delicious taste, but also its agricultural uses.
The peanut plant adds nitrogen to the soil, which makes it excellent for efficient and sustainable cultivation. In the US, peanut crops were thought to be more preferable than cotton. This idea was promoted by George Washington Carver, an African-American agriculturist, in the 1920s and 30s. He even made a list of over 300 products that can be made from peanuts, many of which he invented. This list ranges from foods to cosmetics to gasoline. Today, Carver is often regarded as the father of the modern peanut industry.
Since then, peanuts have become a significant part of US history. They became a popular crop across the southern US. This notably increased when Jimmy Carter, a former peanut farmer, became President. Today, most of the world’s peanuts are produced in China, but you can still grow them in your backyard. To help you get started, we’ll share everything we know about peanuts: how to grow them, harvest them, and even feast on them.
Quick Care Guide

| Common Name(s) | Peanut, ground nut, grass nut, goober, monkey nut |
| Scientific Name | Arachis hypogaea |
| Days to Harvest | 80-150 days |
| Light | Full sun |
| Water: | Consistently |
| Soil | Light, well-draining, calcium-rich |
| Fertilizer | Low nitrogen |
| Pests | Aphids, thrips |
| Diseases | Leaf spot, powdery mildew |
All About Peanuts
As you can guess by its name, peanuts are part of the pea family. They are not, however, nuts. Arachis hypogaea is actually a legume, making this species more closely related to soybeans than pecans. The plants, being native to South and Central America, love the warm weather and have a long growing season. Because of this, they have to be grown as annuals in the majority of the US, which is the common cultivation practice.
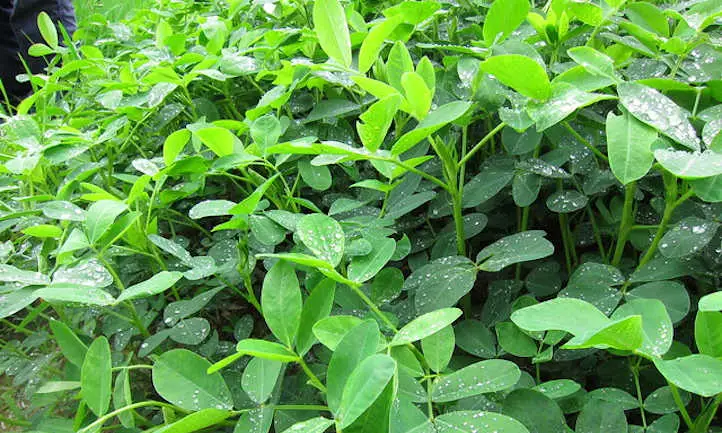
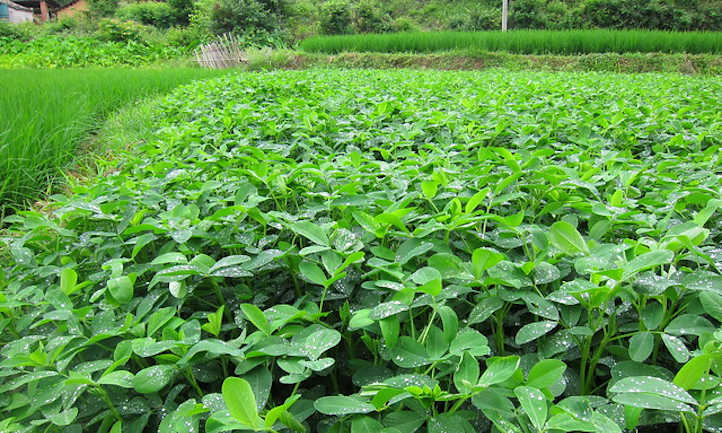
We’re sure you know what peanuts look like, but what does the plant add to your garden’s aesthetic? It’s actually a pretty generic looking plant, at least above the soil. It grows bushy, light-green leaves close to the ground. Each plant typically reaches only 1-1.5 feet tall.
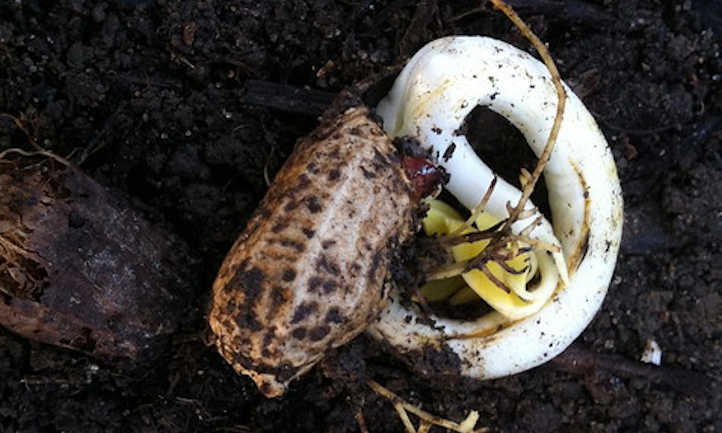
How a peanut grows is pretty interesting. From July to September, the plant grows yellow and orange flowers. Once a flower is pollinated, a stem, called a peg, grows from it, drooping downwards and burying itself in the soil. Through it, the fertilized ovules travel from flower to ground and develop into pods that contain 1-3 seeds (the peanuts) each. This growing method, called geocarpy, sounds unique, but there are actually a few hundred legume species that develop this way.
Since the peanut seeds grow underground, they’ve been nicknamed groundnuts or earthnuts. You may also hear them referred to as grassnuts or goobers. In Britain, they’re even called monkeynuts, a term stemming from zoo visitors feeding peanuts to the monkeys.
Peanut Varieties
Groundnuts are sorted into cultivar groups. Each has something different to bring to the table, so you have a good selection to choose from.
The runner group is the most popular among commercial growers thanks to its uniform seeds and high yield. The plants are somewhat vine-like and take up more horizontal space than the others (about 3.5 feet). Because of this, be sure to plant the seeds several extra inches apart. You can thank this variety for your sandwiches because 54% of these runner plants are used to make peanut butter.
Spanish group earthnuts have the highest oil content, so of course, they’re used for peanut oil production. These varieties are also common in candy and mixed nuts. Some of these varieties only take 90 days to grow seeds, so they’re a good choice if you live in a cold climate.
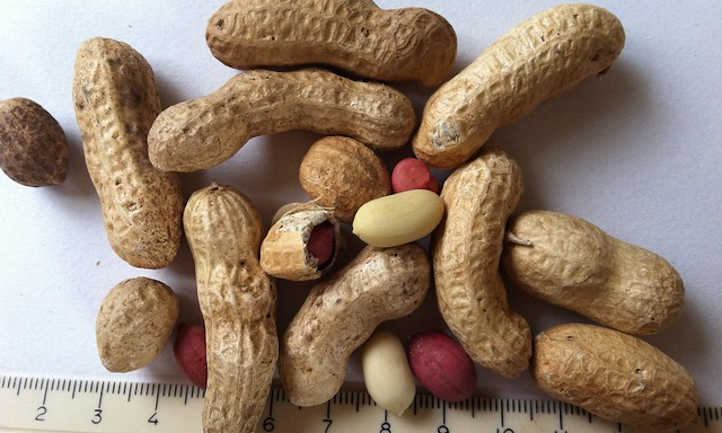
You can also find early varieties in the Valencia group. These peanuts are the most common in the home garden because of their short growing time. The seeds have pretty, red skin and are said to be the sweetest-tasting. They’re usually prepared by roasting but are also good as boiled peanuts.
The Virginia group features the largest seeds and are more on the gourmet side of things. They have a long growing season with some taking 150 days to mature. However, Virginias typically have a great yield and excellent taste. The plant itself may be bushy or running and produces pods that are 2 inches long (or more!).
Planting Peanuts
Since they demand such a long growing season, you’ll need to take precautions if you live up north. Choose an early variety of peanuts for planting and start it indoors about 6-8 weeks before the last frost. You’ll want to get your peanut seeds from a supplier or save your own. While you can plant peanuts from the grocery ones meant for eating, this isn’t a very reliable method.
Whether it’s a transplant or direct sow, plant outdoors 3 weeks after the last frost. The soil must be at least 60°F at this time. Bury the seeds 1 – 2 inches deep and 24 – 36 inches apart. If you’re planting rows, space them at least 72 inches apart. Plant the peanut with or without the shell as long as each seed still has its papery covering, which may be necessary for germination. Optionally, you may soak the seeds overnight jumpstart germination. They only take about a week to germinate but peanuts grow slowly after that.
It’s recommended to add mulch to the soil once the seedlings are half a foot tall. This will help lock in moisture and keep the weeds under control. When you add it, try to gently loosen the soil around the plants, making it easier for the pegs to penetrate it.
Once planted, it will be 100-150 days until harvest, depending on the variety. You can expect to see flowers in 6-8 weeks, after which you can observe the extraordinary growing process!
Care

We know all about them, but how do I grow peanuts? Peanut plant care is surprisingly easy, and we’re sure you’ll enjoy it!
Sun and Temperature
Peanut plants love lots of sunlight and a long, warm growing season – no wonder they grow so well in the southeast! These plants will grow in zones 2-11, but the further south you are, the better your harvest will be.
Ideally, the temperature should be around 85°F. The plant is sensitive to cold and needs 120 consecutive frost-free days to grow. Temperatures above 95°F may damage the flowers, so provide shade if needed.
Water and Humidity
It doesn’t seem like it, but peanut farming takes a decent amount of water, at least 1 inch per week. The soil should never dry out, especially during or after flowering. Depending on where you live, you’ll likely need to water daily. At the very least, you should give your plants a good long soak once a week.
On the flip side though, these are legumes, not water lilies. They shouldn’t be drowning in the soil. Maintain a consistent and even moisture level, but don’t allow soggy, muddy conditions to develop. A soaker hose is extremely useful, as it slowly diffuses the water over your intended area.
When the peanut plant leaves start turning yellow around harvest time, stop watering completely so the seeds don’t sprout. A little humidity won’t hurt the plant, but dry conditions are best.
Soil
Since they guzzle water, you’ll need well-draining soil for your peanut plants. Choose a growing medium that’s light and loamy with plenty of organic matter. To give it an extra boost, add in some well-composted manure. For best results, the soil should be slightly acidic, ranging from a pH of 5.5-7.0.
Fertilizing
As George Washington Carver taught long ago, peanut plants are nitrogen-fixers, meaning they give nitrogen back to the soil. Because of this, they don’t need as much nitrogen as other plants. Use a low-nitrogen or balanced fertilizer, working it well into the soil. Peanut growth can be burned by fertilizer, so apply it before planting.
For peanuts, calcium is the most important nutrient to focus on. Peanuts absorb most of their calcium directly through the pods instead of their roots. So, if a calcium deficiency happens, pod development is directly affected. They may rot and not develop seeds well or at all. Because of this, calcium needs to be present in the soil when the pods start growing. Make sure to amend your soil well prior to planting.
Pruning
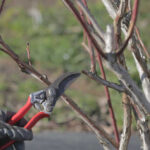
When growing peanuts, pruning isn’t a must but may be necessary from time to time. You may clip back the stems if they’re getting tangled or overstepping their boundaries, particularly for runner types. You’ll also want to remove any diseased portions to keep the infection from spreading.
Propagation
Since it’s typically grown as an annual, the peanut plant is only propagated by seed. You can easily save your own seeds after harvesting peanuts. Leave them dry, raw, and in their shell. Store them in a dry, aerated place in a mesh bag. Plant peanuts the following spring for best results.
When you choose the seeds to save, only select healthy, mature ones. If they have any disease, it could be passed on to the soil or the next generation. If there’s any concern about disease having been in your soil, opt to purchase new seed rather than storing your own.
Peanut plants are self-pollinating, but there’s still a chance that the next crop may not be true to type. Try to plant all the same variety of peanut plants to ensure that any cross-pollination does not cause the plants to produce hybridized seed.
Harvesting and Storing
Harvesting peanuts is a simple, yet long, process – but it’s so worth it! With just a little patience, you’ll soon be snacking on some home-grown seeds.
Harvesting
You’ll be able to start harvesting peanuts from late summer to early fall when the leaves turn yellow. It’s easiest to tell if they’re ripe by looking at the pods. But, you don’t want to go digging them all up if you aren’t sure they’re ripe. Instead, unearth a couple of pods. Break them open and inspect the peanuts. They should fill almost the entire shell, which will be dark on the inside (depending on variety).
If the leaves or pods are starting to fall off the plants, you need to harvest right away. If you put it off too long, the pods will start to sprout.
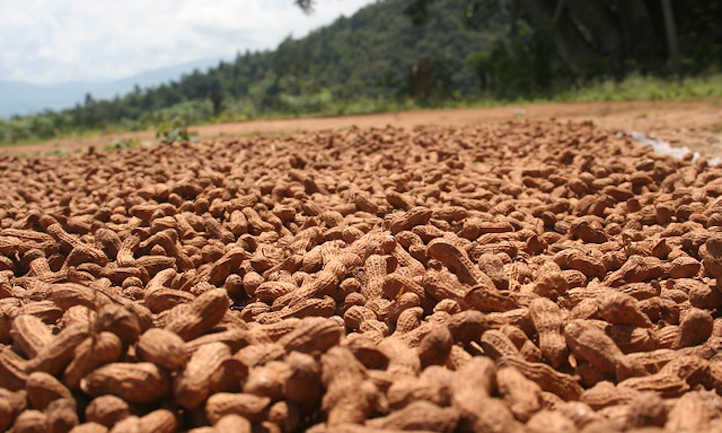
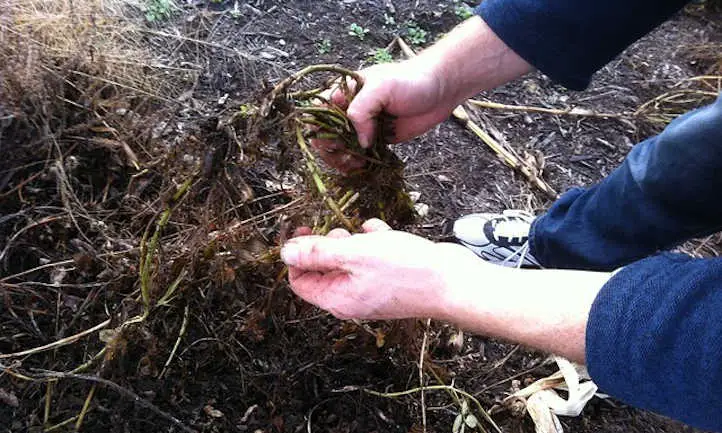
To harvest, gently loosen the soil around the plant and pull the whole thing up. Shake off any loose dirt and collect any detached pods. Once unearthed, let the entire plant dry out, either hanging or on a flat surface. Keep it dry and out of direct sunlight for at least 1-3 weeks. Once dry, pull the pods free and dry them for an additional 1-2 weeks. After that, you’re free to use them however you want!
Storing
Peanuts can be eaten raw, though they’re usually cooked. You can store them raw in the shell for several months, as long as you do it correctly. Otherwise, your hard-earned goobers might grow mold. They need good air circulation, so keep them in a mesh bag in a dry place. Be sure to place them where rodents can’t reach them.
Roasting peanuts is a popular, and tasty way, to eat them. Just stick the shelled seeds in the oven for 15-20 minutes at 350°F. You can also roast them with the shell on, as long as it’s completely intact. Just add 5-10 minutes onto the cooking time. They’ll last about 6 months in the fridge and a whole year in the freezer. Once roasted, you can eat the peanuts plain or in a recipe.
You can also boil your harvest, especially if they were picked too early. In a pot, cover them with a small amount of water, add some salt, and boil them for three hours, stirring occasionally. Eat boiled peanuts within a week or freeze them for 6-12 months.
Troubleshooting
Thankfully, peanuts aren’t troublemakers. Though there’s always a chance you may encounter some issues, these plants are typically problem-free.
Growing Problems
If your plant’s peanut seeds aren’t growing and developing well, it most likely needs more calcium. If you’ve already harvested or stopped watering though, there isn’t much to do except prepare better for next year. Apply calcium to the soil right when the flowers show up so there’s plenty available when the seeds start to grow.
Pests
If you have a pest problem with peanuts, it’s most likely aphids. These minuscule, green insects feed on plant sap. Just one of them may not seem like a problem, but an infestation of aphids can quickly weaken your plants and expose them to disease. Insecticidal soap is very effective against these pests, as are predators like lacewings and ladybugs. Keep them away with diatomaceous earth, neem oil, or even a good spray of water.
Thrips are also a potential threat when you’re growing peanuts. These nasty bugs are small, long, and dark. Like aphids, they drain plant juice and spread disease. Thrip populations can quickly get out of hand, so you need to act as soon as possible. You can use insecticidal soap and neem oil on them, just like aphids. For large infestations, a pyrethrin spray should do the trick. Diatomaceous earth, lacewings, and ladybugs are good solutions as well.
Diseases
Early or late leaf spot is just what it sounds like: spots on the leaves. It’s a fungal growth that shows up as dark, circular blotches. It’s especially brought on by warmth and humidity, so try to keep your peanuts as dry as possible. If left untreated, this disease can cause leaf drop, which may lead to decreased yield. Choose resistant varieties and rotate your crops to prevent this disease. Fungicide can control it but may cause further damage to peanuts, so try to avoid it if possible.
Powdery mildew is not uncommon in groundnuts. Initially this shows as whitish spots on the surfaces of leaves that have a powdery texture. The points at which the mildew appears later become necrotic. Neem oil or copper-based fungicides can eliminate this fungal growth.
Frequently Asked Questions
Q: How many peanuts do you get from one plant?
A: This depends on the variety of growing peanuts, but you can usually expect around 25-50 peanuts per plant.
Q: Can you grow peanuts indoors?
A: Yes, as long as they have a good-sized container and plenty of sunlight, peanuts make excellent potted plants.
Q: Is it OK to eat raw peanuts?
A: Yep! You can snack away as soon as you finish harvesting.
Publicaciones relacionadas:
 Estiércol de vaca: cómo convertir la caca en turba
 Etapas de crecimiento del ajo a tener en cuenta
 8 increíbles ideas de jardinería vertical para tu jardín
 Poda de arándanos para cosechas abundantes
 Planta de alcaravea: especia de semillas y raíces sabrosas
 Ciclismo de un tanque para acuaponia con o sin peces
 Sedum rubrotinctum: cuidado de las gominolas indulgentes
 Margarita pintada: Cultivando una abundancia de piretro