
Asparagus is one of those perennial veggies that takes patience, but once you’ve learned how to grow asparagus plants, it’s so satisfying! It’s absolutely delicious and is usually one of the first crops to come to harvest in the spring time.
As far as nutrition, it’s packed with vitamin C, B vitamins, iron, and calcium. On top of that, you’ll never get better tasting asparagus than freshly picked shoots straight from the garden – no store-bought asparagus will come close.
Asparagusplants can be grown in most climates save for mild temperature wet regions like Florida or the gulf coast – but I’m willing to bet with a little creative problem solving, you could grow it in those climates.
Growing Asparagus: Quick Care Guide

| Common Name(s) | Asparagus |
| Scientific Name | Asparagus officinalis |
| Days to Harvest | Can harvest in 2-3 years from planting |
| Light | Full sun preferred |
| Water: | 1” water for young plants, drought-tolerant as older plants. Moist soil preferred. |
| Soil | Rich, well-draining soil with high potassium and phosphorous levels |
| Fertilizer | Granular, high potassium/phosphorous |
| Pests | Cutworms, asparagus beetles, asparagus miners, aphids, thrips |
| Diseases | Asparagus rust, Stemphylium purple spot, fusarium root rot |
Recommended Asparagus Varieties
Asparagus is a monoecious plant, with each plant either male or female. Male plants provide better spear production than female plants. Because of this, many cultivars have been specifically bred to be all-male. Older, heirloom varieties are a mix of male and female plants.
If you want to select for all-male plants, look at your asparagus plants with a magnifying glass once flowers appear. Female plants have pistils with 3 lobes, males are larger and longer than females. Pull out all of the female plants and transplant the males to your permanent bed next spring.
Those who aren’t as worried about high production should check out some of the more unusual heirloom varieties of asparagus. These heirlooms produce incredibly beautiful plants, both male and female, but if you wish to harvest seed, you’ll need some female plants.
- Jersey Giant: High yield, disease resistant, great flavor. Predominantly male plants.
- Jersey Knight: Mostly male plants. Highly resistant to most asparagus diseases. Hardy in freeze areas.
- Jersey Supreme: Earlier producing variation on Jersey Knight. Male plants. Cold-tolerant and disease-resistant.
- Mary Washington: Rust-resistant, produces long, thick and tender shoots. Heirloom variety.
- UC 157: Highly Fusarium-tolerant, rust-tolerant, heavy producer, commercial variety.
- UC 72: Mary Washington-type variety, tolerant to Fusarium & rust, heat and drought-tolerant.
- Pacific Purple: Bright purple spears, mild flavor. Beautiful variety.
- Purple Passion: Sweeter and more tender than some green varieties, purple spears, great raw.
- AsparaBest: Predominantly male plants, very cold tolerant, heavy producer.
- Precoce D’Argenteuil: Heirloom variety with rose-colored buds. Both male and female plants.
Planting Asparagus
As a perennial, it’s essential that you plan in advance before planting asparagus. After all, you’ll be harvesting this crop for years to come! Asparagus is planted in early spring. As soon as the ground can be worked, that’s the time to plant.
If you are planting from seed, plan to start your seeds with enough time for them to develop into 3″ young plants before the last winter frost. That way, you can transplant them straight out the minute the ground is workable.
Starting from asparagus crowns is a more popular method, especially because they can be planted immediately. Again, the minute that the ground can be worked, get them in the soil.
It’s important to choose where you’re going to plant your asparagus with extreme care. Because you’ll be harvesting your asparagus for over 20 years, make sure that the spot you’re choosing is perfect. Many people opt for growing asparagus in raised beds, as they provide great drainage potential and ease of harvesting.
Asparagus plants prefer full sun, although they can tolerate a little bit of shade. Selecting a spot where your asparagus will have optimal sun conditions is best, especially given that it will return year after year!
Ensure your planned planting site is completely weed-free. Asparagus does not like competition from other weeds. Mulch the area very heavily to help prevent weed growth.
Dig a trench that’s roughly a foot deep and across. Amend your bed thoroughly with 2-4″ of compost, manure, or high-quality soil mix in the top portion of the bed for good fertility. As asparagus plants should be spaced about 18″ apart, it’s good to work a shovel full of compost and some rock phosphate into the soil every 18″ to provide good fertilization for the root mass.
Some people advise soaking your asparagus crowns in compost tea for about a half hour prior to planting. If you don’t have compost tea on hand, you can use water. The goal is to fully hydrate the root mass and make it a bit more pliable and easy to spread.
Create 4″ to 6″ tall mounds at 18″ intervals, and then carefully lay your asparagus crowns in place, spreading the roots out across the top of the mound. Ensure the buds, which look like miniature asparagus spears, are pointed upward. Cover the roots and asparagus crowns with 2-3″ of soil and water them in.
As shoots appear, add more soil until you have finished filling in the trench. Mound up above the soil surface too, if you want. This ensures the roots are deep enough that they are well insulated from hot or cold conditions.
The process is similar for asparagus plants started from seed, except that you do not have to dig as deep of a trench. The root mass will be much smaller and will spread deeper into the soil on its own. Often, people create a nursery patch for first-year plants to develop in, and then transplant them into their permanent bed later. Regardless, amend your soil to offer good nutrition for your young plants.
Caring For Asparagus
In some areas, asparagus grows wild. This is typically in areas that are in cooler climates and receive a lot of rain. But for those of us who don’t have a natural bounty nearby, here’s some helpful hints to help your asparagus thrive.
Sun and Temperature
Full sun is ideal for asparagus, at least six to eight hours or more per day. It can tolerate partial shade conditions although it may grow a bit more slowly.
Once soil temperatures reach above 50 degrees Fahrenheit, asparagus will put up new shoots. However, the optimal temperature range for production is between 75-85 degrees Fahrenheit during the daytime, with 60-70 degrees at night. In that optimal range, it’s not uncommon for an established plant to grow three to six inches of asparagus spears per day!
Temperatures over 85 or below 55 cause root development to slow and shoot production to fade. Hotter temperatures also cause misshapen shoots and premature fronding. Colder temperatures near or below freezing cause discoloration or plant die-back.
Watering
Most asparagus, when established, is surprisingly drought-resistant. However, for best production, water is essential. Asparagus likes moist but not wet conditions. If you stick your finger down into the soil and don’t feel moisture in the top couple inches, it’s time for a good soaking.
Most of the time, an inch of water per week is plenty. In drought conditions, a deep soaking every 10-14 days is recommended. If you’re growing in raised beds, a drip irrigation system is a wise choice. This enables you to keep the soil moist without getting the tops of the plants wet. Avoid watering the fronds or the spears of the plant to reduce risk of fungus-based infections.
Regardless of whether you’re growing in the ground or in raised beds, I recommend heavy mulching. This reduces the likelihood of weed development, and keeps the soil moist.
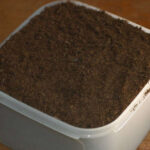
Soil
Well-draining, nutrient-rich soil is absolutely essential for your asparagus. This plant is a reasonably heavy feeder, especially on phosphorous. I recommend working compost or composted cow manure or horse manure thoroughly into your bed before planting, along with some rock phosphate to increase the phosphorous content of your soil. Asparagus likes soil with a pH of 6.5 to 7.0.
Fertilizing Asparagus
Fertilization should happen in the late summer or very early fall, and possibly again in the spring. Due to this plant’s needs, use a higher phosphorous and potassium content fertilizer, such as a 5-10-10 or an 8-24-24.
In the fall, use a slow-release granular fertilizer. Move the mulch back and work your fertilizer into the top of the soil, being careful not to place fertilizer directly against the plant or its roots. Add a scoop or two of compost to top it off if you’d like. Then replace the mulch material around the plant.
In the springtime, the process is similar. Still, use caution, as you don’t want your fertilizer directly against any newly-forming spears that are coming up from the ground. Generally speaking, springtime fertilization isn’t required, but for older plants it provides an extra boost to growth.
Pruning Asparagus
Pruning asparagus happens in stages: during harvest, and then in the fall in preparation for winter. Let’s focus on the fall pruning. As the summer starts drawing to a close, you will notice your asparagus plant starts to yellow, then brown. This is normal. The plant is placing its energy into the roots so that it can overwinter.
Once the plant is completely brown, cut off the now-dead growth at the soil’s surface. Compost or dispose of the cuttings. This leaves the area open to new growth in the spring. Mulch your patch deeply to prevent weed spread, and check it regularly throughout the winter months to make certain that no weeds have formed. In the spring, it will come back to life!
Asparagus Plant Propagation
Asparagus is propagated from seeds or from root division. Here’s some helpful hints on both processes.
When planting seeds, know that it will be a couple of years before your plant begins producing harvestable asparagus spears. The first year, it develops its root mass; the second year, it spreads and works its roots deeper into the soil and won’t produce heavy yields of spears.
Start your seeds early enough that you have young plants ready to plant out once the final frost has occurred. Soil temperatures above 50 are ideal for early-stage growth. Often, those who are starting from seed will plant their first-year plants in a “nursery bed” to allow them to stretch out their roots for that first year, and then transplant them in the fall.
To start your seeds, soak them in water for 24 hours to allow them to hydrate. Then plant them as directed on your seed packet. You can start your asparagus in a seed flat or in containers at your choice, but be sure to leave plenty of room for root development.
If you have older plants that are starting to become crowded, it is time to divide your root mass. You can generally tell it’s time to divide your plants when production begins to slow after several years of harvest.
To divide your roots, carefully dig up the entire root mass in the fall, after the plant has already died back. You can then cut the root ball into several segments, leaving large masses of root in each segment. Either replant those root segments right away, or store them in a mesh or paper bag filled with sawdust over the winter. Then plant the root segments in the spring as new asparagus crowns.
Transplanting your asparagus plants requires caution. While the top of the root crown may be fairly close to the surface, the remainder of the roots run deep in the soil. Carefully work the soil back away from the plant so that you can remove it intact from the ground.
To place it in a new bed, follow the directions mentioned above on how to plant asparagus crowns – in a trench, roots spread out over a mound of soil and are buried a couple inches deep in fresh soil. Treat it as though it were a new plant.
If you’ve ever seen all-white spears of asparagus, those have been naturally bleached by soil coverage. Mound soil up overtop of your plants to ensure that spears develop in the absence of light. Check your plants at least once per day, and possibly twice per day to make sure you catch them in time. Continue mounding soil up to cover your spear until it’s reached a good harvesting height. You can then harvest an all-white asparagus spear!
An alternate method for bleaching the color is to place hoops over your asparagus rows, covered with black plastic to block out the light. Lift the plastic every couple days to harvest your white asparagus from underneath. While white asparagus is identical in nearly every way to green or purple varieties, some believe that its flavor is milder due to the lack of exposure to the sun.
As mentioned above, asparagus hates to fight weeds or grass for space. You don’t want to plant anything else directly on top of your asparagus plants to avoid the competition for vital nutrients. However, there are some plants that do benefit from proximity to asparagus!
There’s a symbiotic relationship between tomatoes and asparagus. Tomato plants give off solanine, which repels asparagus beetles. In return, asparagus provides a natural chemical that will deter nematodes. These two grow well near each other. Leave enough space for both plant’s roots to spread without meeting.
Basil and parsley are also excellent companions to asparagus, as both also repel asparagus beetles. They also help tomato growth, so a bed which holds all of these plants can be a good producer!
Early, short-term spring crops of spinach, lettuce, or even beets can be planted between asparagus rows. In the late summer, start another crop of lettuce or spinach, as the asparagus fronds provide much-needed shade from the summer sun. Avoid planting alliums such as garlic or onions near your asparagus, as well as tuberous crops like potatoes. Asparagus doesn’t thrive next to these.
Harvesting & Storing Asparagus
When you see asparagus spears coming up, you may be tempted to grab them right away. However, sometimes you should wait for when the time is right. Read on to learn when and how to harvest your delicious spears, when to let them grow unchecked, and how to keep some for later in the year.
Harvesting Asparagus
If you started your asparagus from seed, the first year is all root development, and you shouldn’t harvest any. Similarly, the second year is for plant development, and you should avoid harvesting spears that year, too. The third year, you can harvest some for two to four weeks, and stop when the new spears are narrower than a pencil’s width. For subsequent years, harvest for up to eight weeks.
Even with asparagus from transplanted asparagus crowns, you probably want to wait for a year and not harvest until the second year. That second year, harvest for two to four weeks at most. Doing this gives the plant the best start it can get, which means your later years of harvest will be more abundant.
To harvest asparagus spears, use a knife (something like this mushroom knife is ideal) and cut the spear off. Some growers prefer to do this just under the surface of the soil. If you do that, avoid cutting other spears that may be forming under the soil’s surface. I prefer to cut just above the soil. You can also simply grasp the spear and bend it to snap it off just above the soil surface.
Ideally, your spears should be 6-9 inches in length at the time of harvest. You can harvest them when they’re shorter if you’d like, but you’ll have less asparagus that way! Harvest them before the tips start to spread.
If the tip of the asparagus spear has started to open up, it’s already started to go woody and will be unpleasant to eat. You should still harvest those spears during your harvest period, but compost them.
Since asparagus is a rapidly-growing plant, harvest spears every day or two throughout the season. Pick all spears of reasonable size every time you harvest, and you’ll have a constant crop for up to eight weeks!
Storing Asparagus
Fresh-picked asparagus is amazing right out of the garden, but if you have a lot of asparagus plants, you may find you need to store some of it for use later. Let’s go over how to do this in the fridge, the freezer, and on your pantry shelves.
If you need short-term storage, take your fresh asparagus and rubberband it together in a bunch. Place the cut or snapped-off ends into a mason jar with about an inch of water in it. Take a plastic bag and put it over the top, using another rubberband to secure the bag to the mason jar. Change the water if it begins to go cloudy. Stored this way, your asparagus will last for about a week.
For longer-term storage, lightly blanch your asparagus and freeze it. Bring a large pot of water to a boil, and prepare an ice bath. Cut your asparagus into roughly one-inch segments. Once the water is at a rolling boil, put your asparagus into the pot for one minute.
Thicker stalks could take up to a minute and a half, and thinner ones may take less than a minute. Once the time is up, use a slotted spoon to remove your asparagus and drop it into the ice bath. Leave it in the cold water for at least the same amount of time you’d boiled it, then drain it with a colander and allow it to air dry.
Once your asparagus has dried, spread it out on a sheet pan and cover it with a piece of plastic wrap. Place it in the freezer for an hour or so. This initial flash freezing stops the asparagus from sticking together later. Then transfer it into a container or freezer bag for long-term storage. Frozen asparagus will keep for about a year.
Asparagus can be canned for later use, too. However, since it’s a low-acid food, you will need to use a pressure canner to prevent potential spoilage or dangerous bacterial contaminants like botulism.
The benefit to canning asparagus is that you can prepare whole spears. Lay a clean and sterilized quart jar on its side, and slide in spears with the wide end towards the bottom of the jar. Pack the jar tightly with asparagus spears, then set it upright. Add a teaspoon of salt to each quart jar if you’d like; while you can skip it, the salt will improve its final flavor.
Bring water to a boil and then fill the jars. You will need to have the spears completely covered with water, but leave an inch of space between the top of the liquid and the jar’s rim. Place the lids and rings on the jars, and pressure-can them for 40 minutes at ten pounds of pressure (or eleven pounds for a dial-gauge canner). Adjust the pressure by the canner’s manufacturer’s recommendations if you live at high altitude.
There are also recipes out there for pickled asparagus. If you pickle your asparagus, you can process it in a hot water bath canner instead of a pressure canner, as you are dramatically increasing its acidity. However, be sure that the recipe you’re using is for a canning pickle and not a refrigerator pickle!
You can actually dehydrate your asparagus, too! Blanch your asparagus in boiling water as directed above, chilling it with ice water to stop the cooking process. Once drained, lay your asparagus on dehydrator trays. Place larger thickness pieces together on one tray, medium-thickness pieces on another, and the smallest pieces on a third.
Following your dehydrator’s manual, dehydrate the asparagus until it is fully dried and can be snapped easily. Store in an airtight container with a dessicant packet to remove any residual moisture. To use, you can either rehydrate it by soaking it for about 15-20 minutes in water prior to cooking, add whole dried chunks to soups or stews, or powder it to use as a flavorant for other dishes. Dried asparagus can also be a nice crunchy snack!
Incidentally, freeze-drying also works well for asparagus. Thinner spears seem to work better than thicker ones for this particular preservation method. Be sure to blanch it first!
Troubleshooting Asparagus Issues
Asparagus isn’t a difficult plant to grow once you’ve gotten accustomed to how to care for it, but there are a few things which can cause problems. Let’s go over those now.
Growing Problems
If you are finding that your new shoots are turning brown, or that they’re soft and withered, they may have suffered from frost damage. Trim those spears off and compost them. To prevent frost damage, mulch your plants with straw or newspaper heavily when frost is predicted.
Nursery-grown asparagus crowns can suffer from transplant shock. To try to prevent this, try not to purchase your crowns until you’re ready to plant them. Give them a short soak in water or compost tea for about a half hour before planting, and be very gentle with the root mass. Try not to break any of the roots while spreading them out over the mounded soil.
If you live in an environment where wind is likely to blow sand around, try to protect your asparagus spears with some sort of wind block. The tender shoots can get abraded by windblown sand and will start to bend. Abraded plants may also be at risk of disease transmission.
Similarly, rockier soils can cause your shoots to bend, although it doesn’t impact their edible quality. Making sure your plants have higher-quality, well-draining soil is essential for straight spear development.
Purple asparagus can have lower yields than green asparagus varieties. The only real solution is to either grow the green varieties, especially some of the higher-yielding cultivars, or grow more purple asparagus plants.
Pests of Asparagus Plants
While there’s only a few pests that cause damage to asparagus, the damage can be significant.
Cutworms can attack young spears. Most often, the damage from cutworms is either to the young tip of the spear, which it will eat right off. However, one specific type of cutworm (the dark-sided cutworm) can eat a trench along the side of the spears, causing them to form a corkscrew shape.
Ensuring that your soil has a healthy population of beneficial nematodes can eliminate any cutworm pupae, and using bacillus thurigiensis (BT spray) as a foliar spray will kill any that have emerged to feast on your plants. Be sure to use floating row covers to keep the moths away, too.
By far, the worst pest for asparagus is the asparagus beetle. This pest causes holes or pits in spears, and can chew its way through the leaves of plants. It can be a risk for other crops, too, especially cucurbits. With these, beneficial nematodes are also useful for pupa-destruction, but you can use spinosad spray to wipe them out elsewhere in the garden.
The asparagus miner is another threat to your crop. The larvae of this little black fly will eat trenches along the sides of shoots. It’s a potential disease-spreader, as it has been known to carry fusarium spores. While it’s most common in commercial plantings, it should be prevented with the use of floating row covers over your plants. Trim off and dispose of any fronds which have signs of damage. Remove plant stalks when overwintering to prevent outbreaks.
Finally, two very common pests can suck the life out of your plants – aphids and thrips. Both of these can be eliminated with a coating of neem oil on your plants. Be sure to get not only the spears, but any leafy material on both the tops and bottoms of the fronds.
Asparagus Diseases
There’s a number of diseases that will wreak havoc on your asparagus patch.
Asparagus rust is one of the most common. This disease is fast-moving. Initially, it causes orange spotting on leaves and foliage. The spotting will turn a rusty red-orange hue, and if not caught then, it will turn black. This is a fungal infection, and while it is treatable while it’s still red to red-orange, the black form is the overwintering stage; the spores of the fungus are fully developed. Use a chlorothalonil fungicide to treat this disease.
Stemphylium purple spot causes, you guessed it, purplish spotting. While this is not necessarily dangerous if it’s on the spear, it can rapidly become a major issue if it spreads to the plant foliage. An organic fungicide concentrate will also treat this fungal infection.
The most dangerous disease for asparagus plants is fusarium root rot. Unfortunately, fusarium is an infection in the soil which builds up over time. Planting resistant varieties is your best bet for protection, as there’s currently no treatment. Plants which have signs of fusarium root rot should be removed and destroyed. Do not plant more asparagus in diseased beds! It can take three or more years for this soil infection to go away.
Frequently Asked Questions
Q: Is asparagus fern the same as asparagus?
A: Edible asparagus (Asparagus officinalis) is not the same as the asparagus fern. While they are related, and both are asparagus plants, the most commonly-grown ornamental form of asparagus fern is Asparagus sprengeri. The shoots of asparagus fern resemble the shoots of edible asparagus, but they aren’t food!
Q: Can you use square foot gardening techniques with asparagus?
A: With some varieties, yes. Generally, it’s best to use one of the all-male hybrid varieties for square foot gardening purposes. These varieties have higher yields, and as there’s no risk of reseeding, you can plant them closer together than 18″ apart. Some varieties even claim you can space them 8-12″ apart.
However, something to keep in mind is that asparagus tends to spread over time. You will eventually need to reduce the size of your asparagus crowns to keep production up. As they start to get crowded, they will start to decline in terms of production. Larger spacing initially gives you more time for the plants to grow before you need to even consider crown reduction.
Q: Can you plant asparagus in a container?
A: Absolutely! While you won’t get a huge harvest from just one plant, smaller containers of asparagus can be lots of fun to grow. Be sure it’s a very large container, though. You want room for the plant’s roots to grow.
Q: Is growing asparagus worth it?
A: It really depends on what you consider to be worth it. The flavor of freshly-picked asparagus is incredible. However, you are devoting a reasonably large amount of space to a crop which will only produce for a short period of time in the spring. It’s relatively easy to maintain that space the rest of the year, but only you will be able to decide if the space is worth it for you. For me? Absolutely worth it.
Publicaciones relacionadas:
 Planta Dusty Miller: cuidado, tipos y consejos de cultivo
 Cómo hacer crecer una palmera de cola de caballo al aire libre
 Una práctica hoja de trucos para el cultivo de vegetales
 Turba de musgo: uso de turba de esfagno en el jardín
 Cuidado de las plantas de hielo: mantener felices a las plantas de hielo
 Cuidado de los cactus navideños: cactus navideños que te encantarán
 Pimientos ornamentales: estallidos brillantes del poder de la pimienta
 Cultivo de brócoli: “Árboles” diminutos y sabrosos